
Sundance V6-181 3.0L SOHC (1994)
Air Door Cable: Service and Repair
REMOVAL AND INSTALLATION
1. Remove heater-A/C control panel. Disconnect the attaching flag on the control cable from the heater-A/C control panel.
2. Remove console assembly.
3. Remove instrument panel lower steering column cover.
4. Remove the right lower instrument panel/glove box door assembly. This assembly is clipped to the upper instrument panel at the right upper side.
5. A/C equipped vehicles: From under the hood, disconnect the A/C suction line mounting bracket from the dash panel (above the expansion valve).
6. From under the hood, loosen (do not remove) the four heater-A/C assembly to dash panel mounting nuts.
7. From inside the vehicle: Remove the vertical (heater-A/C housing) support bracket (below the glove box).
8. Tilt the entire heater-A/C housing assembly downward to gain access to the temperature cable.
Temperature Control Cable
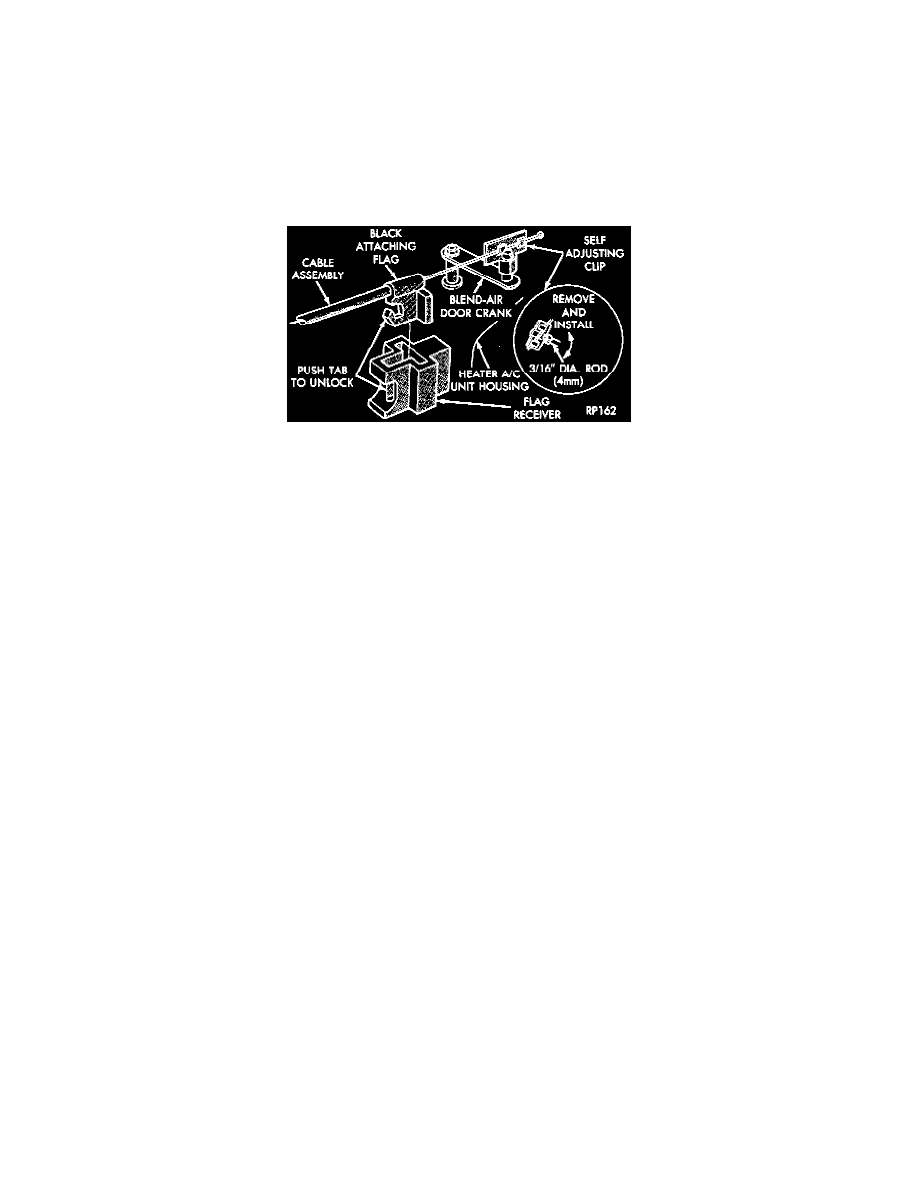
9. Locate and disconnect the attaching flag on the control cable at the heater-A/C housing.
10. Slip the cable self-adjusting clip from the blend air door crank.
11. Remove the cable from the vehicle.
12. Insert a 4mm (3/16 inch) diameter drill bit into the door crank access hole. Then rotate the clip from the cable.
To install, reverse the preceding operation.