
Voyager L4-135 2.2L SOHC (1985)
Intake Manifold: Service and Repair
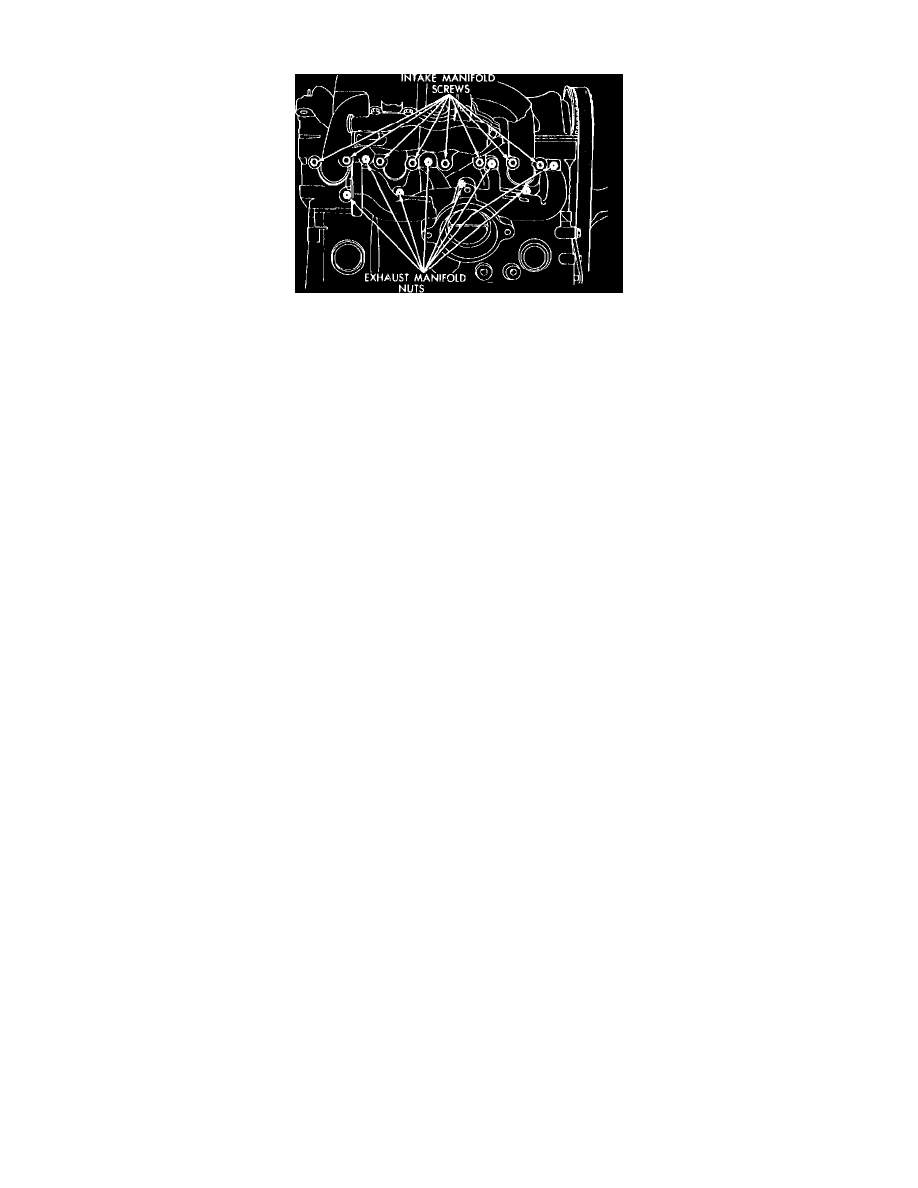
Fig. 7 Intake & exhaust manifold replacement
1.
Disconnect battery ground cable.
2.
Drain cooling system, then disconnect all vacuum lines, electrical connectors and fuel lines from carburetor.
3.
Remove throttle linkage, then the power steering pump drive belt, if equipped.
4.
Disconnect power brake vacuum hose, if equipped, from intake manifold.
5.
Remove coolant hoses from water crossover.
6.
Raise and support vehicle.
7.
Remove exhaust pipe from exhaust manifold.
8.
On models equipped with power steering, unfasten power steering pump and position aside.
9.
On all models, remove intake manifold support bracket, then the EGR tube.
10.
Remove intake manifold attaching bolts, then lower vehicle.
11.
Remove intake and exhaust manifold assembly from engine.
12.
Remove exhaust manifold retaining nuts and separate exhaust manifold from intake manifold.
13.
Reverse procedure to install, noting the following:
a. Discard gaskets and clean gasket surfaces on both manifolds and cylinder head.
b. Use a straightedge to ensure gasket surfaces on manifolds are flat within .006 inch per foot of manifold length.
c. Install new gaskets with suitable sealant on manifold side.
d. Torque exhaust manifold retaining nuts and intake manifold attaching bolts to 200 inch lbs., starting at center and working outward in both
directions.