
Voyager L4-153 2.5L SOHC (1990)
4. Tap rear of camshaft with suitable mallet to break caps free.
5. Continue loosening bearing cap bolts, ensuring camshaft does not cock, then remove bearing caps and camshaft. Loosen bearing cap bolts
evenly. If camshaft cocks in bearing bores, bearing surfaces may be damaged.
6. With caps removed from engine, check oil holes for obstructions.
7. Check camshaft lobe height in center (contact area) and on shoulders of lobe. If difference in reading exceeds .010 inch (.25 mm), camshaft should
be replaced.
8. Install rocker arms in original positions, then position camshaft in bearing saddles of cylinder head.
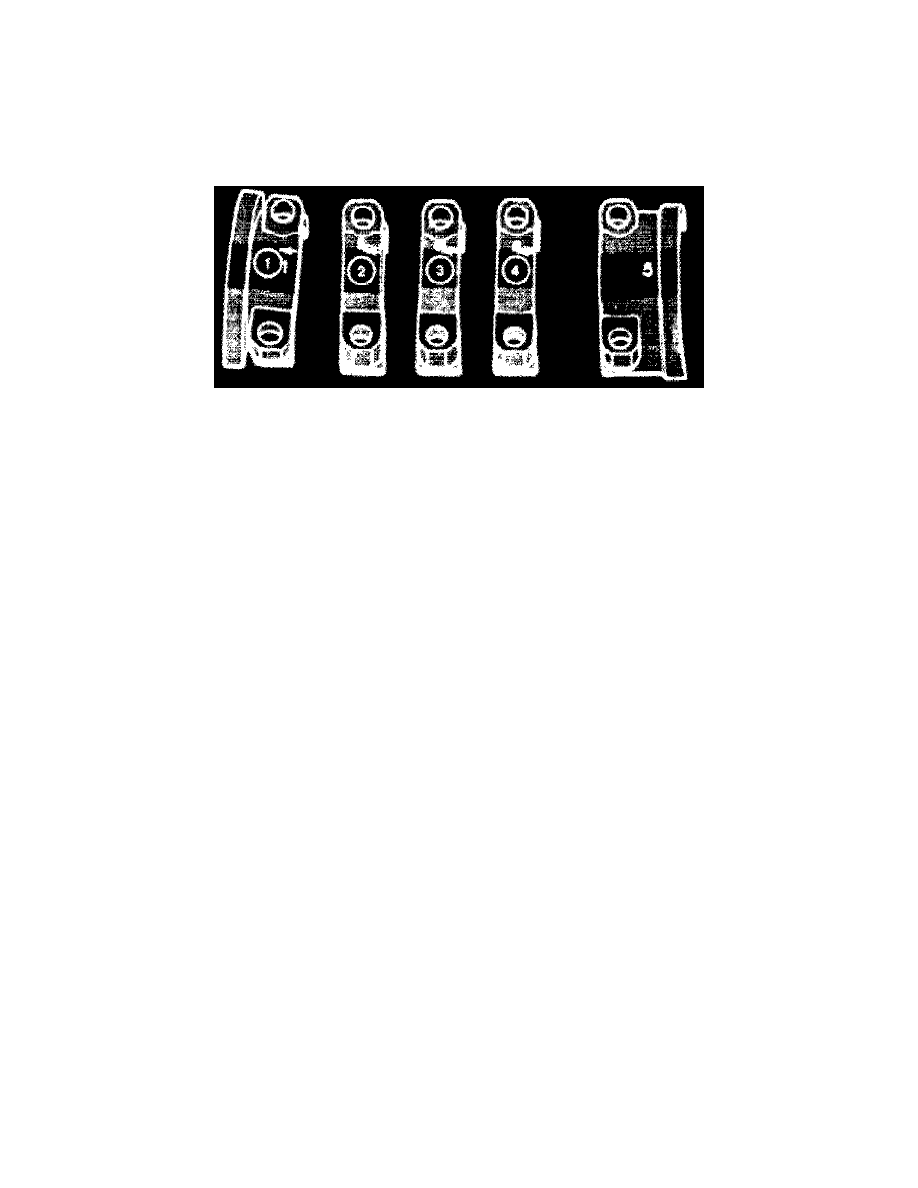
9. Apply suitable sealant to No. 1 and No. 5 bearing cap.
Fig. 18 Camshaft Bearing Cap Installation
10. Align caps in proper sequence, with No. 1 cap at timing belt end and No. 5 cap at flywheel end of engine. Ensure arrows on caps 1, 2, 3 and 4
point toward timing belt, Fig. 18. Install caps before installing camshaft seals.
11. Torque camshaft bearing cap bolts to 18 ft. lbs., evenly in crossing pattern to ensure camshaft remains properly aligned.
12. Install camshaft seals as outlined.