
Voyager V6-201 3.3L VIN R SMFI (1997)
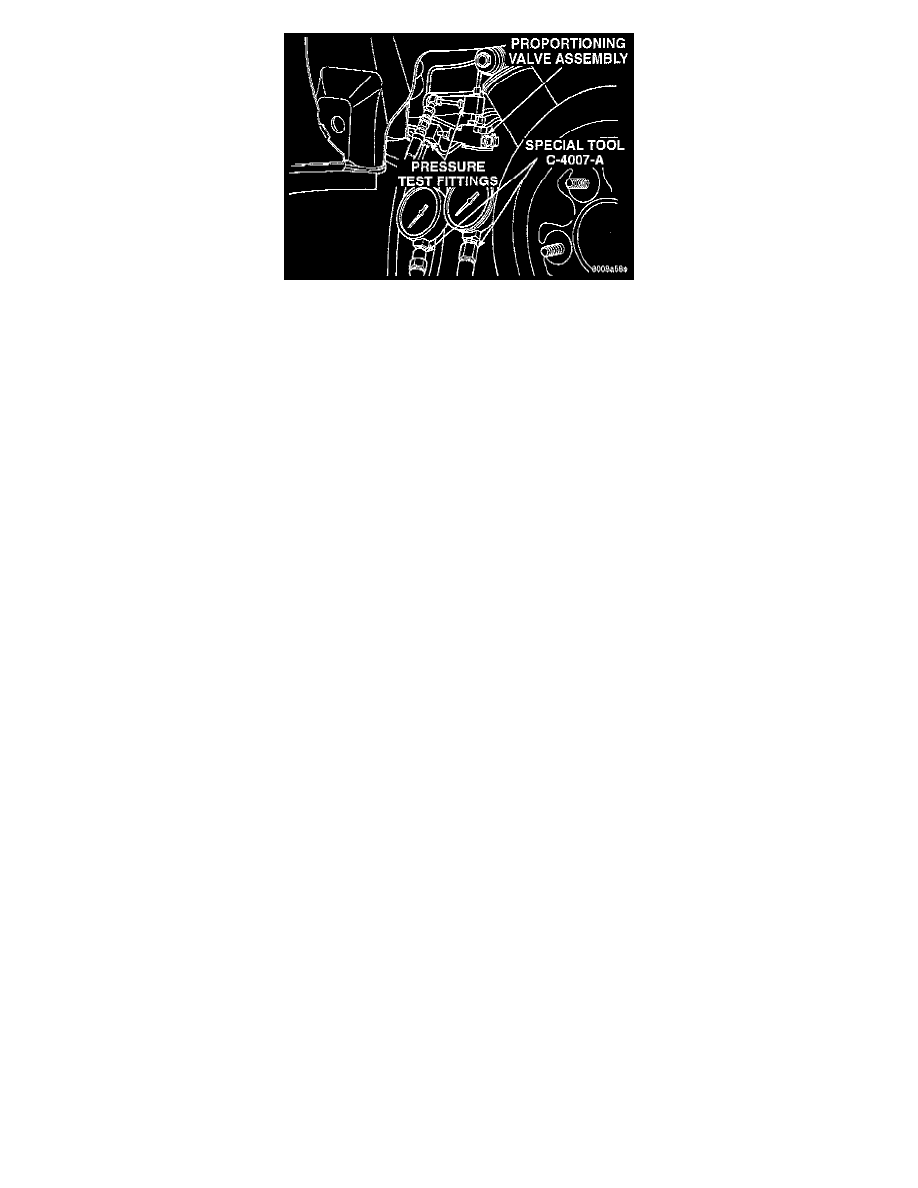
Pressure Gauges Installed On Pressure Test Fittings
7. Install a pressure gauge from Gauge Set, Special Tool C-4007-A, or equivalent into each pressure test fitting. Bleed air out of hose from
pressure test fittings to pressure gauges, at the pressure gauges. Then bleed air out of the brake line being tested, at that rear wheel cylinder.
8. With the aid of a helper, apply pressure to the brake pedal until a pressure of 6895 kPa (1000 psi) is obtained on the proportioning valve inlet
gauge. Then based on the type of brake system the vehicle is equipped with and the pressure specification shown on the following table,
compare the pressure reading on the outlet gauge to the specification. If outlet pressure at the proportioning valve is not within specification
when required inlet pressure is obtained, replace the proportioning valve.
9. Repeat steps 2 through 7 for the other proportioning valve of the assembly.
NOTE: When mounting the original or a replacement proportioning valve on the frame rail of the vehicle install the mounting bolts in only
the two forward holes of the mounting bracket.
10. After testing, remove gauges, and bleed brake system. See: Brake Bleeding/Service and Repair