
Voyager V6-201 3.3L VIN R SMFI (1997)
Ball Joint: Service and Repair
Ball Joint Replacement (Front Suspension)
REMOVE
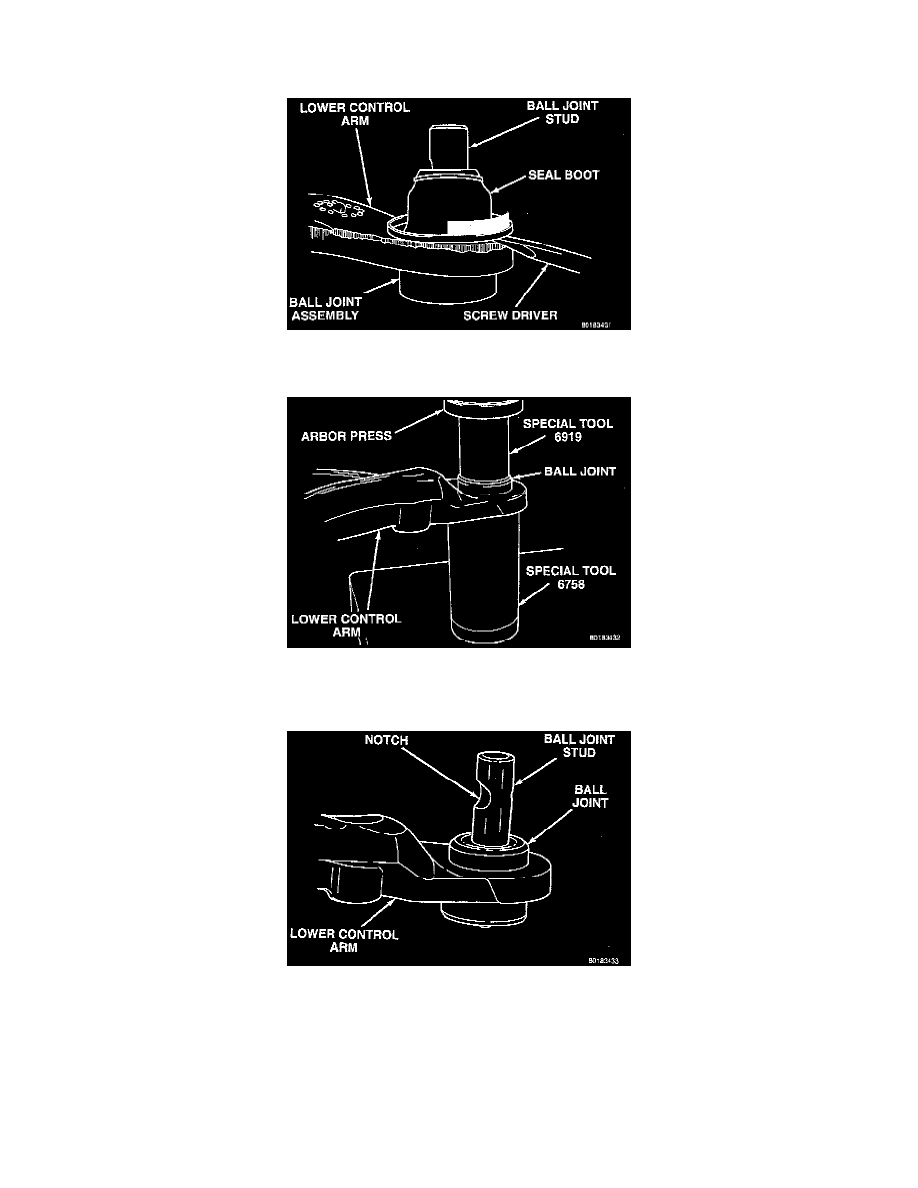
1. Using a screw driver or other suitable tool, pry the seal boot off of the ball joint assembly.
2. Position receiving cup, Special Tool 6758, or equivalent to support lower control arm when removing ball joint assembly. Install Remover,
Special Tool 6919, or equivalent on top of the ball joint assembly.
3. Using the arbor press, press the ball joint assembly completely out of the lower control arm.
NOTE: When installing ball joint in lower control arm, position the ball joint in control arm so notch in ball joint stud is in the direction shown. This
will ease assembly of the ball joint to the steering when installing pinch bolt.
INSTALL
1. By hand, position ball joint into ball joint bore of lower control arm. Be sure ball joint is not cocked in the bore of the control arm, this will cause
the ball joint to bind when being pressed into control arm.