
Voyager V6-229 3.8L (1996)
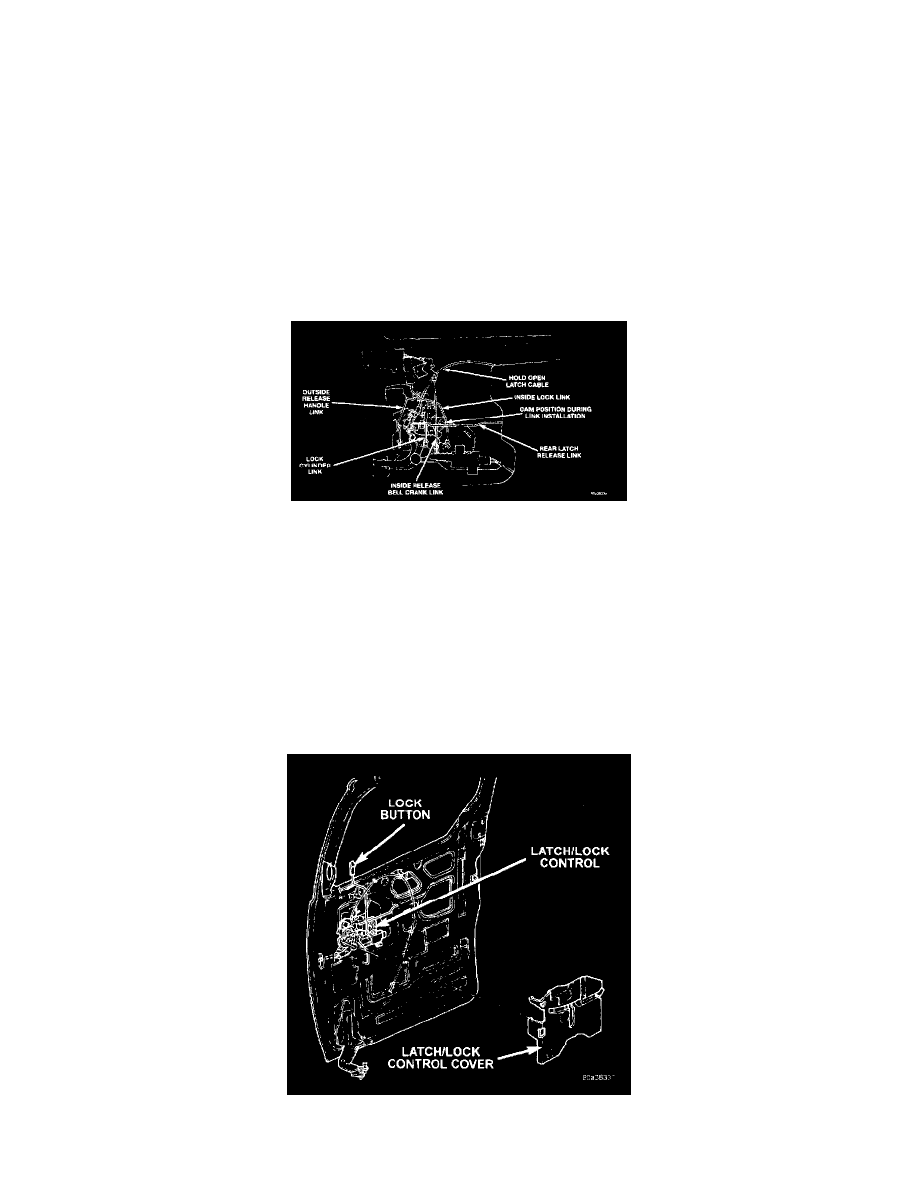
10. Disengage clip holding inside door handle bell crank link to latch/lock control.
11. Separate inside door handle bellcrank link from latch/lock control.
12. Disengage clip holding lock cylinder link to latch/lock control.
13. Separate lock cylinder link from control.
14. Disengage clip holding inside lock link to latch/lock control.
15. Separate inside lock link from control.
16. Disengage lock tabs holding hold open latch cable case to latch/lock control.
17. Separate hold open latch cable hall end from latch/lock control.
18. Loosen bolts holding latch/lock control to sliding door.
19. If equipped, disengage wire connector from power door lock motor.
20. Separate latch/lock from vehicle.
INSTALLATION
1. Position latch/lock locking lever in unlocked position.
2. Engage rigging cam.
3. Place latch/lock in position on vehicle.
4. If equipped, engage wire connector into power door lock motor.
5. Insert bolt heads into slots in sliding door inner panel.
6. Tighten bolts to hold latch/lock control to sliding door.
7. Engage hold open latch cable ball end into latch/lock control.
8. Engage lock tabs to hold the hold open latch cable case to latch/lock control.
9. Insert lock cylinder link into control.
10. Engage clip to hold lock cylinder link to latch/lock control.
11. Insert inside lock link into control.
12. Engage clip to hold inside lock link to latch/lock control.
13. Lift clip for inside door handle bellcrank link to top of slot in mechanism.
14. Pull inside release bellcrank link downward to remove cable slack then engage link to clip.
15. Lower clip for outside door handle link to bottom of slot in mechanism and engage link to clip.