
Voyager V6-3.0L VIN 3 (1998)
Engine Mount: Service and Repair
Front Mount
REMOVAL
1. Support the engine and transmission assembly with a floor jack so it will not rotate.
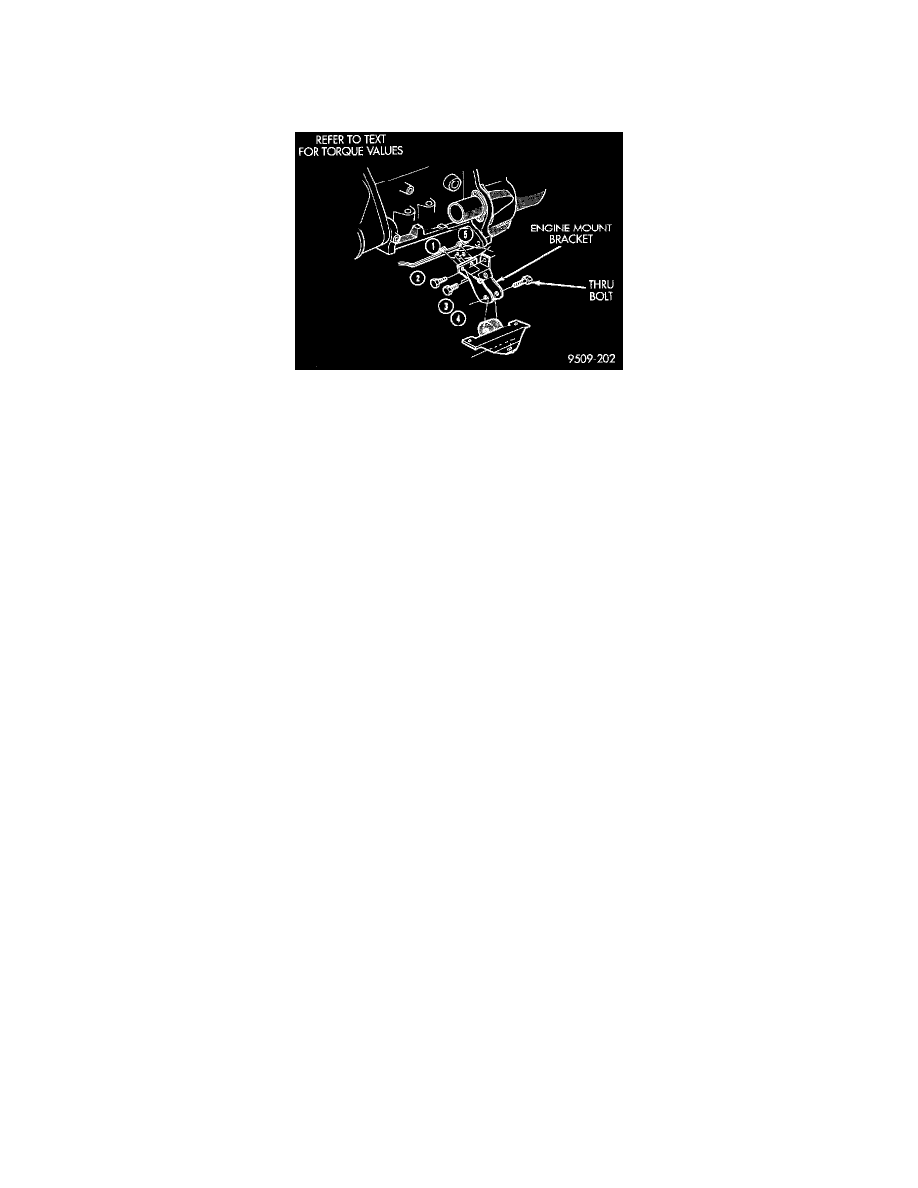
Engine Mount Front
2. Remove the front engine mount through bolt from the insulator and front crossmember mounting bracket.
3. Remove six screws from air dam to allow access to the front mount screws.
4. Remove the front engine mount screws and remove the insulator assembly.
5. Remove the front mounting bracket, if necessary.
INSTALLATION
1. Reverse removal procedure for installation and tighten fasteners in this order:
a. Tighten bolts 2, 3, and 4 to 108 Nm (80 ft. lbs.).
b. Tighten bolts 1 and 5 to 54 Nm (40 ft. lbs.).
2. Engine mount adjustment. Refer to Engine Mount Insulator Adjustment.
3. Install six screws to air dam and tighten to 12 Nm (105 inch lbs.).