
Voyager V6-3.0L VIN 3 (1998)
Distributor Cap: Testing and Inspection
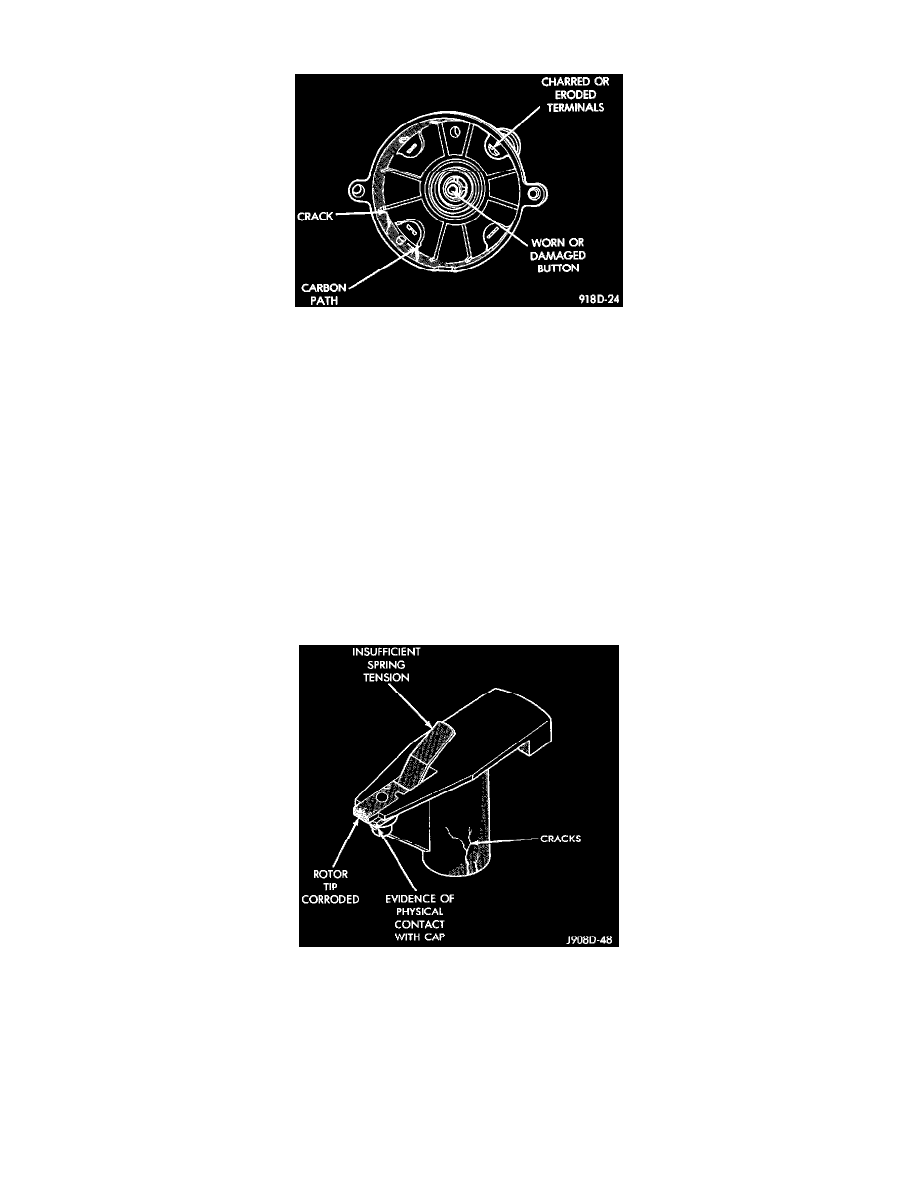
Fig 9 Distributor Cap Inspection
DISTRIBUTOR CAP INSPECTION
Remove the distributor cap and inspect the inside for flashover, cracking of carbon button, lack of spring tension on carbon button, cracking of
cap, and burned, worn terminals (Fig. 9). Also check for broken distributor cap towers.
-
If any of these conditions are present the distributor cap and/or cables should be replaced.
When replacing the distributor cap, transfer spark plug wires from the original cap to the new cap one at a time.
-
Ensure that each wire is installed into the tower of the new cap that corresponds to its tower position in the original cap.
-
Fully seat the wires into the towers.
-
If necessary, refer to the engine firing order diagram.
Light scaling of the terminals can be cleaned with a sharp knife.
-
If the terminals are heavily scaled, replace the distributor cap.
A cap that is greasy, dirty or has a powder-like substance on the inside should be cleaned with a solution of warm water and a mild detergent.
-
Scrub the cap with a soft brush.
-
Thoroughly rinse the cap and dry it with a clean soft cloth.
Fig 10 Rotor Inspection
DISTRIBUTOR ROTOR
Replace the rotor if it is cracked, the tip is excessively burned or heavily scaled (Fig. 10).