
Voyager V6-3.3L VIN G Flex Fuel (2000)
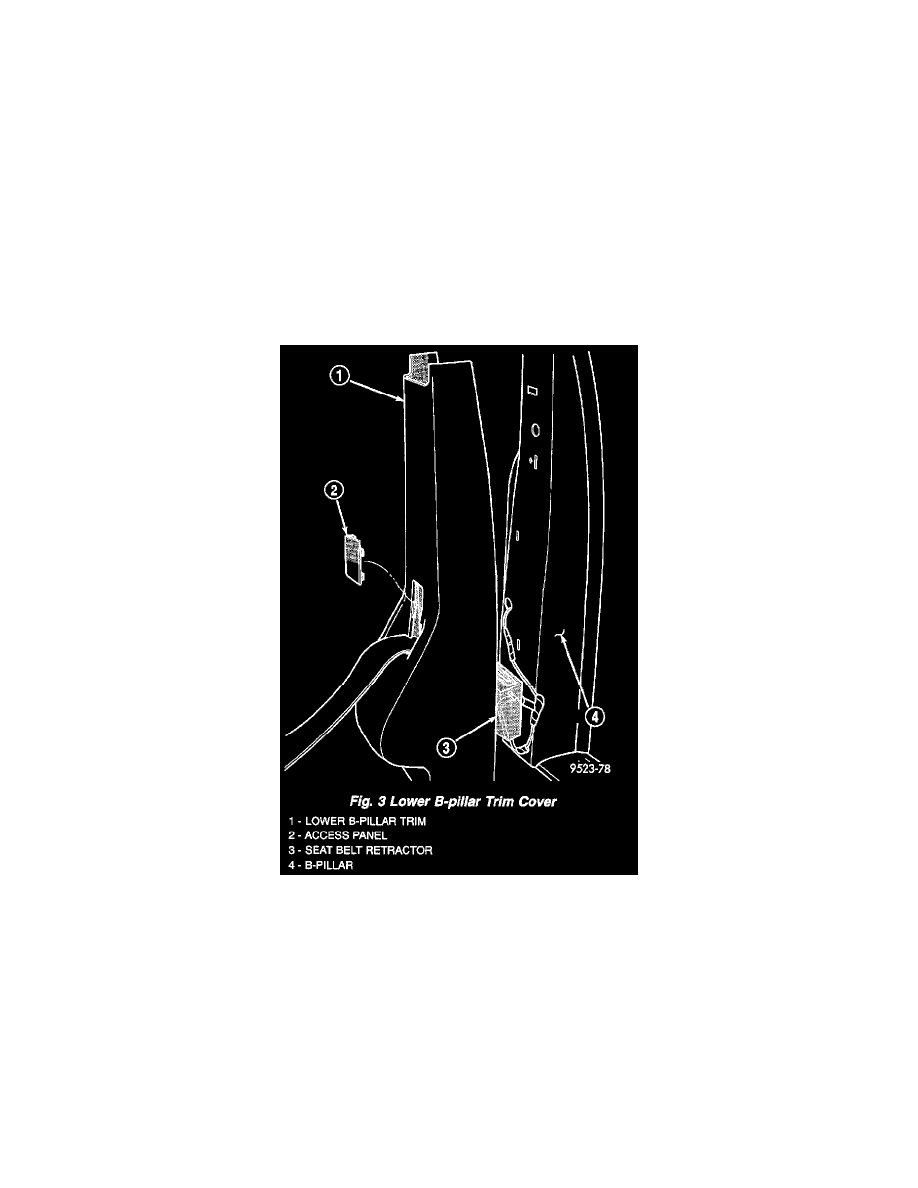
Fig. 1
3. Remove A-pillar extension trim from vehicle (Fig. 1) .
INSTALLATION
1. Place A-pillar extension trim in position on vehicle.
2. Install screw to hold A-pillar extension to door hinge pillar.
3. Install instrument panel side cover.
B-Pillar Lower Trim
B-PILLAR LOWER TRIM
REMOVAL
1. Slide lower seat belt cover rearward to expose anchor bolt.
2. Remove bolt attaching lower seat belt anchor to floor.
3. Remove upper B-pillar trim cover.
Fig. 3
4. Remove access panel. from B-pillar trim (Fig. 3)
5. Remove screw attaching lower trim cover to B-pillar from below seat belt retractor.
6. Disengage hidden clips attaching lower trim cover to B-pillar.
7. Remove lower B-pillar trim cover from vehicle.
INSTALLATION
1. Place lower B-pillar trim cover in position on vehicle.
2. Insert seat belt through hole in lower B-pillar trim.
3. Engage hidden clips attaching lower trim cover to B-pillar.
4. Install screw attaching lower trim cover to B-pillar below seat belt retractor.
5. Install access cover.
6. Install upper B-pillar trim cover.