
Voyager V6-3.3L VIN R (1999)
3. Compress the coil spring until all coil spring tension is removed from the upper mount.
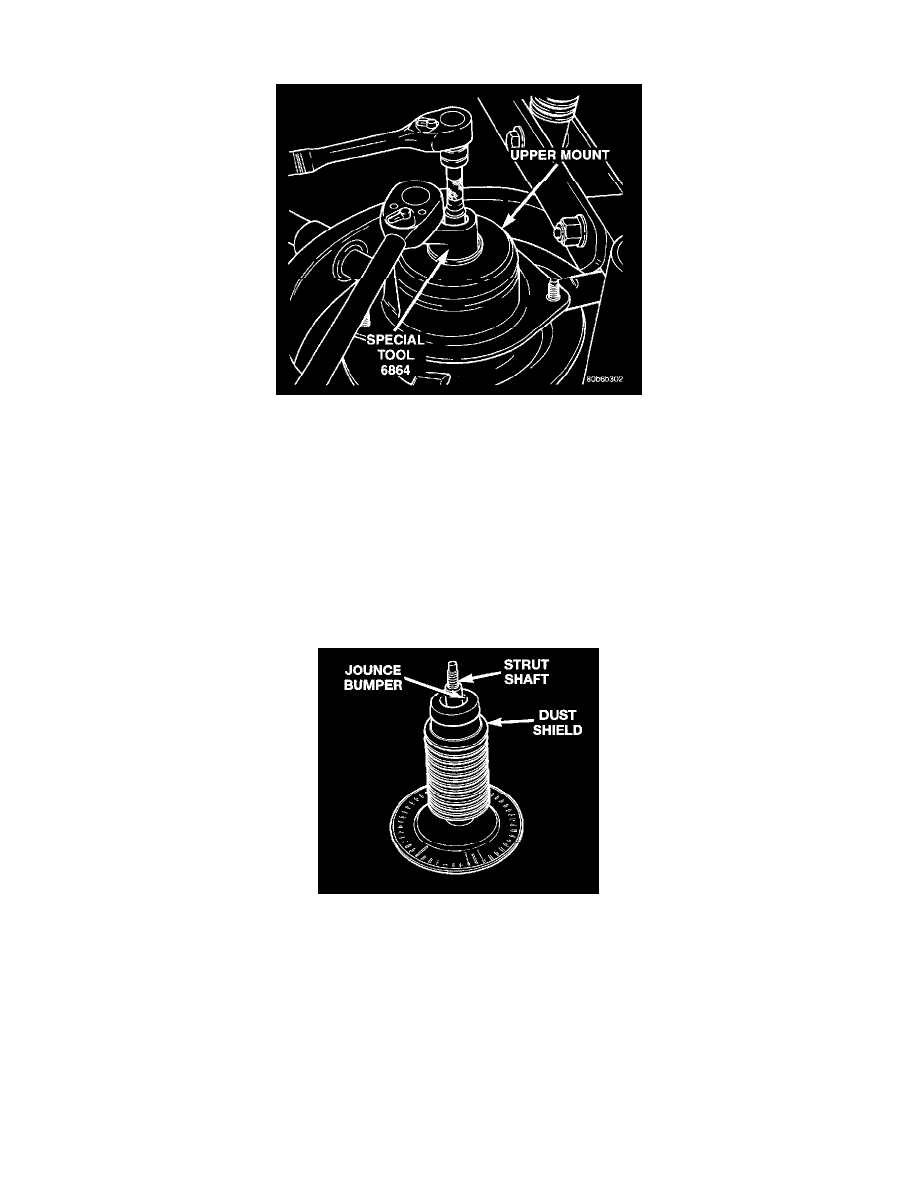
Retaining Nut Removal/Installation
4. Install Strut Nut Socket, Special Tool 6864, on the strut shaft retaining nut. Next, install a 10 mm socket on the hex on the end of the strut shaft.
While holding the strut shaft from turning, remove the nut from the strut shaft.
5. Remove the upper mount from the strut shaft.
6. If the upper pivot bearing needs to be serviced, remove it from the top of the coil spring upper seat by pulling it straight up.
7. Remove the clamp from the bottom of the coil spring and remove the strut out through the bottom of the coil spring.
NOTE: If the coil spring or upper mount need to be serviced, proceed with the next step, otherwise, proceed with step 10.
8. Release the tension from the coil spring by backing off the compressor drive fully. Push back the compressor upper hooks and remove the upper
spring seat.
9. Remove the coil spring from the spring compresser.
Dust Shield/Jounce Bumper
10. Remove the dust shield and jounce bumper as an assembly from the strut shaft by pulling both straight up and off the strut shaft. The dust shield
cannot be separated from the jounce bumper until after it is removed from strut shaft.
11. Remove the jounce bumper from the dust shield. The jounce bumper is removed from the dust shield by collapsing the dust shield until the jounce
bumper can be pulled free from the dust boot.