
2000 Sunbird L4-121 2.0L VIN B 2-bbl (1984)
all 1985---88 engines are assembled with the 1-piece seal. The new seal should be used on early models if replacement is necessary. Before replacing a
rear oil seal, make absolutely sure it is the exact source of leakage. On 1984 models, once it has been determined that the seal must be replaced, it is
necessary to determine the type of seal (thin or thick) installed in the engine, Fig. 21. Refer to the appropriate following procedures.
Thin Seal
1.
Drain coolant and oil from engine.
2.
Remove engine and mount on engine stand in inverted position. Remove oil pan and pump.
3.
Remove timing chain cover, then lock chain tensioner with pin.
4.
Rotate crankshaft so crankshaft and camshaft sprocket timing marks line up.
5.
Remove camshaft sprocket and timing chain.
6.
Rotate crankshaft to horizontal position.
7.
Remove connecting rod caps and bearings, taking care not to mix caps and bearings.
8.
Remove main bearing caps and bearings, taking care not to mix caps and bearings.
9.
Remove crankshaft.
10.
Remove old oil seal and clean sealant from grooves in block and cap.
11.
Using solvent, clean crankshaft seal area to remove excess solvent, taking care not to damage surface.
12.
Inspect sealing and mating surfaces and crankshaft journal, checking for nicks, scratches, or machining defects.
13.
Apply a 1 mm bead of anaerobic sealant 1052357 or equivalent to outside circumference of seal.
Fig. 22 Installing thin seal. 4-121
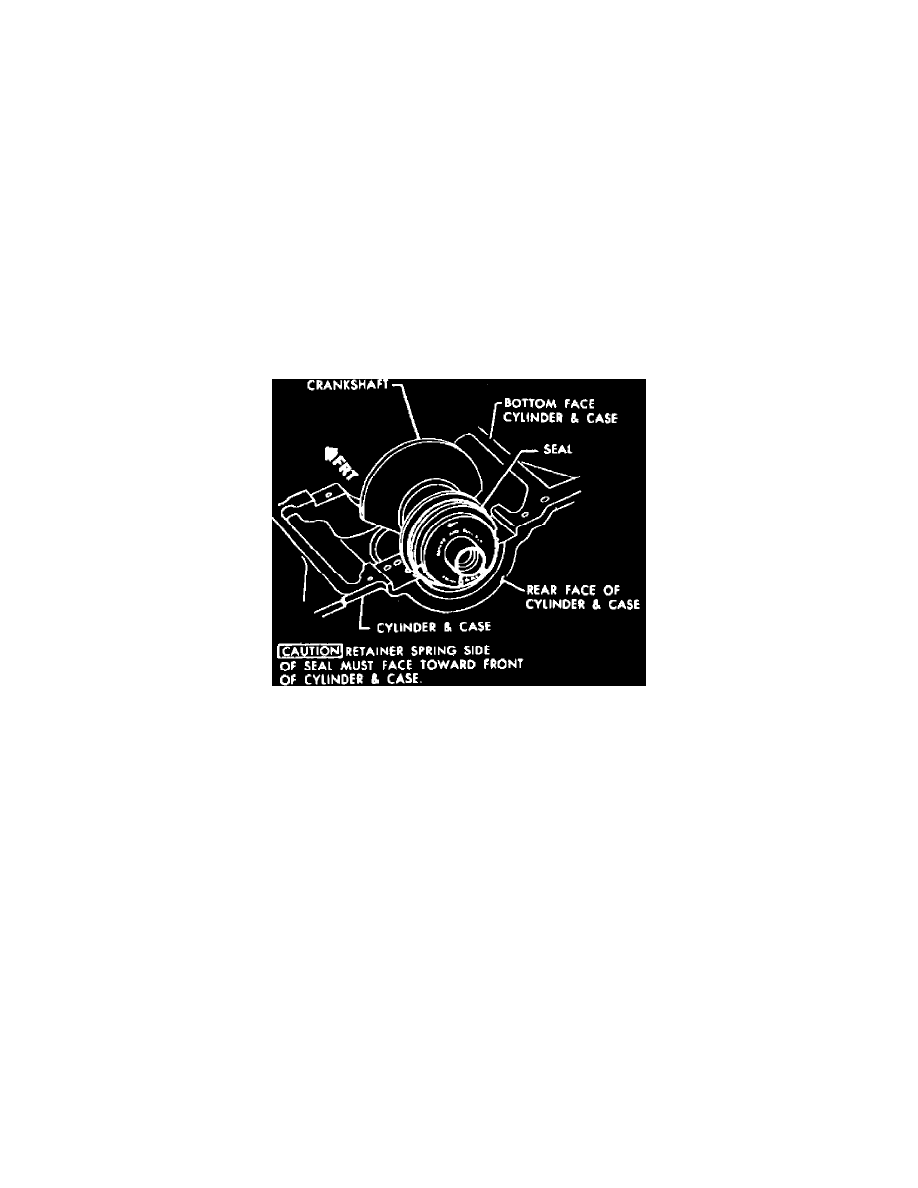
14.
Place seal and tool assembly on rear of crankshaft.
15.
Position seal tool so arrow points toward engine block, Fig. 22.
16.
Position crankshaft in engine block with seal tool in place.
17.
Remove seal tool and discard.
18.
Lightly oil crankshaft journals.
19.
Apply sealant 1052357 or equivalent to rear journal mating surfaces and install main bearing and cap.
20.
Install remaining bearings and caps. Torque cap bolts to 63---75 ft. lbs.
21.
Install connecting rod bearings and caps. Torque cap bolts to 34---40 ft. lbs.
22.
Install oil pump, making sure that mating surface is clean. Torque oil pump to 26---35 ft. lbs.
23.
Align crankshaft sprocket timing mark and install camshaft sprocket and timing chain. Torque sprocket bolt to 66---84 ft. lbs.
24.
Clean, seal and install oil pan.
Thick Seal