
Bonneville V6-231 3.8L VIN 3 SFI (1988)
door.
3 and 4.
Position front door window frame scalp molding assembly to
front door. Starting at the upper rear corner, engage over outer edges of the top leg and upper rear vertical leg of the door frame simultaneously.
(Figure 2) working in the order depicted in Figure
3.
Once corner on frame, push scalp molding as far forward as possible on horizontal leg of header.
5 - 11.
Engage molding over the outer edge of the stationary door
frame and snap molding onto retainer clips on the inner edge of stationary door frame (Figure 2) working in the order depicted in Figure 3.
IMPORTANT:
Cross section of correctly installed molding (Figure 4). Kent-Moore Installation Tool # J-38714 will be available May 4.
Rear Door Scalp Molding
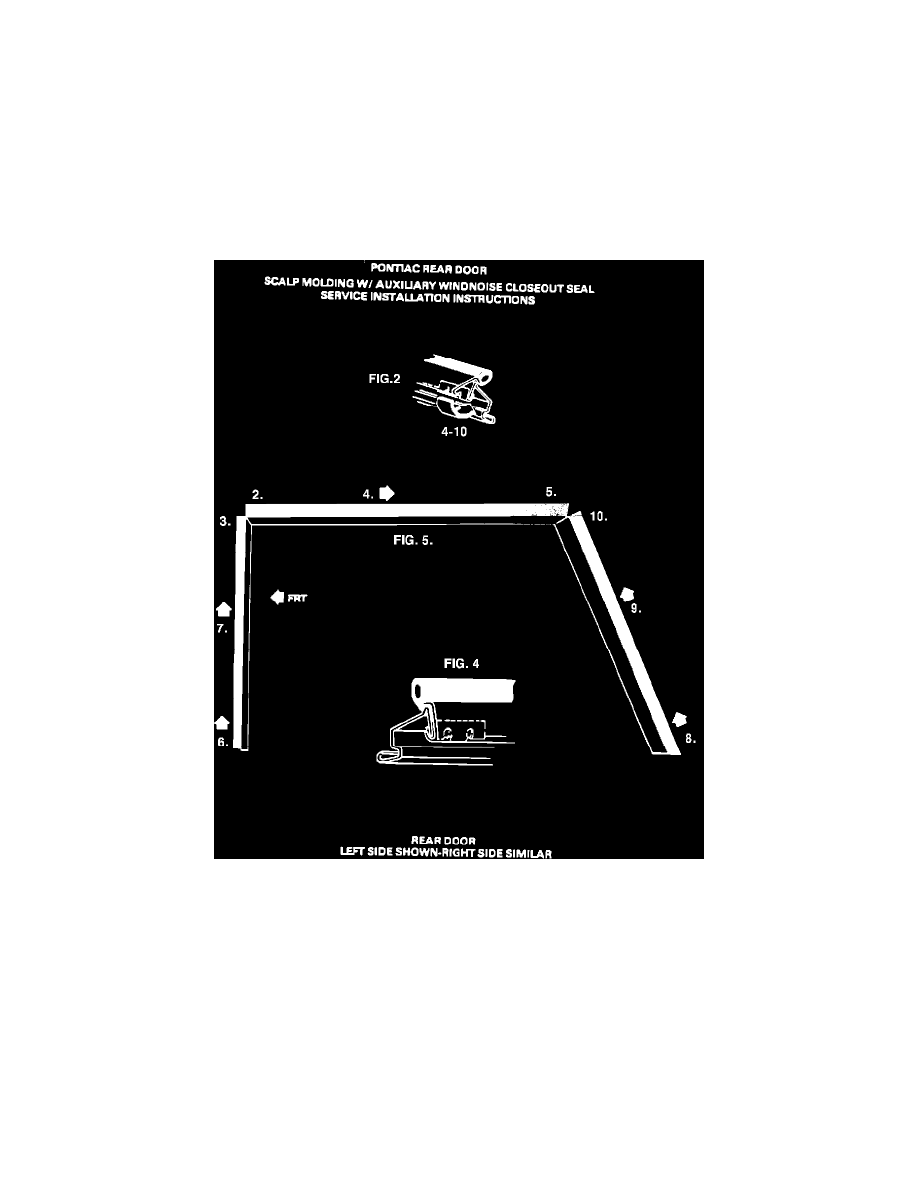
PONTIAC REAR DOOR
REAR DOOR SCALP MOLDING WITH AUXILIARY WINDNOISE CLOSEOUT SEAL
SERVICE INSTALLATION INSTRUCTIONS
1.
Apply soap solution to cover complete perimeter of outer edge of stationary door frame.
2 and 3. Position rear door window frame scalp molding assembly to rear door and starting at upper front corner, engage over outer edges of top leg and
upper front vertical leg of door frame simultaneously. (Figure 4) once corner on frame, push scalp molding as far forward as possible on horizontal leg of
header.
4 - 10. Engage molding over the outer edge of the stationary door frame and snap molding onto retainer clips on the inner edge of stationary door frame
(Figure 2) working in the order depicted in Figure 5.
Clean area of ALL excess soap. This would be general information for both doors.