
Bonneville V6-3800 3.8L (1991)
currently available from GMSPO.
TORQUE STRUT REMOVAL
Refer to Section 6 of the Service Manual for additional information.
1. Remove the torque strut from the frame bracket.
2. Remove the rose bud fastener that holds the oil filter drip shield from the transmission bracket, if so equipped. Unscrew the rosebud to prevent
damage to the fastener.
3. Remove the transmission bracket.
4. Remove the frame bracket.
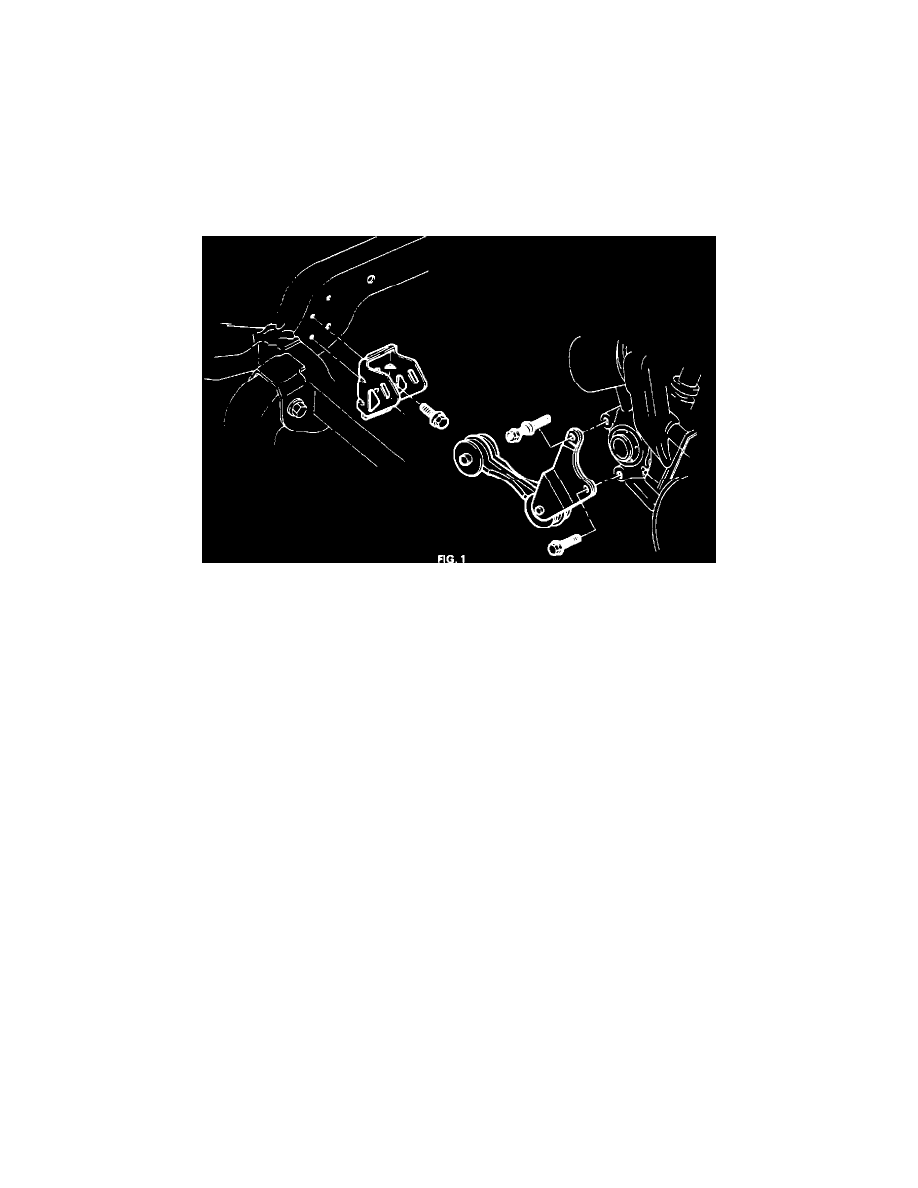
FIG. 1
TORQUE STRUT INSTALLATION
1. Install the frame bracket and secure it to the frame using the outer bolt holes (closest to the passenger side). Be sure that the bracket is installed with
the slot at the top. See Figure 1.
2. Install the torque strut to frame bracket bolt and torque to spec.
3. Install the transmission bracket to the transmission. Install the double ended stud in the location shown in Figure 1.
4. Install the torque strut to transmission bracket bolt and torque.. to spec.
5. The oil filter drip shield lower attachment should be made to the outside of the double ended stud as per Figure 1, if so equipped.
WARRANTY INFORMATION:
Cross switch front tire/wheel assemblies
Labor Operation No.: T5243
Labor Time:
.8 hr.
Vehicle Torque Steers Left - Remove shim under Torque Axis Mount. Includes tire Cross switch time.
Labor Operation No.: T5244
Labor Time:
2.2 hr.
Vehicle Torque Steers Right - Add shim under Torque Axis Mount. Includes tire cross switch time.
Labor Operation No.: T5245
Labor Time:
1.6 hr.
Vehicle Torque Steers Right - Install Angled Rear Torque Strut. Includes tire cross switch and adding shim time.
Labor Operation No.: T5246
Labor Time:
2.5 hr.