
Bonneville V6-3800 3.8L Supercharged (1992)
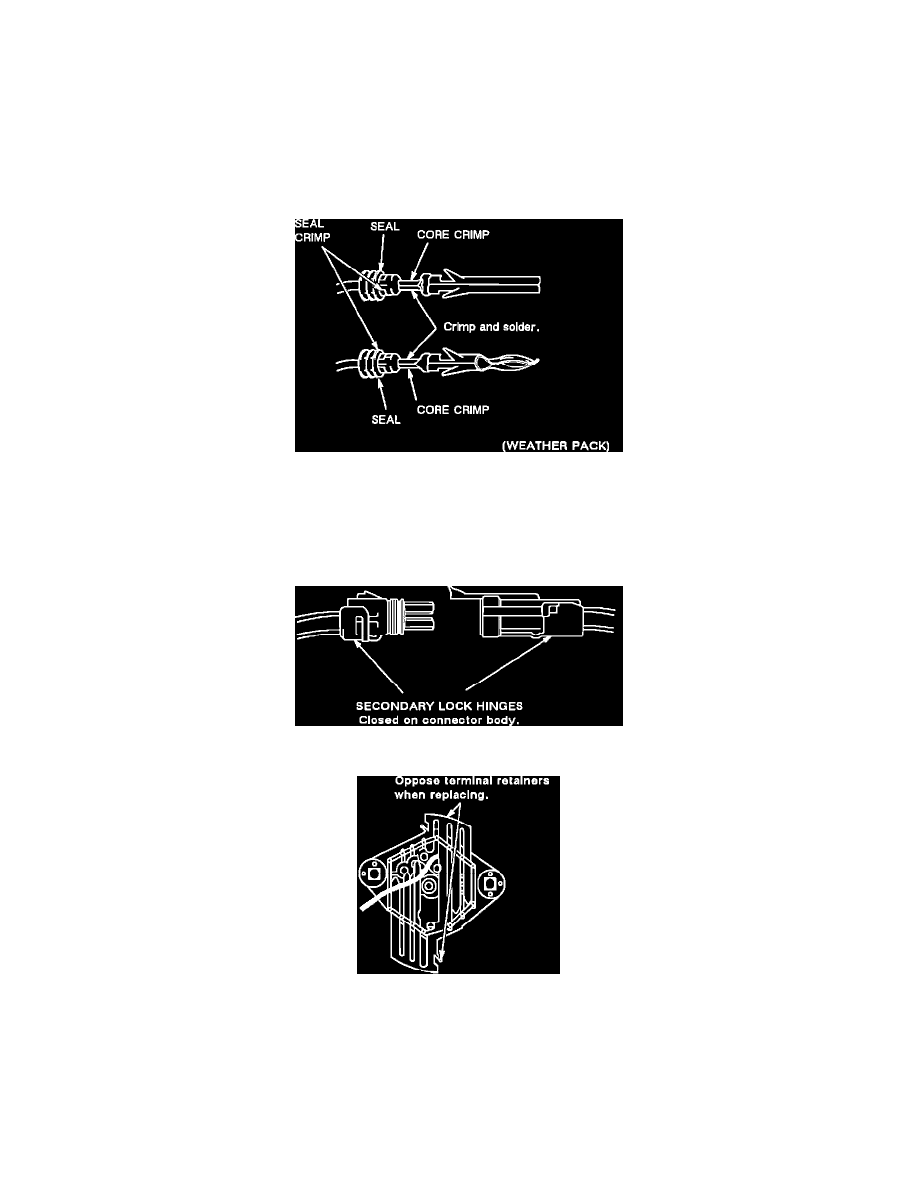
When using a new terminal:
a.
Slip cable seal away from terminal (if seal exist).
b.
Cut wire as close to terminal as possible.
c.
Slip a new cable seal onto wire (if necessary).
d.
Strip 5mm (3/16") of insulation from wire.
e.
Crimp a new terminal to the wire.
f.
Solder with rosin core solder.
g.
Slide cable seal toward terminal (if equipped with a seal).
h.
Crimp cable seal and insulation (if equipped with a seal).
i.
Apply grease to connectors outside the passenger compartment where the connector originally was equipped with grease.
Figure 17
To re-use a terminal or lead assembly, see previous steps c through i for repairs. Be sure to keep cable seal (if equipped) on terminal side of splice.
5.
Insert lead from the back until it catches.
6.
Install TPA's, CPA's and/or secondary locks, if equipped (see Figures 18 & 19).
Figure 18
Figure 19
Basic Troubleshooting Guide
TROUBLESHOOTING GUIDELINES
Without a basic knowledge of electricity, it will be difficult to use the diagnostic procedures contained in this section. You should understand the
basic theory of electricity and know the meaning of voltage, current (amps) and resistance (ohms). You should understand what happens in a
circuit with an open or a shorted wire. You should be able to read and understand a wiring diagram. The following four-step troubleshooting
procedure is recommended: