
Bonneville V6-3800 3.8L Supercharged (1992)
6.
Lower front of vehicle.
7.
On Bonneville, 88 and LeSabre models, install three strut to body attaching nuts.
8.
On 98 and Park Avenue models, place cross brace assembly on inboard strut studs and install strut attaching nuts.
9.
On all models, set caster to specifications by moving strut forward or rearward as necessary.
10.
Torque strut attaching nuts to 18 ft. lbs.
11.
On 98 and Park Avenue models, torque cross brace bar through bolts to 21 ft. lbs.
Front Camber Adjustment
Fig. 4 Camber Adjustment
1.
Loosen both strut to knuckle attaching nuts, Fig. 4.
2.
Install camber adjusting tool J-29862.
3.
Set camber to specifications.
4.
Remove adjusting tool and torque strut to knuckle attaching nuts to 144 ft. lbs.
5.
Recheck camber.
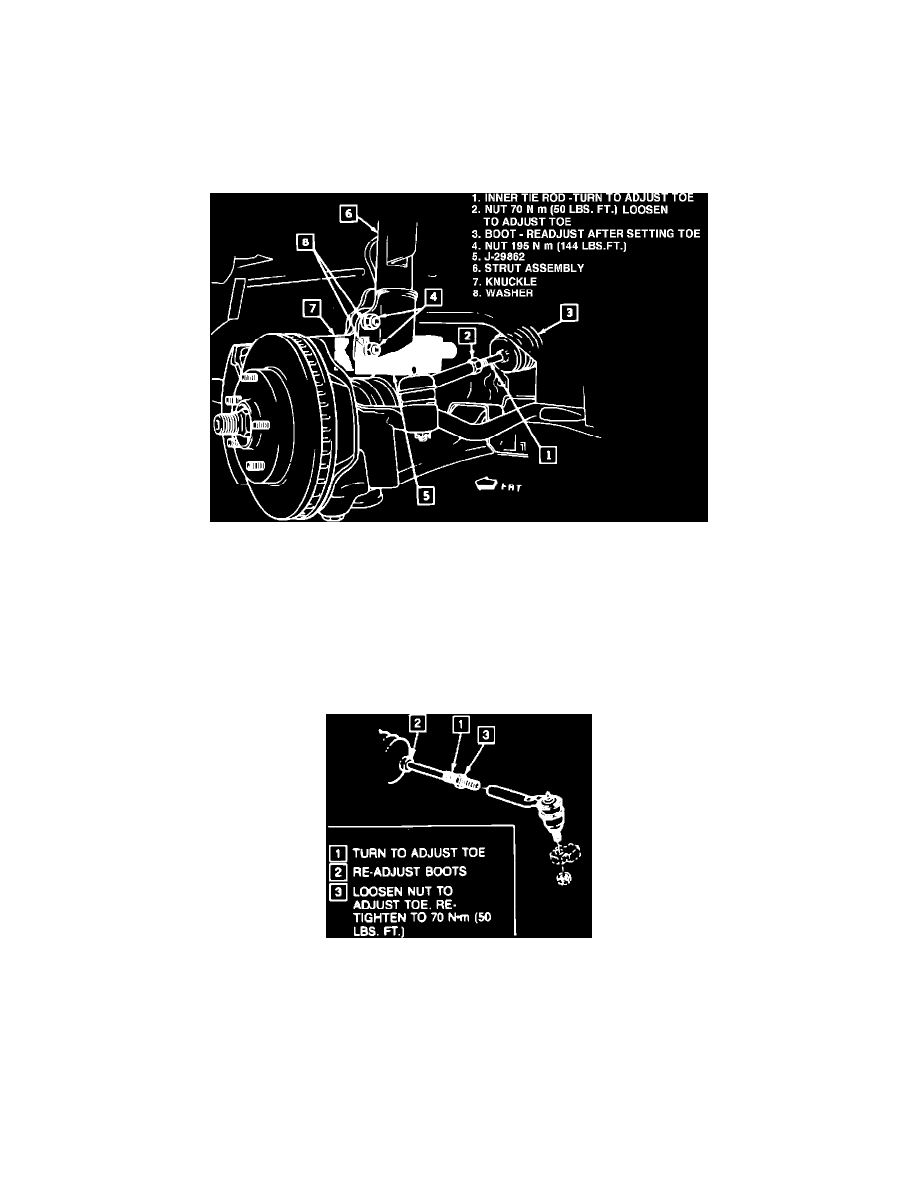
Front Toe Adjustment
Fig. 5 Rear Camber & Toe Adjustments
1.
Loosen locknuts on both inner tie rods, Fig. 5.
2.
Adjust toe to specifications by rotating inner tie rod.
3.
Torque locknuts to 50 ft. lbs.
4.
Recheck toe setting.