
Bonneville V6-3800 3.8L Supercharged (1992)
Ball Joint: Service and Repair
Removal and Installation
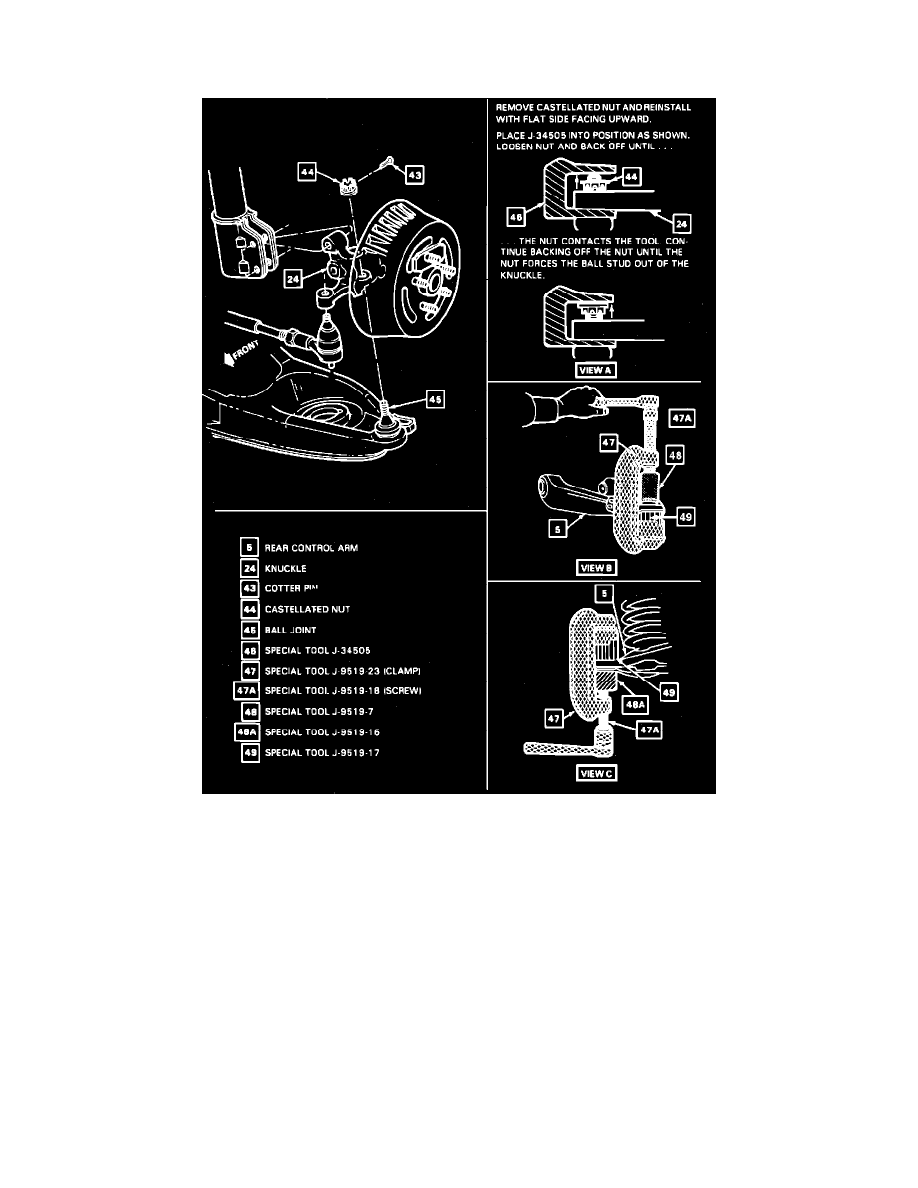
Fig. 7 Ball Joint Replacement
1.
Raise and support vehicle.
2.
Remove wheel assembly, cotter key and castle nut.
3.
Disconnect outer tie rod/adjustment link from knuckle as outlined previously.
4.
Disconnect electronic level control height sensor link from right side control arm.
5.
Support control arm with a suitable jack.
6.
Remove ball joint cotter pin and nut.
7.
Using tool J-29330, disconnect ball joint from knuckle, Fig. 7.
8.
Using tool J-9519-7, remove ball joint from control arm.
9.
Reverse procedure to install.