
Bonneville V6-3800 3.8L Supercharged (1992)
Repair Method:
The simplest method of repair is to carefully pull the adhesive sealing tape that holds the glass run channel to the door frame loose from the door.
Reposition the glass run channel in a way that pulls the auxiliary lip further into the door opening. It will be necessary to apply a length of double face
tape such as 3M Part No. 06382 Scotch-Mount or equivalent to properly re-attach the run channel to the door frame. In some cases where the condition
cannot be corrected by the simple adjustment, the door fit itself will have to be adjusted to correct the condition. Road test to assure the condition is
repaired.
Chart A5 General Wind Rush In Front Pillar From Base to Roof
GA high level of wind rush in the front pillar, that cannot be associated with charts A1, A3 or A4, may be internal to the pillar itself. The pillar has an
expandable foam plug in its base and may not be completely sealed. Noise from this source will be fairly uniform when checked all along the inside of
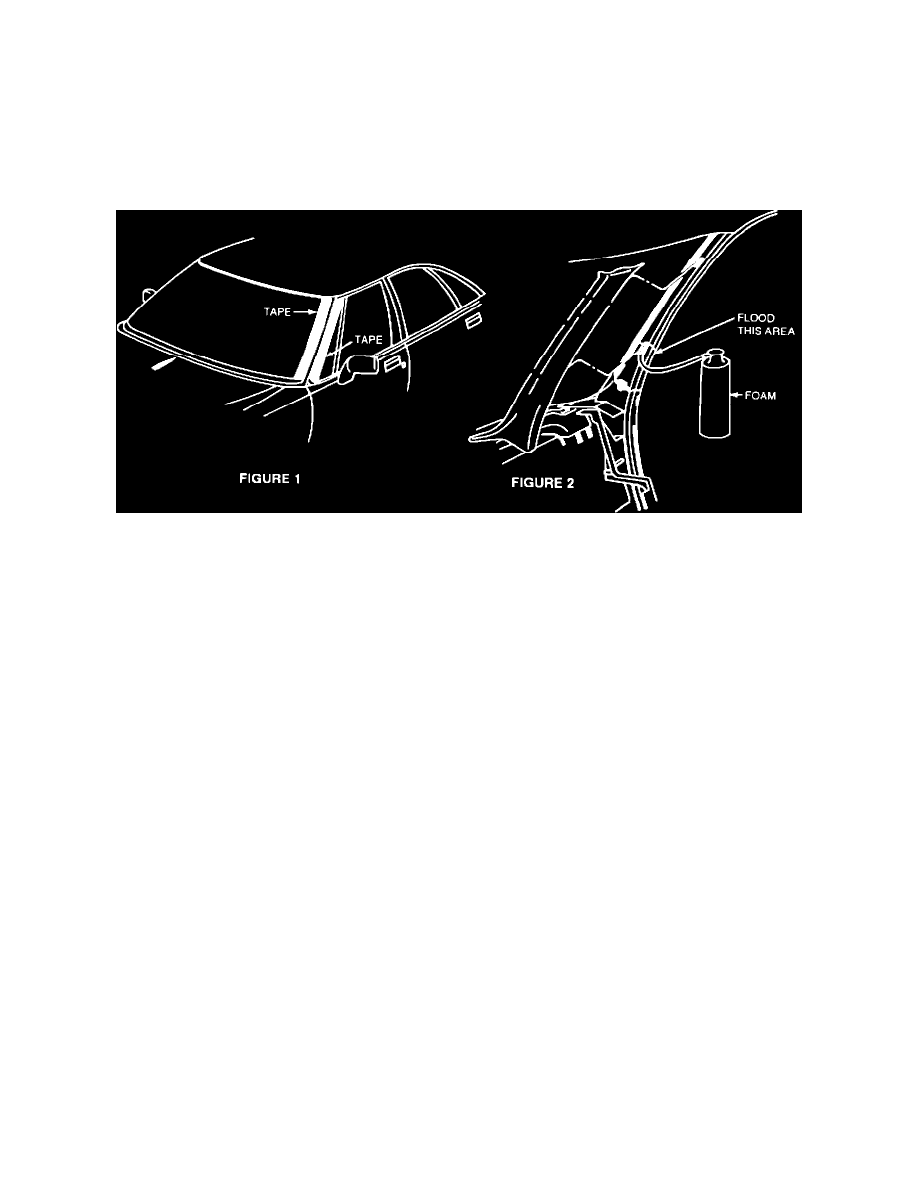
the windshield during the road test. Before repair is started, cover the windshield side reveal molding and its mating surface on the windshield and the
door glass run channel with duct tape (See figure 1) and road test again. If there is no improvement, proceed with the repair method as described below.
If the taping improves the condition, re-evaluate for conditions A1 and/or A3 and/or A4.
Repair Method:
Remove the front pillar garnish molding to expose the pillar. Using a double-expanding polyurethane foam (available from a building supply outlet), fill
the lower one quarter of the pillar through the bottom slotted hole (See figure 2). Use caution not to allow the foam to come in contact with other parts
and not to overfill the pillar. The foam will more than double its volume during the curing process.
Note:
First squirt a small amount of foam into a wastebasket to get an idea of how fast it comes out of the can and to make sure the foam expands properly.
Place a piece of tape over the slot until the foam cures. After the foam has cured, remove the tape and reinstall the garnish molding. Road test to assure
the condition is repaired.
Chart B1 Innner Door Beltline Leaks At Several Locations