
Bonneville V8-4.6L VIN Y (2004)
Front Door Window Regulator: Service and Repair
Front Side Door Window Regulator Replacement
Removal Procedure
1. Remove the door trim panel.
2. Remove the water deflector.
3. Tape the window in the closed position.
Caution: Refer to Express Window Down Caution in Service Precautions.
4. Thru the access holes in the inner door panel, loosen the window clamp attachment bolts 4 revolutions.
5. Lower the window regulator 3 quarters of the way down.
6. Disconnect the electrical connector from the window regulator motor.
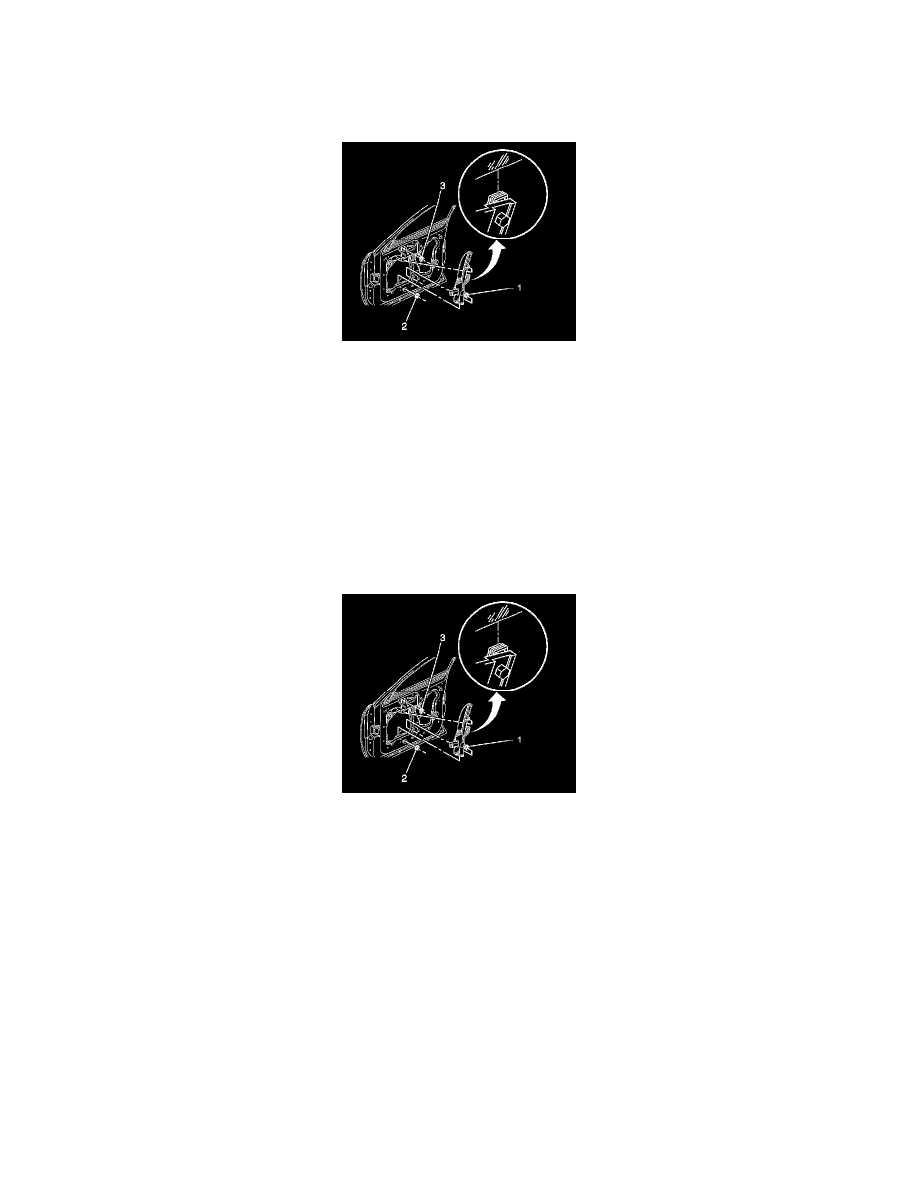
7. Remove the window regulator to inner door panel fasteners (1, 2, 3).
8. Remove the window regulator.
Installation Procedure
1. Install the window regulator into the door.
Notice: Refer to Fastener Notice in Service Precautions.
2. Install the window regulator fasteners.
Tighten the fasteners in this order, (1, 3, 2) to 9 N.m (80 lb in).
3. Remove the tape holding the window up.
4. Lower the window into the window regulator clamps.
5. Ensure the glass is fully rearward into the window channel.
6. Install the power window motor electrical connector.
Important: Start the vehicle to ensure maximum power to the window motor. This is required to fully seat the window for adjustment.
7. Raise the window to the full up position.
Tighten window clamp fasteners to 11 N.m (95 lb in).
8. Check for proper window operation and a tight seal around the glass before installing the water deflector and the trim panel.