
Fiero L4-151 2.5L (1985)
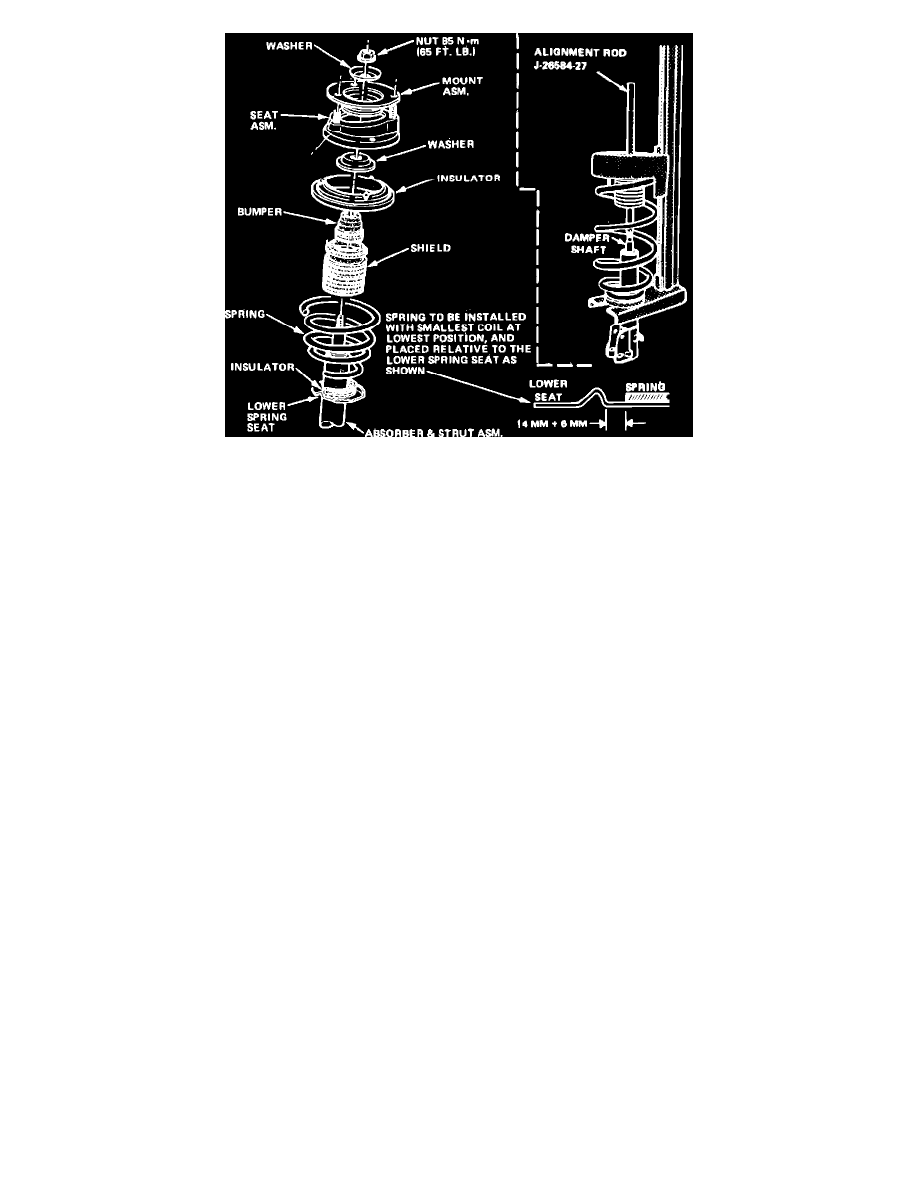
Fig. 13 Strut assembly alignment & components
ASSEMBLY
1.
Perform steps 1 and 2 as outlined in the ``Disassembly'' procedure.
2.
Rotate strut assembly until mounting flange is facing outward, opposite compressor forcing screw.
3.
Install strut components, Fig. 13. Ensure spring is properly seated on bottom spring plate.
4.
Install strut spring seat assembly on top of spring with long stud positioned 180° from strut mounting flange.
5.
Install top adapter over spring seat assembly.
6.
Rotate compressor forcing screw until compressor top support just contacts top adapter. Do not compress spring.
7.
Install strut alignment rod through top spring seat and thread onto damper shaft hand tight, Fig. 13.
8.
Rotate compressor forcing screw clockwise to compress spring until damper shaft is exposed enough so nut can be threaded securely, then install
the nut. Ensure damper shaft comes through center of spring seat opening to prevent damage. Do not compress spring until bottomed.
9.
Remove alignment rod, then install mount and torque nut to 65 ft. lbs.
10.
Rotate compressor forcing screw counterclockwise and remove strut assembly from compressor.