
Fiero V6-173 2.8L (1986)
1.
Caliper as previously described.
2.
Outboard shoe and lining (5) (Figures 7 & 8).
^
Use screwdriver to disengage buttons on shoe from holes in caliper housing (13).
3.
Inboard shoe and lining (6).
4.
Bushings (4) from grooves in mounting bolt holes.
Install or Connect
1.
Lubricated new bushings (4) in grooves in mounting bolt holes.
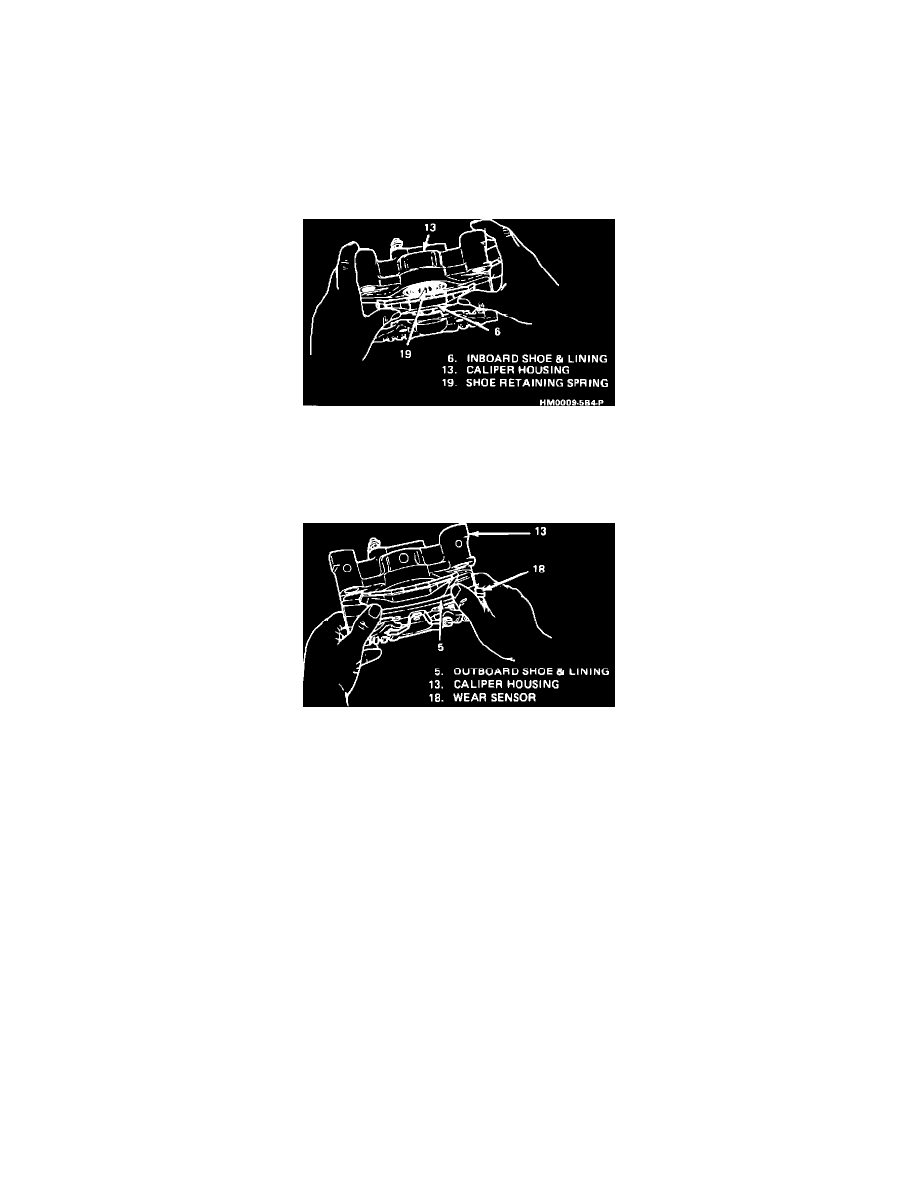
FIGURE 9 - INSTALLING INBOARD SHOE AND LINING
2.
Inboard shoe and lining (6) by snapping retainer spring (19) into center hole of piston (9). Shoe retainer spring is already staked to the inboard
shoe. Shoe must lay flat against piston with piston retracted in caliper housing (13) (Figure 9).
FIGURE 10 - INSTALLING OUTBOARD SHOE & LINING
3.
Outboard shoe and lining (5) with wear sensor (18) at leading edge of caliper during forward wheel rotation. Back of shoe must lay flat against
caliper (Figure 10).
4.
Caliper as previously described.
5.
Apply approximately 778 N (175 lbs.) force three times to brake pedal to seat linings.
Unit Repair
CALIPER OVERHAUL
Tool Required:
J 29381 Boot Seal Installer
Disassemble
Figures 11 through 13
Remove or Disconnect