
Firebird V6-3.8L VIN K (1995)
Accumulator: Service and Repair
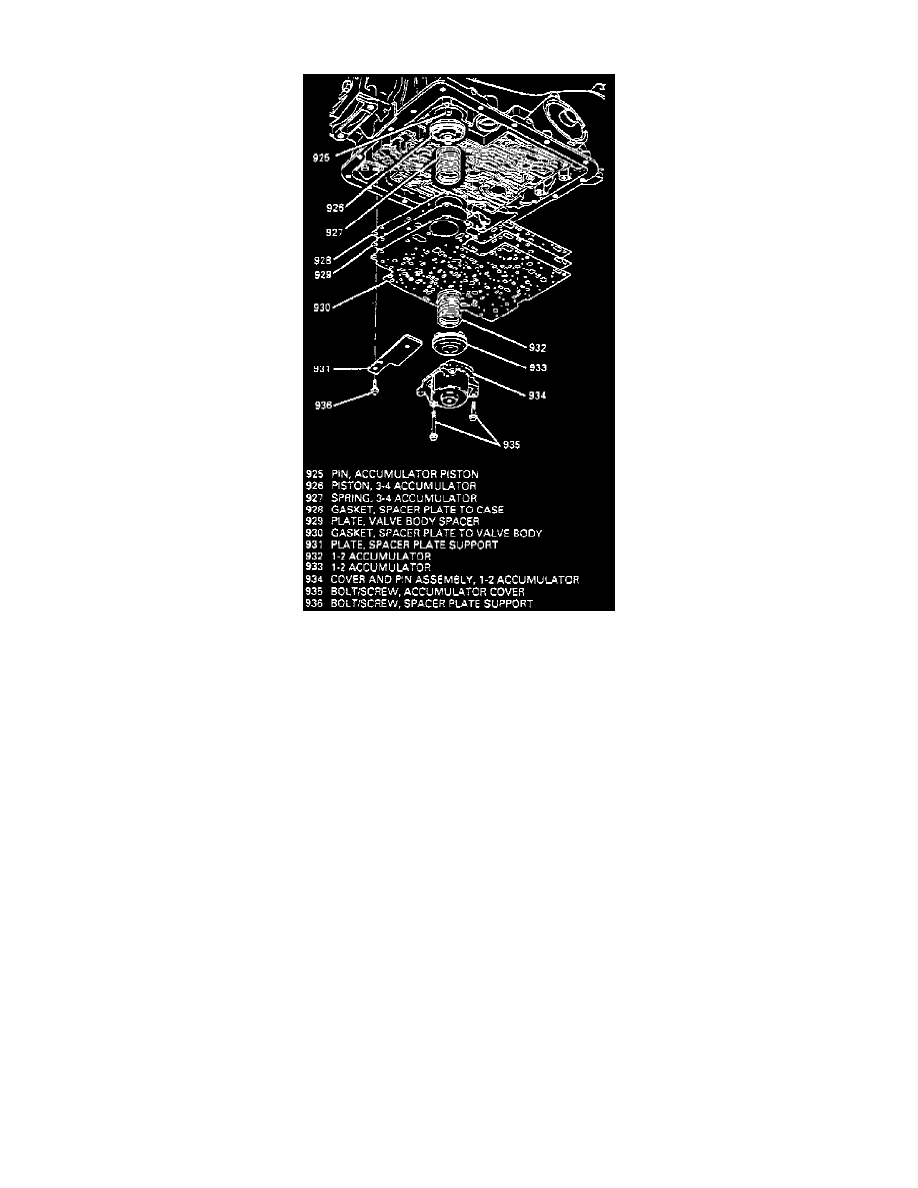
Fig.15 Accumulator Assembly
REPLACE
1. Raise and support vehicle.
2. Remove oil pan and gasket.
3. Remove oil filter and filter seal.
4. Remove control valve body as described under Valve Body. Refer to Valve Body. See: Valve Body/Service and Repair
5. Remove accumulator cover bolts, Fig. 15.
6. Remove 1-2 accumulator cover, piston and spring.
7. Remove spacer plate support bolts.
8. Remove spacer plate and spacer plate gaskets.
9. Remove 3-4 accumulator spring, piston and pin.
10. Remove accumulator assembly.
11. Reverse procedure to install, noting the following:
a. When installing 3-4 accumulator piston onto the pin, the piston legs must face the valve body.
b. When installing case and valve body gaskets. The case gasket will be marked with a C and the valve body gasket will be marked with a V.
c. Tighten spacer plate support bolts to specification.