
Firebird V8-305 5.0L VIN E (1992)
Headlamp Dimmer Switch: Service and Repair
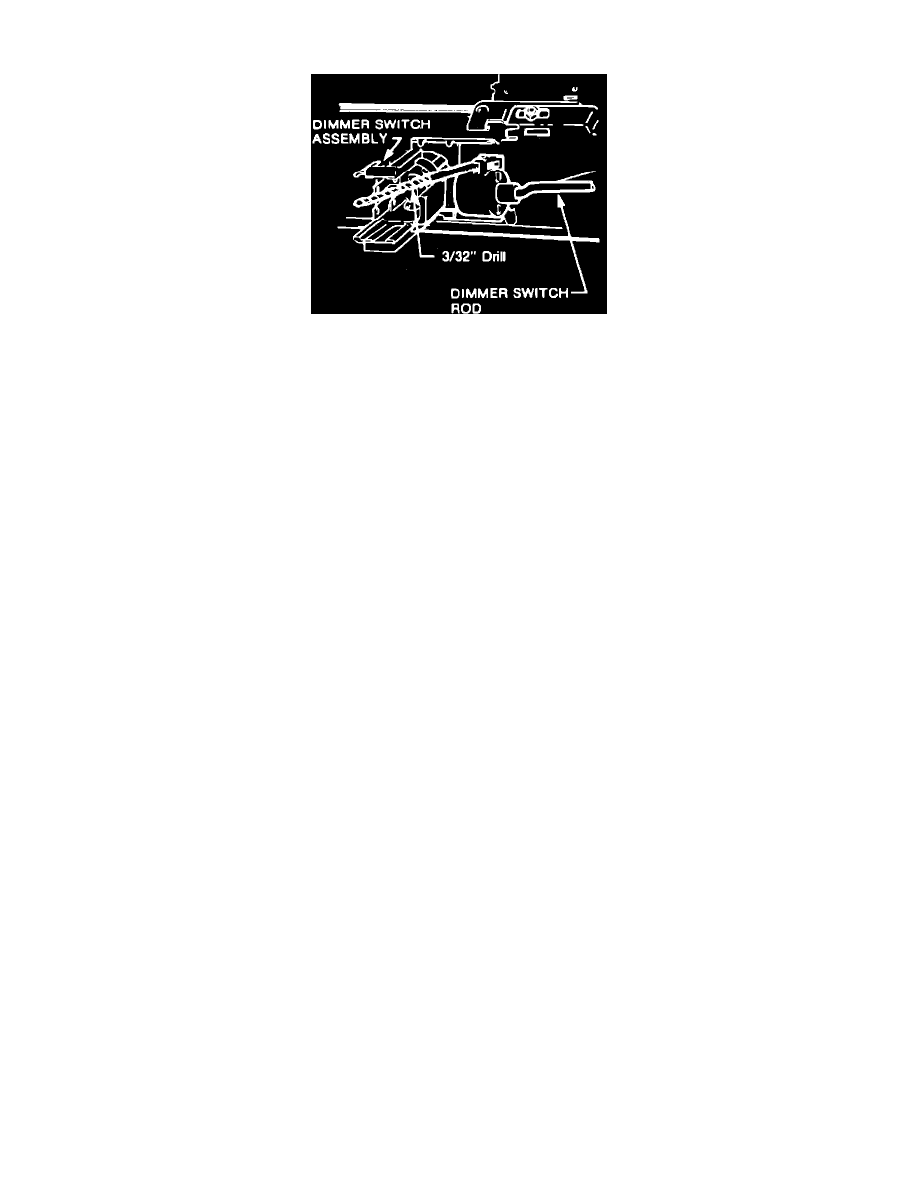
Fig. 18 Column Mounted Dimmer Switch Installation
1.
To avoid personal injury when servicing models equipped with Supplemental Inflatable Restraint (Airbag) System, temporarily disarm
system. Refer to Air Bags and Seat Belts/Air Bags (Supplemental Restraint Systems)/Service and Repair.
2.
Disconnect battery ground cable.
3.
Remove instrument panel lower trim and on models with A/C, remove A/C duct extension at column.
4.
On models less Supplemental Inflatable Restraint (Airbag) System, disconnect and lower steering column. It may be necessary, on some
models, to remove the upper column mounting bracket if it hinders servicing of switch. Use extreme care when lowering steering column
to prevent damage to column assembly. Only lower steering column a sufficient distance to perform switch service.
5.
On models with Supplemental Inflatable Restraint (Airbag) System, it is recommended that steering column be remove from vehicle when
replace switch.
6.
Remove dimmer switch retaining screw(s) and the switch. Tape actuator rod to column and separate switch from rod.
7.
Reverse procedure to install. To adjust switch, depress dimmer switch slightly and install a 3/32 inch twist drill to lock the switch to the body, Fig.
18. Force switch upward to remove lash. Torque retaining screws to 35 inch lbs. and remove tape from actuator rod. Remove twist drill and check
for proper operation.
8.
After completing service procedure activate Supplemental Inflatable Restraint (Airbag) System. Refer to MAINTENANCE
PROCEDURES/AIRBAG SYSTEM DISARMING.