Firebird V8-305 5.0L VIN E TBI (1989)

NOTE:
The SIR coil assembly is the last internal component to be installed in the steering column after service.
Begin this procedure with lower SIR coil wires routed through the column shift bowl exiting the I.P. bracket on the jacket assembly (wire protector
removed) with the coil head hanging freely from the top of the column (See Figure 2).
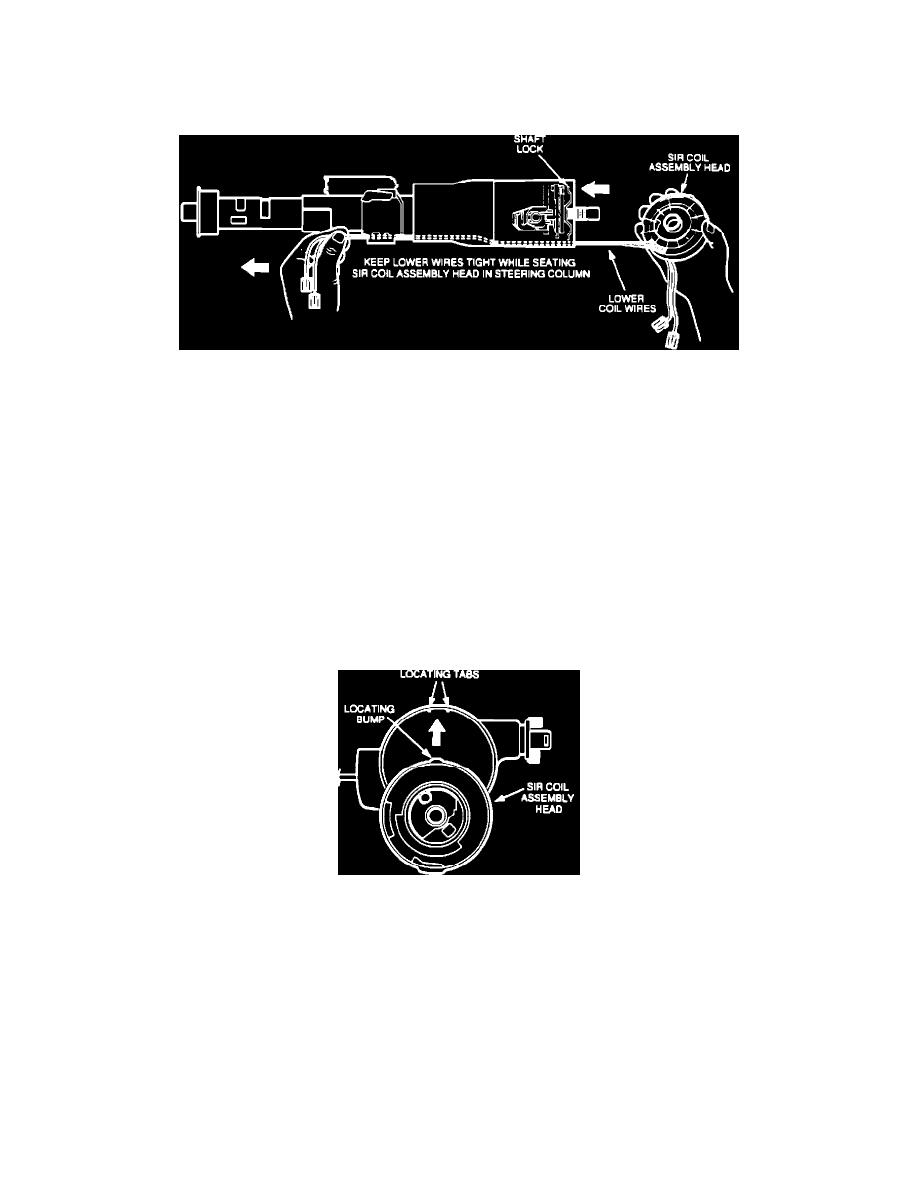
Figure 3 - SIR Coil Assembly Installation Procedure
Seat the SIR coil assembly as follows:
NOTE:
SIR coil assemblies may be equipped with one or two sets of upper and lower coil wires depending on model.
1.
Grasp the ends of all the lower SIR coi-1 wires below the I.P. bracket (See Figure 3).
2.
Grasp the SIR coil head with the other hand. Position the head assembly with the lower wires in the down position (See Figure 3).
3.
Stretch the SIR coil head and lower wires so that they are straight and tight with no slack.
4.
Pull on the lower wires to keep them straight while positioning the SIR coil head over the end of the upper steering shaft assembly.
5.
Continue to pull on the lower coil wires while moving the coil head down on the steering shaft.
6.
Align opening in SIR coil head with the horn tower.
Figure 4 - SIR Coil Assembly Head Seating Orientation
7.
Align the SIR coil "locating bump" between the two tabs in the steering column cover (See Figure 4).
8.
Continue to pull down on the lower coil wires, keeping them straight with no slack, while seating the SIR coil head in the steering column.
9.
Assemble the coil retaining ring.
10.
Hold all wires straight and tight while installing the wire protector into the I.P. bracket on the bottom of the jacket assembly.
11.
Refer to the vehicle service manual to complete reassembly and installation of the column. (See section 3F).
