
Firebird V8-350 5.7L VIN P SFI (1996)
Valve Clearance: Adjustments
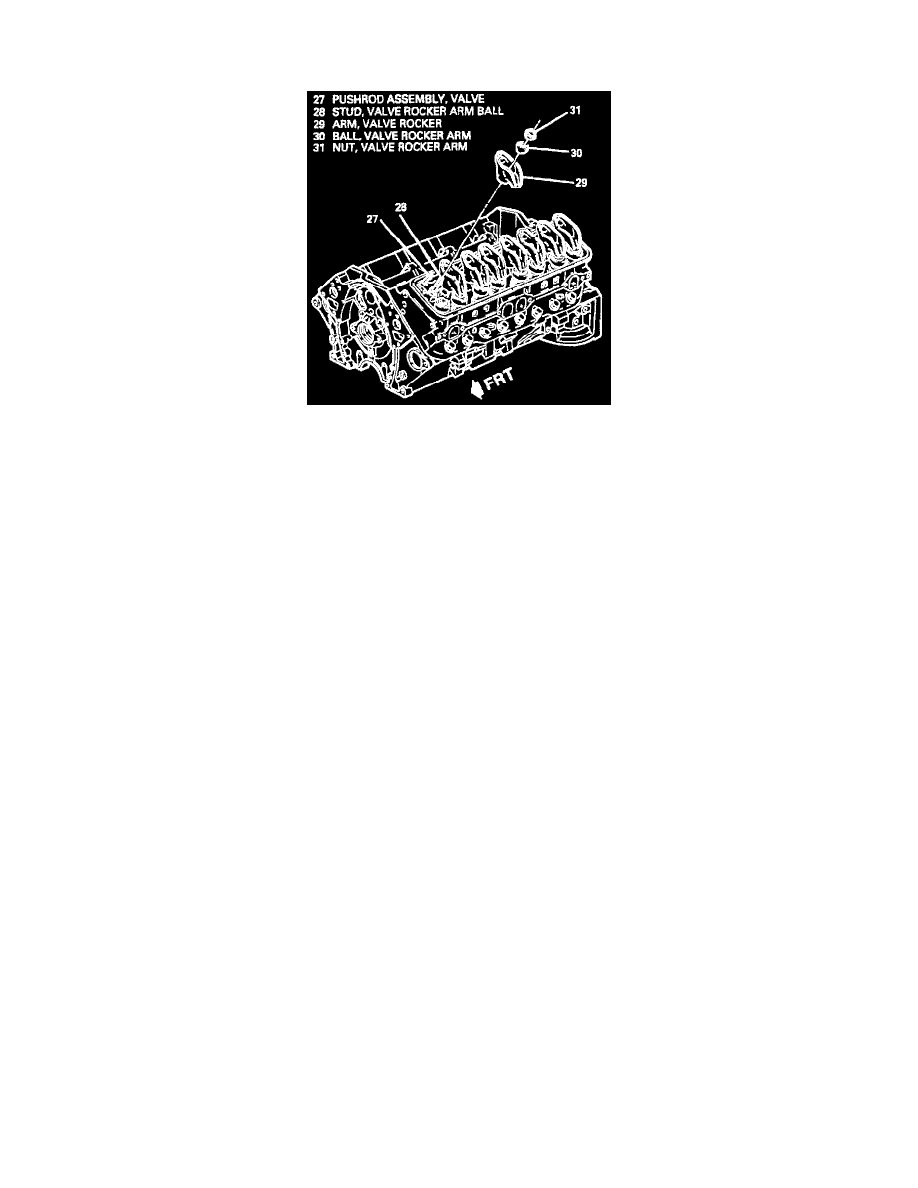
ROCKER ARMS AND PUSHROD ADJUSTMENT
Valve Rocker Arms And Pushrod Assemblies
ADJUST
1. Turn crankshaft assembly until cast arrow on crankshaft hub is in 12 o'clock position and number 1 cylinder is in firing position (top dead center).
^
Watch number 1 cylinder valves as crankshaft hub arrow approaches 12 o'clock position. If a valve moves as the arrow moves to position, the
engine is in number 6 cylinder firing position. Crankshaft assembly must then be turned one more time to reach number 1 cylinder firing
position.
2. With engine in number 1 cylinder firing position, the following valves can be adjusted:
^
Exhaust: 1, 3, 4, 8.
^
Intake: 1, 2, 5, 7.
3. Back off rocker arm nut (31) until lash is felt in pushrod assembly (27). Then tighten rocker arm nut (31) until all lash is removed. Zero lash can
be felt by moving pushrod assembly (27) up and down using thumb and forefinger until there is no more movement.
4. When all free play has been removed, tighten rocker arm nut (31) one additional turn.
5. Turn crankshaft assembly one revolution until hub arrow is again at 12 o'clock position. This is number 6 cylinder firing position. The following
valves can now be adjusted:
^
Exhaust: 2, 5, 6, 7.
^
Intake: 3, 4, 6, 8.