
Firebird V8-350 5.7L VIN P SFI (1996)
Brake Light Switch: Service and Repair
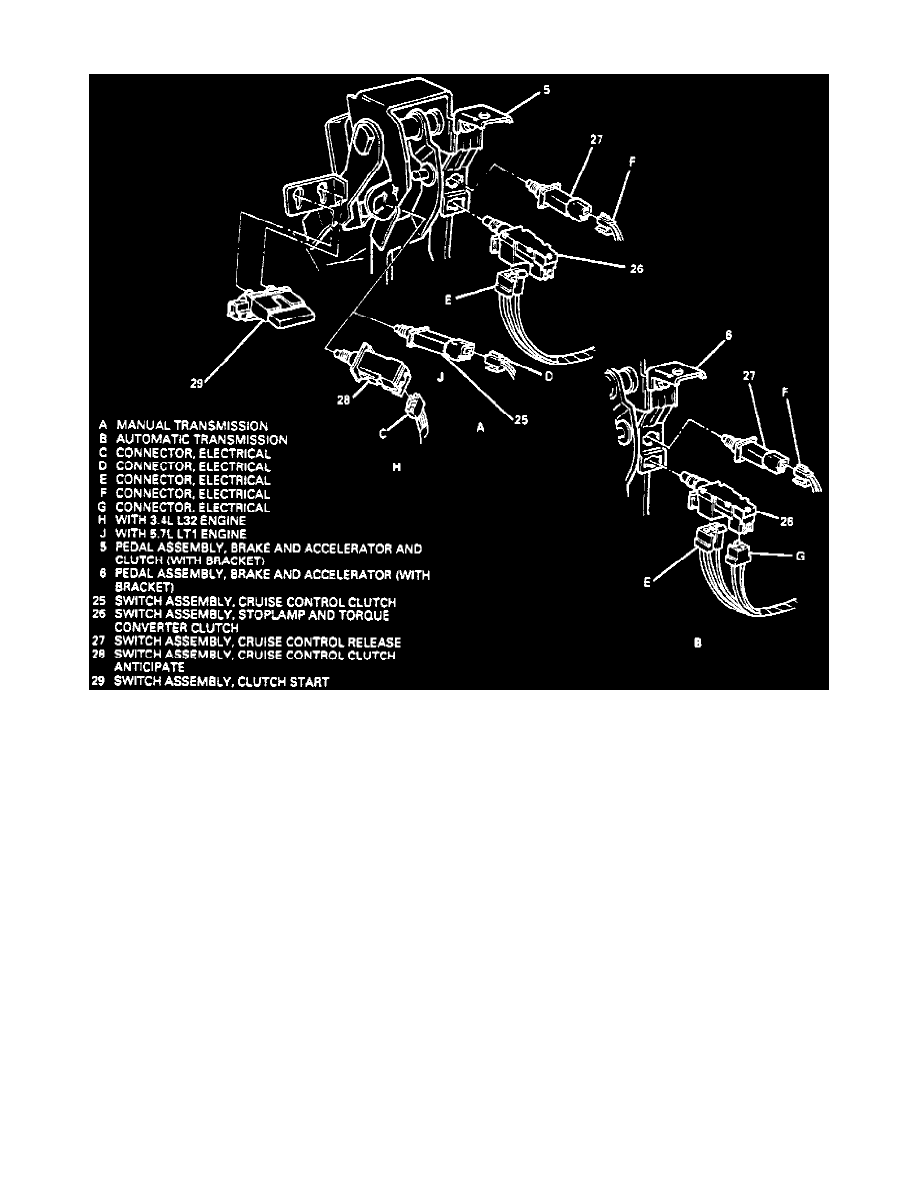
Fig. 11 Stop Lamp Switch Replacement
1. Remove lefthand instrument panel sound insulator assembly, then disconnect electrical connectors, Fig. 11.
2. Remove release switch assembly, stop lamp and TCC switch assembly and clutch switch assembly, or clutch anticipate switch assembly, if
equipped, from pedal assembly with bracket.
3. Install release switch assembly, stop lamp and TCC switch assembly and clutch switch assembly, or clutch anticipate switch assembly, if equipped,
to pedal assembly with bracket.
4. Connect electrical connectors, then adjust switches as follows:
a. Depress brake pedal assembly or clutch pedal assembly and insert release switch assembly, stop lamp and TCC switch assembly and clutch
switch assembly, or clutch anticipate switch assembly into pedal assembly with bracket until retainer is fully seated.
b. Slowly pull brake or clutch pedal assembly rearward with a force of 50 lbs. until click sounds can no longer be heard.
c. Measure release switch assembly and stoplamp and TCC switch assembly contacts, should be open 1 inch or less of pedal assembly travel, and
should occur at the same time or before onset of braking.
5. Install lefthand instrument panel sound insulator assembly.