
Firebird V8-5.7L VIN G (2001)
1. Inspect the caliper slide boots for cuts, team or deterioration. If damaged, replace the slides and the boots. Refer to Disc Brake Hardware
Replacement- Front.
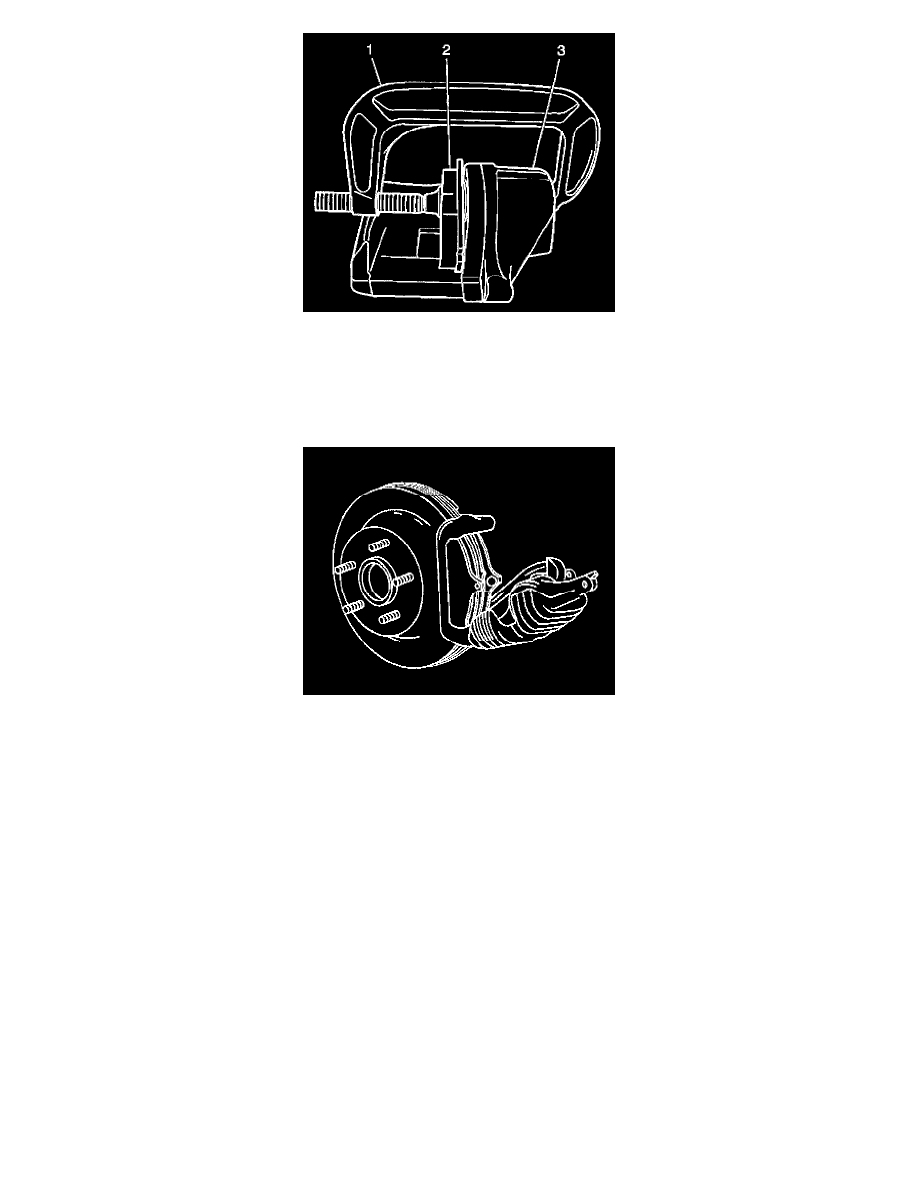
2. Install large C-clamp (1) over the body of the brake caliper (3) with the C-clamp ends against the rear of the caliper body and against an old
inboard brake pad (2) or a wood block installed against the caliper pistons.
3. Tighten the C-clamp (1) evenly until the caliper pistons are compressed completely into the caliper bores.
4. Remove the C-clamp and the old brake pad or wood block from the caliper.
5. Install the brake pad retainers to the caliper bracket.
6. Install the brake pads to the caliper bracket. The brake pad wear sensor, mounted on the inboard brake pad, must be positioned so that it is in the
trailing position during forward rotation of the brake rotor.
7. Pivot the brake caliper upward, over the brake pads and into the caliper bracket.
Notice: Refer to Fastener Notice in Service Precautions.
8. Install the upper brake caliper guide pin bolt.
-
Tighten the brake caliper guide pin bolt to 31 Nm (23 ft. lbs.).
9. Install the tire and wheel assembly.
10. Lower the vehicle.
11. With the engine OFF, gradually apply the brake pedal to approximately 2/3 of its travel distance.
12. Slowly release the brake pedal.
13. Wait 15 seconds, then repeat steps 11-12 until a firm brake pedal apply is obtained; this will properly seat the brake caliper pistons and brake pads.
14. Fill the brake master cylinder reservoir to the proper level. Refer to Master Cylinder Reservoir Filling.
15. Burnish the pads and rotors. Refer to Burnishing Pads and Rotors.