
Firebird V8-5.7L VIN G (2001)
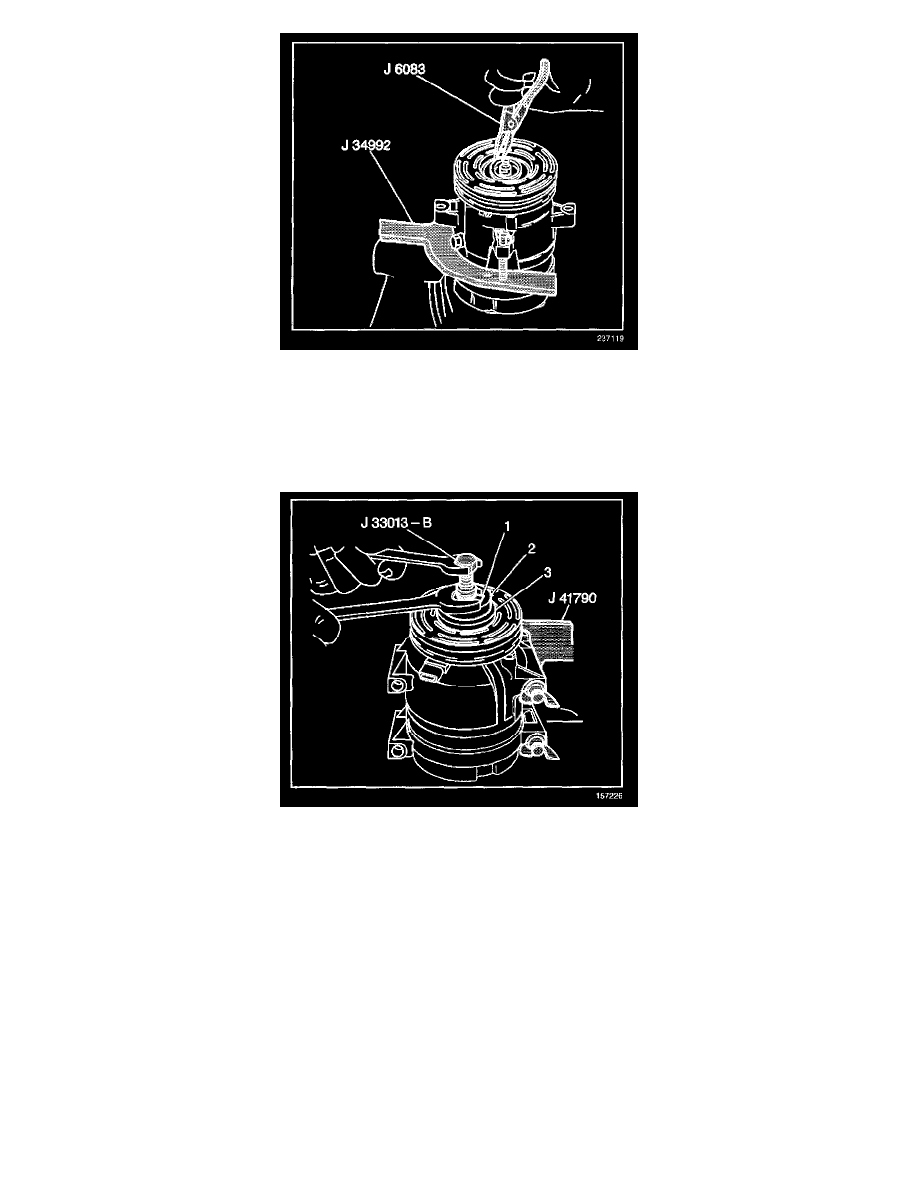
17. Install the rotor and bearing assembly retainer ring using the J 6083.
18. Install the clutch plate and hub assembly.
V7 - Direct Mount
TOOLS REQUIRED
^
J 33013-B Hub and Drive Plate Remover/Installer
^
J 33017 Pulley and Bearing Assembly Installer
1. Position the clutch rotor and bearing assembly (2) onto the A/C compressor.
2. Position the J 33017 and bearing (1) from the J 33013-B directly over the inner race of the bearing.
3. Place the washer (3) from the J 42126 tool kit onto the body of the J 33013-B.
4. Remove the center screw from the body of the J 33013-B.
5. Install the center screw into the opposite end of the J 33013-B.
6. Back the body of the J 33013-B off enough to allow the center screw to be threaded onto the end of the A/C compressor shaft.
7. Thread the center screw several turns onto the end of the A/C compressor shaft.
Do not tighten the center screw on the A/C compressor shaft.
8. Hold the center screw with a wrench.
9. Tighten the hex portion of the J 33013-B body several turns.