
Firebird V8-5.7L VIN G (2001)
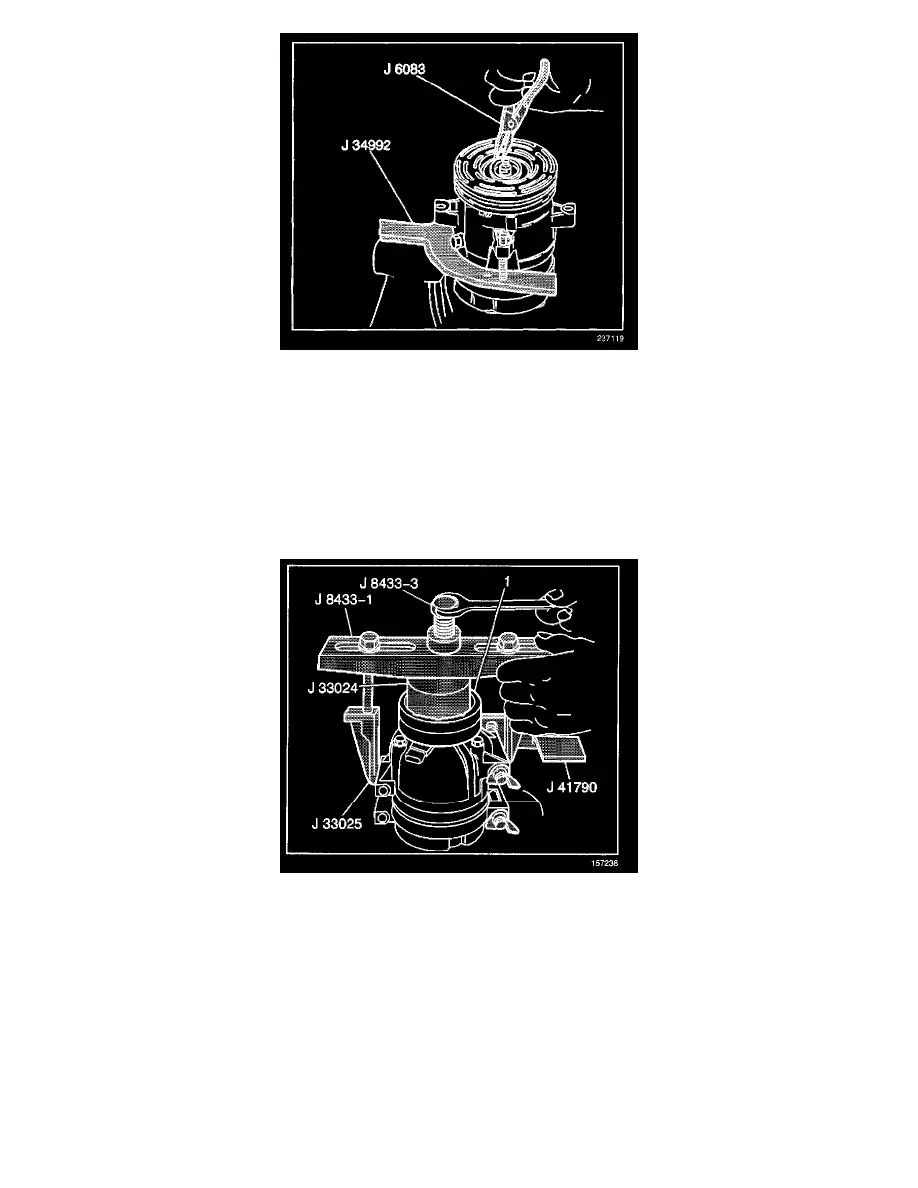
18. Install the rotor and bearing assembly retainer ring using the J 6083.
19. Install the clutch plate and hub assembly.
20. Install the shaft nut.
V7 - Direct Mount
TOOLS REQUIRED
^
J 8433 A/C compressor Pulley Puller
^
J 8433-3 Forcing Screw
^
J 33024 Clutch Coil Installer Adaptor
^
J 33025 Clutch Coil Puller Legs
^
J 41790 A/C compressor Holding Fixture J 42136 A/C Lip Seal Remover
1. Place the clutch coil assembly (1) on the front head with the clutch coil terminal positioned at the mark made during disassembly.
2. Place the J 33024 over the internal opening of the clutch coil housing and align installer with the A/C compressor front head.
3. Install the J 8433-3 into the J 8433 and center the screw in the countersunk center hole of the J 33024.
4. Install the 4 inch through bolts and washers from the J 42136 tool kit into the J 33025 and attach them to the A/C compressor mounting bosses.
5. Turn the center forcing screw of the J 8433 to press the clutch coil onto the front head until the clutch coil is fully seated.
Make sure the clutch coil and the J 33024 stay in-line with each other while pressing the clutch coil onto the A/C compressor.
6. Install the A/C compressor clutch rotor and bearing assembly.
7. Install the A/C compressor clutch plate and hub assembly.
8. Remove the A/C compressor from the J 41790.
9. Install the A/C compressor into the vehicle.