Firebird V8-5.7L VIN G (2001)

Important: Ensure that J 34013-115 is straight with the shock absorber.
5. Place J 34013-115 down through the top of J 34013-B to the top of the shock absorber.
Caution: Do not over compress the spring. Severe overloading may cause tool failure which could result in bodily injury.
6. Turn the operating screw clockwise in order to compress the coil spring until the threaded portion of the shock absorber rod is through the top of
the shock absorber mount.
7. Remove J 34013-115.
Important: Always use a new shock absorber nut. Never reinstall the original nut.
8. Insert the new shock absorber nut on the shock absorber.
9. Place J 39642-1 on the shock absorber nut.
Notice: Turning the shock absorber while tightening the nut may damage the shock absorber. In order to prevent damage, keep the shock absorber in
a stationary position while tightening the nut.
10. Insert J 39642-2 through J 39642-1 and tighten the shock absorber nut.
11. Tighten the shock absorber nut while holding onto J 39642-2.
12. Remove the shock absorber and coil spring from J 34013-B.
Installation Procedure
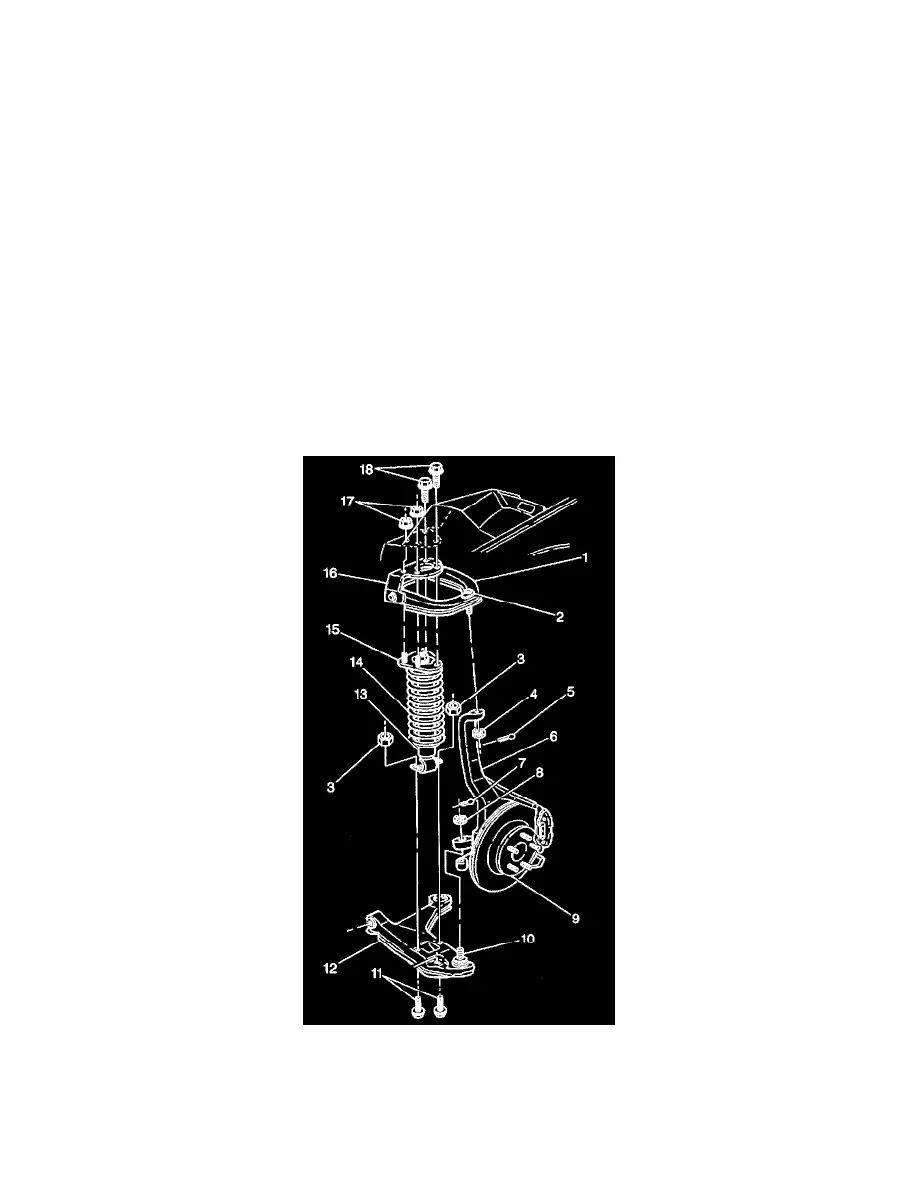
1. Align and install the shock absorber (13) and coil spring (14) to the lower control arm (12).
Notice: Refer to Fastener Notice in Service Precautions.
2. Install the shock absorber lower bolts (11) and nuts (3).
-
Tighten the shock absorber lower nuts (3) to 65 Nm (48 ft. lbs.).
