
G6 L4-2.4L (2007)
5. Disengage the fuel feed line from the retaining features built into the fuel tank.
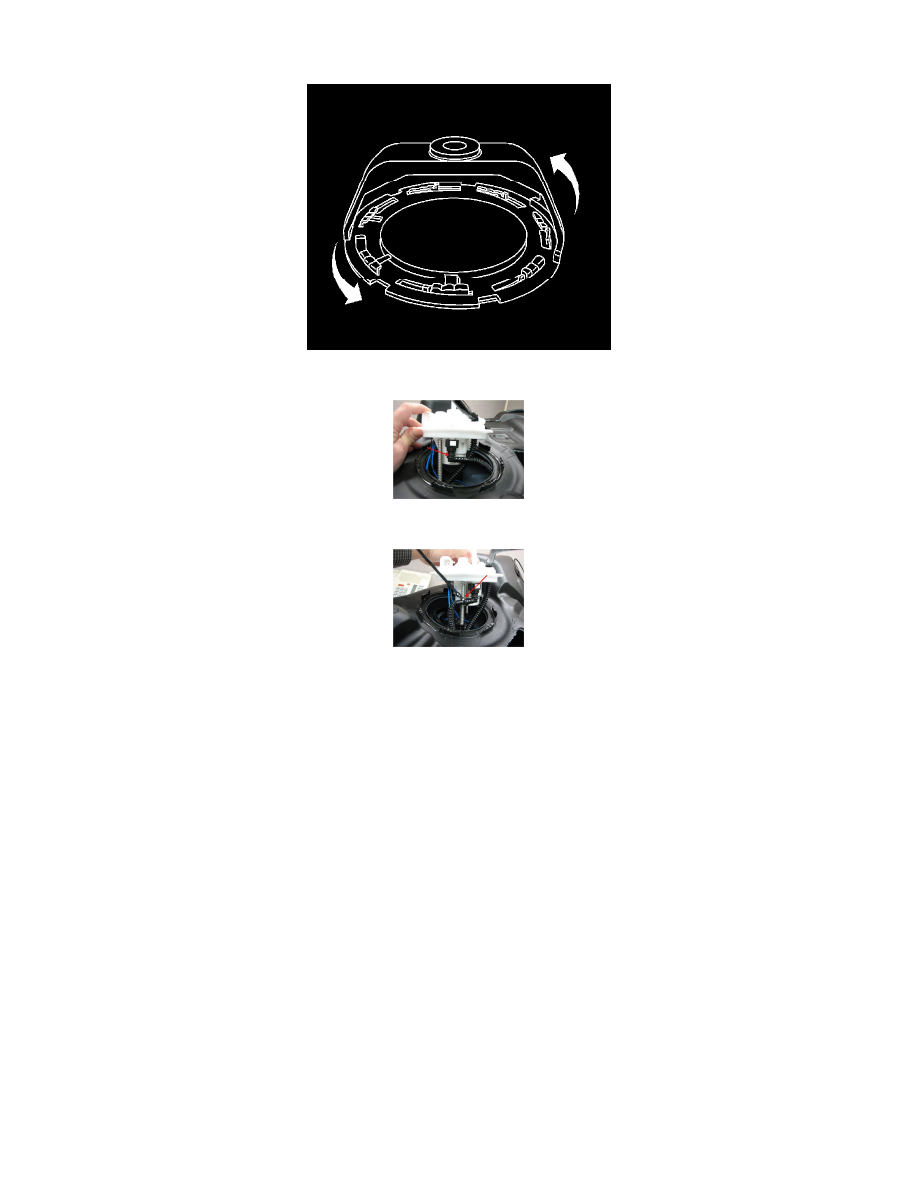
6. Using the J 45722 tool and a long breaker-bar, unlock the fuel sender lock ring.
7. Remove the sender unit and check for possible interference between the internal vent tube and the sender float arm.
8. Take the sender vent line and turn it around to the side of the fuel tank sender. Make sure to rotate the vapor line to the spring guide bar.
Important
Cut off ANY excess tie strap. Make sure material doesn't fall into the fuel tank.
9. Add tie strap, GM P/N 12337820 (note that this is a fuel compatible material), to prevent the vapor line from rotating forward and allowing the
pipe to interfere with the fuel level float.
10. Install an O-ring seal, GM P/N 22682111, onto the fuel sender.
11. Install the fuel sender assembly into the fuel tank.
12. Using the J 45722, install the fuel sender lock ring. Turn the fuel sender lock ring in a clockwise direction.
13. Turn the lock ring until the ring seats on the second detent.
14. Engage the fuel feed line to the retaining features built into the fuel tank.
15. Connect the EVAP vapor line quick connect fittings. Refer to Plastic Collar Quick Connect Fitting Service in SI.
16. Connect the fuel pressure sensor and sender electrical connections.
17. Install the fuel tank. Refer to Fuel Tank Replacement in SI.