
G6 L4-2.4L VIN B (2006)
9. Inspect the bore of the tensioner body for dirt, debris, and damage. If any damage appears, replace the tensioner. Clean dirt or debris with a lint
free cloth.
10. Install the compressed piston assembly back into the timing chain tensioner body until the assembly stops at the bottom of the bore. do not
compress the piston assembly against the bottom of the bore. If the piston assembly is compressed against the bottom of the bore, the assembly
will activate the tensioner, which will then need to be reset again.
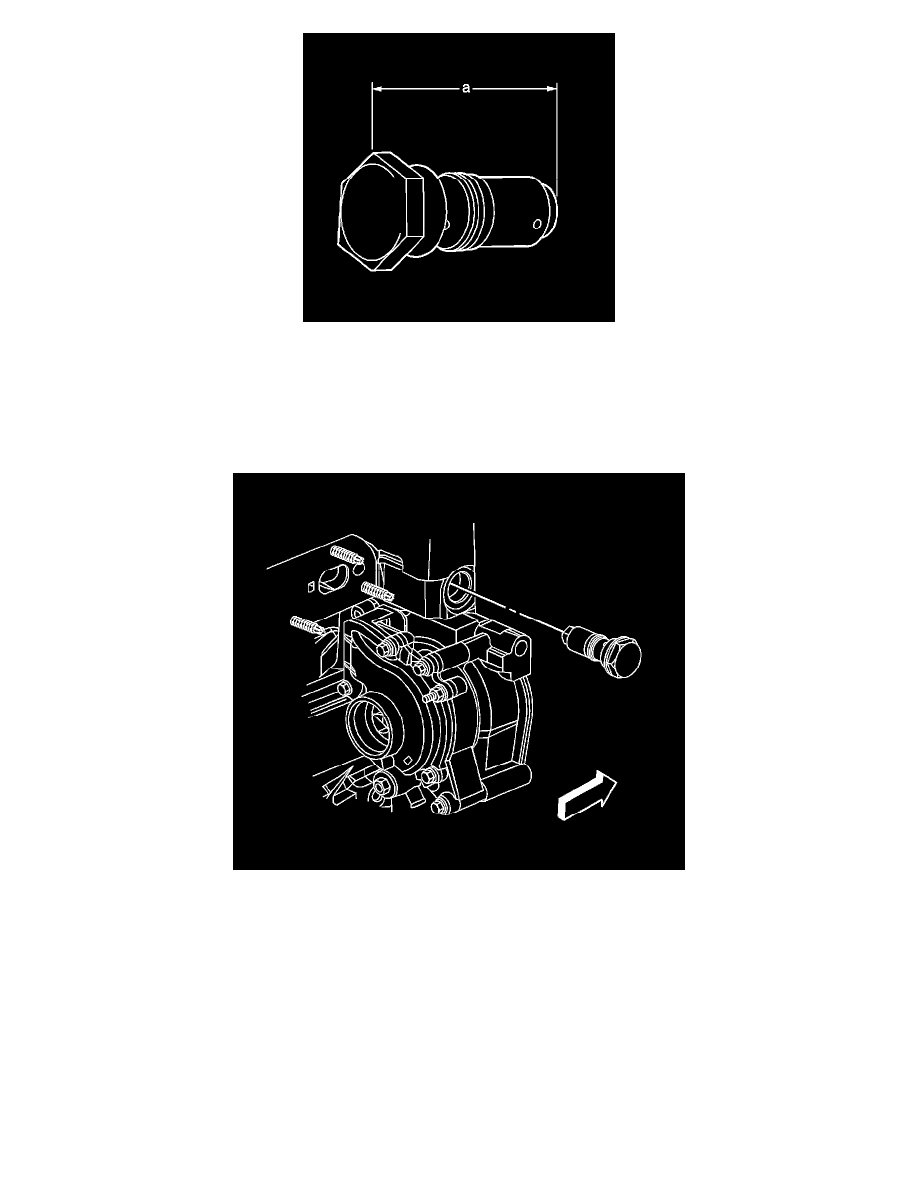
11. At the point the tension should measure approximately 72 mm (2.83 mm) from end to end (a). If the tensioner does not measure 72 mm (2.83 mm)
from end to end (a) repeat steps 8.1 through 8.4.
12. Ensure that all dirt and debris is removed from the timing chain tensioner threaded hole in the cylinder head.
13. Install the timing chain tensioner
Tighten the tensioner to 75 Nm (66 ft. lbs.).
14. The timing chain tensioner is released by compressing the tensioner 2 mm (0.079 inch) which will release the locking mechanism in the ratchet.
To release the timing chain tensioner, use a suitable tool with a rubber tip on the end. Feed the tool down through the cam chest to rest on the cam
chain, then give a sharp jolt diagonally downwards to release the tensioner.