
G6 L4-2.4L VIN B (2006)
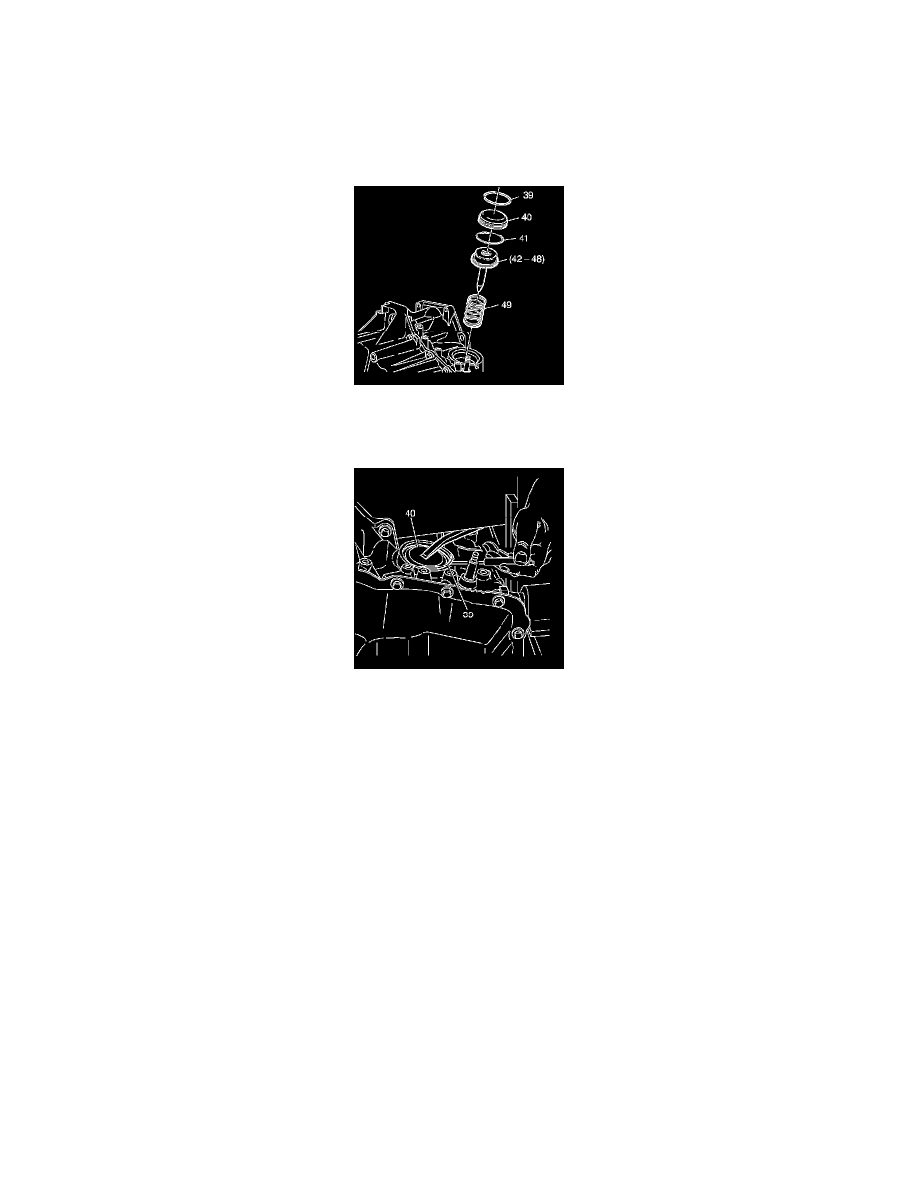
10. Remove the servo spring (49).
Installation Procedure
1. Important: Follow this procedure exactly or the transaxle will have no reverse gear due to the servo pin missing the band.
Jack up the driver side (channel plate side) of the car until it is higher than the differential side. This ensures that the reverse band is in the proper
location and not cocked to the channel plate side of the case.
2. Install the servo spring (49).
3. Install the servo assembly (42-48).
4. Install the reverse servo cover (40) with new O-ring seal (41).
5. Depress the reverse servo cover.
6. Install the snap ring (39).
7. Install the battery.
8. Install the air cleaner outlet duct.
Forward Servo Replacement
Forward Servo Replacement
Removal Procedure
1. Install the engine support fixture.
2. Raise and support the vehicle. Refer to Vehicle Lifting.
3. Remove and support the power steering gear.
4. Remove the left transaxle mount lower nuts.
5. Remove the rear transaxle mount bracket lower nuts.
6. Remove the engine mount lower nuts.
7. Remove the power steering lines from the right side of the frame.
8. Support the rear of the frame with a jackstand.
9. Loosen the front frame bolts and remove the rear frame bolts.
10. Adjust the jackstand to lower the rear of the frame.
11. Position a drain pan under the forward servo cover.