
G6 V6-3.5L (2009)
7. Install the pins (1) and clips (2) retaining the folding top stowage compartment closeout panel link drive rod to the right and left folding top side
rail link arms.
8. Install the rear end trim finish upper panel. Refer to Rear End Trim Finish Upper Panel Replacement (See: Interior Moulding / Trim/Trim
Panel/Service and Repair).
9. Install the right and left lock pillar upper garnish moldings. Refer to Lock Pillar Upper Garnish Molding Replacement (Convertible) (See:
Interior Moulding / Trim/Trim Panel/Service and Repair).
10. Remove the folding top retaining straps and manually move the folding top to the closed position with the front roof panel resting against the
windshield header.
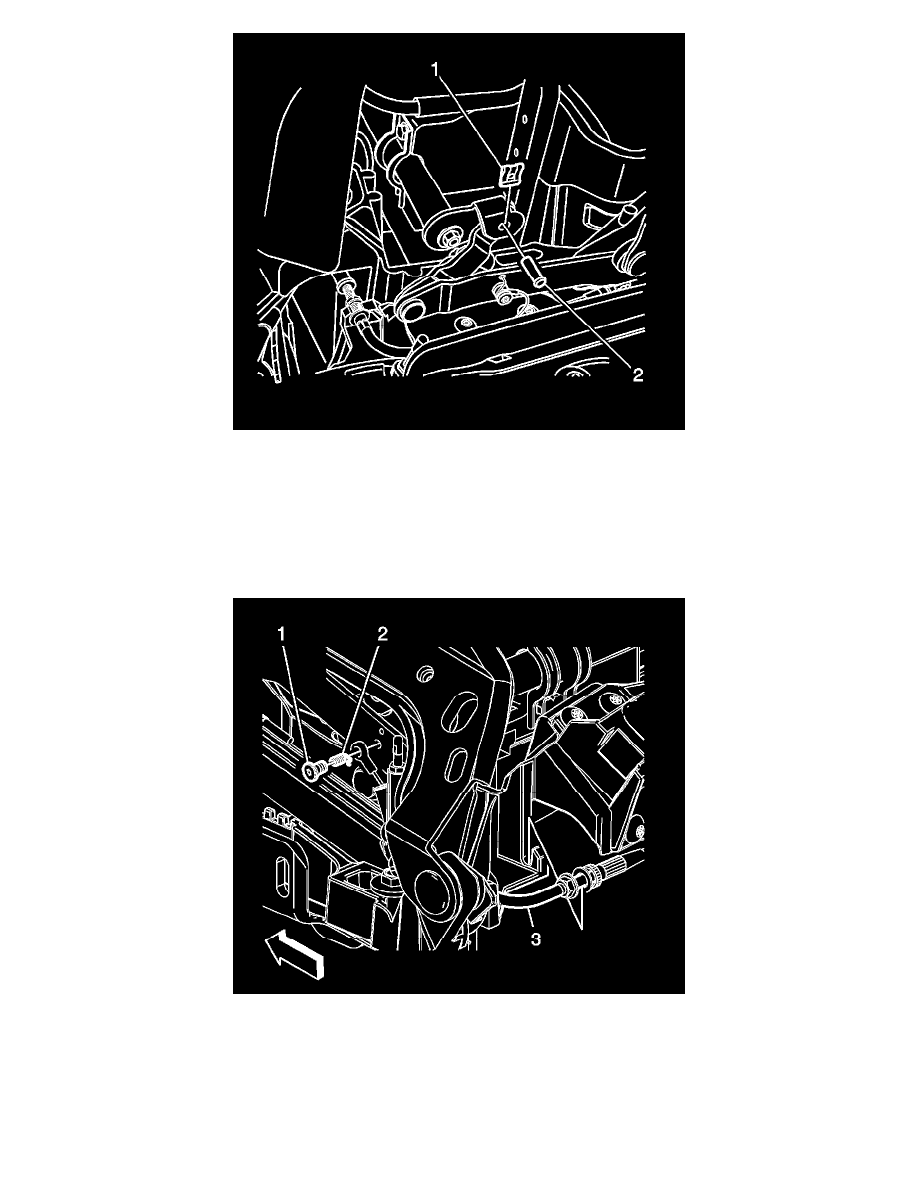
11. From the rear compartment, install the screws (1) and springs (2) which retain the roof retractable stowage compartment closeout panel actuator
cable and eyelets to the folding top side rail links.
Tighten the bolts to 5 Nm (44 lb in).
12. Adjust front and front outer folding top storage compartment closeout panels as necessary. Refer to Folding Top Storage Compartment Closeout
Panel Adjustment - Front (See: Adjustments/Folding Top Storage Compartment Closeout Panel Adjustment - Front) and Folding Top Stowage
Compartment Front Outer Closeout Panel Adjustment (See: Adjustments/Folding Top Stowage Compartment Front Outer Closeout Panel