
G6 V6-3.9L VIN 1 (2006)
^
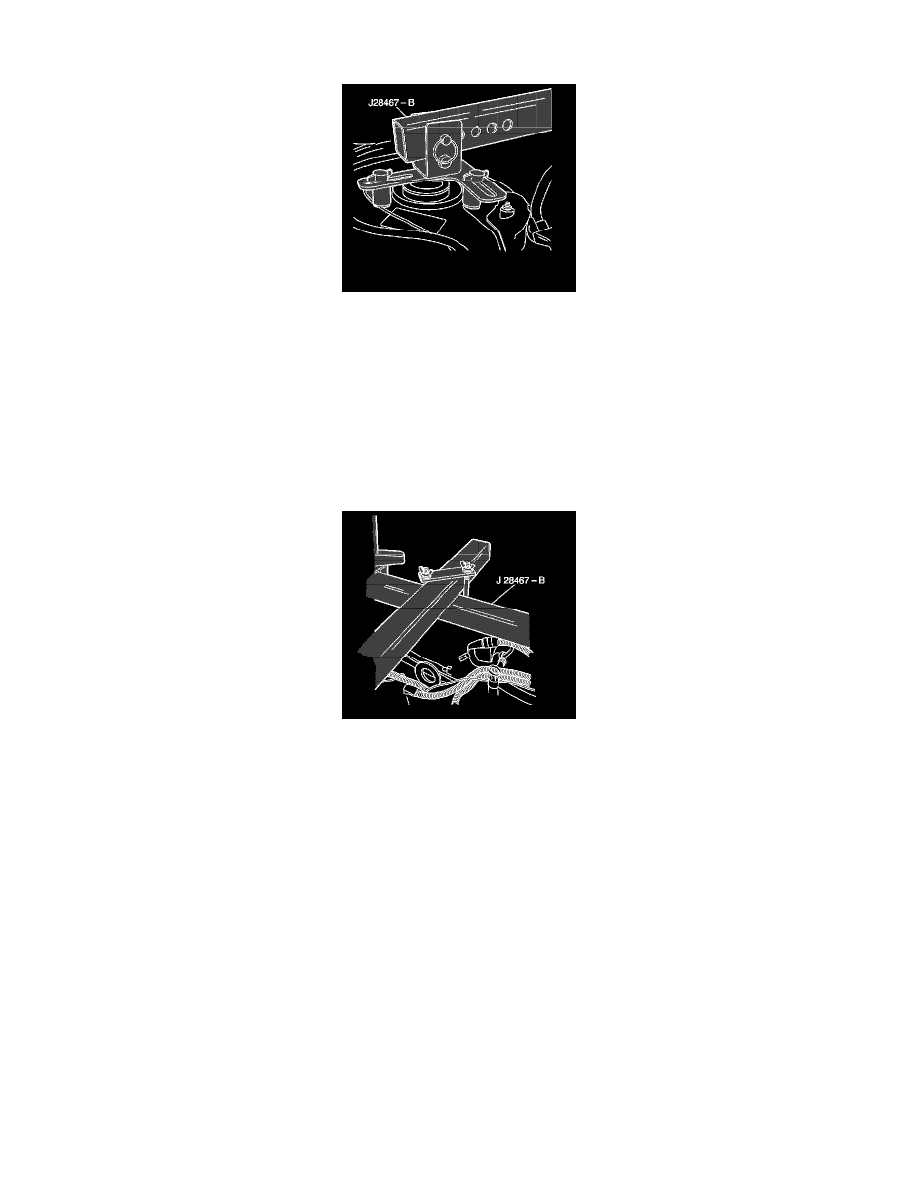
J28467-B Engine Support Fixture
^
J36462 Engine Support Adapter Leg
1. Raise the hood.
2. Install the intake manifold cover.
3. Disconnect the negative battery cable.
4. Install the thread support nuts J28467-33A onto the strut attaching studs.
5. Install the strut tower support assemblies J28467-5A over the thread support nuts J28467-33A.
6. Install the T-bolts J28467-5 with 5/16 inch washers through the strut tower support assemblies J28467-5A into the thread support nuts
J28467-33A. Hand tighten the bolts.
7. Install the 2 cross bracket assemblies J28467-1A over the strut tower tube J28467-3.
8. Install the strut tower tube J28467-3 into the strut tower support assemblies J28467-5A.
9. Install the 1/2 inch x 2.5 inch quick release pin J28467-10 through the strut tower support assemblies J28467-5A and the strut tower tube J28467-3
on one side only.
10. Install the radiator shelf tube J28467-2A through the driver side cross bracket assembly J28467-1A on the top of the strut tower tube J28467-3.
11. Place the rubber padded foot of the front support assembly J28467-4A on the vehicle radiator shelf. The foot position used in the front support
assembly J28467-4A depends on the vehicle application.
12. Install the 7/16 inch x 2.0 inch quick release pin J28467-9 through the hole in the front support assembly J28467-4A in order to level the radiator
shelf tube J28467-2A. The hole used in the front support assembly J28467-4A depends on the vehicle application.
13. Install the lift hook J28467-7A through the lift hook bracket J28467-6A.
14. Install the 1/2 inch lift hook washer and lift hook wing nut J28467-34 onto the lift hook J28467-7A.
15. Install the assembled lift hook bracket J28467-6A over the radiator shelf tube J28467-2A.
16. Adjust the radiator shelf tube J28467-2A and the assemblage lift hook bracket J28467-6A in order to align the hook with the left (front), rear of
engine, lift hook bracket part of the left engine mount strut bracket.
17. Hand tighten the driver side cross bracket assembly J28467-1A wing nuts.
18. Install the second radiator shelf tube J28467-2A through the passenger side cross bracket assembly (J28467-1A) on the top of the strut tower tube
J28467-3.
19. Place the rubber padded foot of the front support assembly J28467-4A on the vehicle radiator shelf. The foot position used in the front support
assembly J28467-4A depends on the vehicle application.
20. Install the 7/16 inch x 2.0 inch quick release pin J28467-9 through the hole in the front support assembly J28467-4A in order to level the radiator
shelf tube J28467-2A. The hole used in the front support assembly J28467-4A depends on the vehicle application.
21. Install the lift hook J28467-7A through the lift hook bracket J28467-6A.
22. Install the 1/2 inch lift hook washer and lift hook wing nut J28467-34 onto the lift hook J28467-7A.
23. Install the assemblage lift hook bracket J28467-6A over the radiator shelf tube J28467-2A.
24. Adjust the radiator shelf tube J28467-2A and the assemblage lift hook bracket J28467-6A in order to align the hook with the right rear, front of
engine, lift hook bracket located next to the generator.
25. Hand tighten the passenger side cross bracket assembly J28467-1A wing nuts.
26. Hand tighten the lift hook wing nuts J28467-34 securely in order to remove all slack from the engine support fixture assembly.