G6 V6-3.9L VIN 1 (2006)

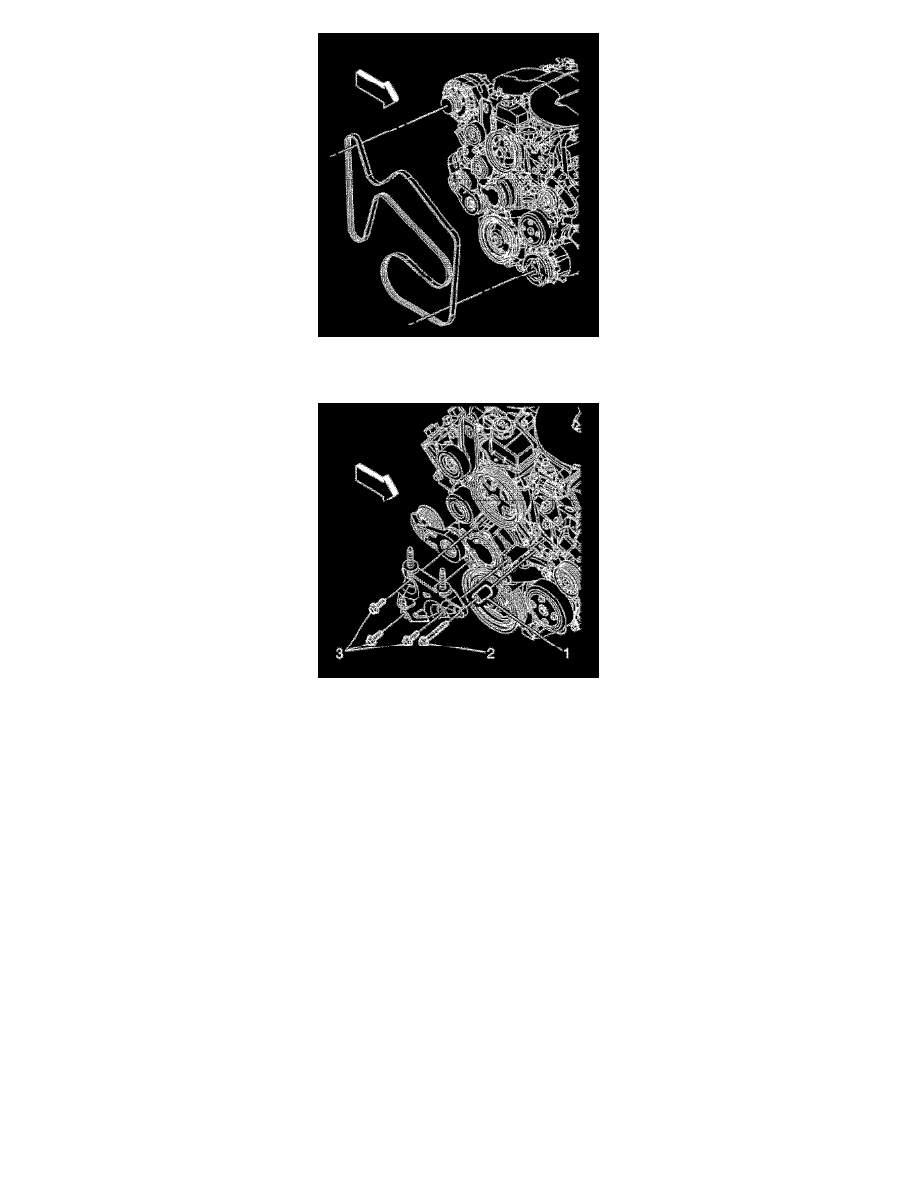
1. Rotate the drive belt tensioner counterclockwise in order to release the tensioner spring tension.
2. Install the drive belt.
Important: The spacer has a nominal length of 36.0 mm (1.42 in). If the spacer cannot be reinstalled, the spacer will require the ends to be buffed
slightly using a crocus cloth or emery paper in order to bring the length to a minimum of 35.80 mm (1.41 in).
3. Install the engine mount bracket spacer (1).
Notice: Use the correct fastener in the correct location. Replacement fasteners must be the correct part number for that application. Fasteners
requiring replacement or fasteners requiring the use of thread locking compound or sealant are identified in the service procedure. Do not use
paints, lubricants, or corrosion inhibitors on fasteners or fastener joint surfaces unless specified. These coatings affect fastener torque and joint
clamping force and may damage the fastener. Use the correct tightening sequence and specifications when installing fasteners in order to avoid
damage to parts and systems.
4. Install the engine mount bracket bolt (2).
Tighten
Tighten the bolt to 50 Nm (37 lb ft).
5. Install the intake manifold cover. Refer to Intake Manifold Cover Replacement See: Engine, Cooling and Exhaust/Engine/Intake Manifold/Service
and Repair.
6. Install the air cleaner assembly. Refer to Air Cleaner Assembly Replacement See: Filters/Air Cleaner Housing/Service and Repair.
