
G6 V6-3.9L VIN 1 (2006)
Tools Required
^
J23129Universal Seal Remover
^
J6125-1BSlide Hammer Adapter
^
J6125-BSlide Hammer
^
J34115 Left Side Axle Seal Installer
Removal Procedure
1. Raise and suitably support the vehicle. Refer to Vehicle Lifting.
2. Remove the left front tire and wheel.
3. Remove the left stabilizer shaft link from the left lower control arm.
4. Remove the left tie rod end from the left steering knuckle.
5. Remove the left lower ball joint from the left steering knuckle.
6. Disconnect the left drive axle from the transaxle.
7. Secure the left drive axle to the left steering knuckle and strut.
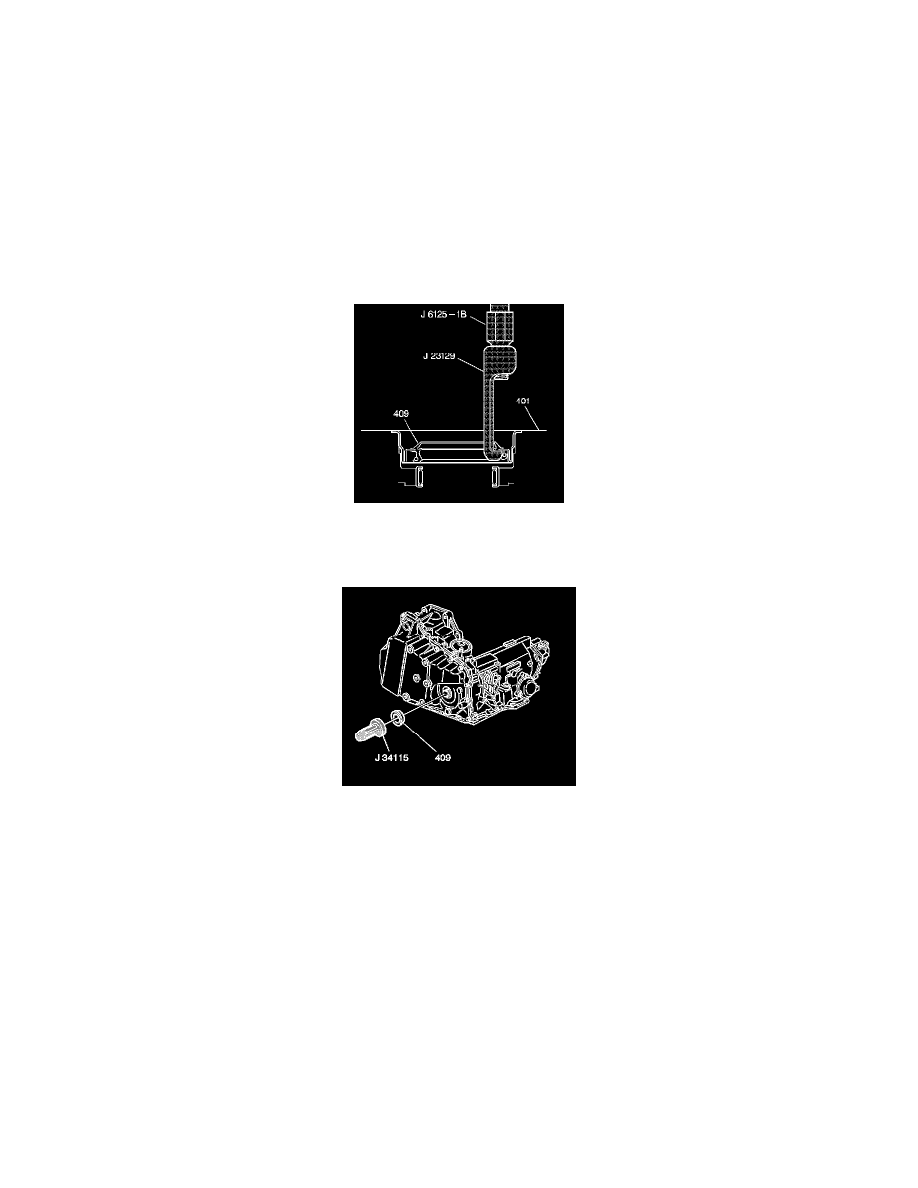
8. Use the J6125-B, J6125-1B, and the J23129 to remove the seal (409).
Installation Procedure
1. Use a light wipe of transaxle fluid to lubricate the seal lip (409).
2. Use the J34115 to install a new seal.
3. Important: Carefully guide the axle shaft past the lip seal. Do NOT allow the shaft splines to contact any portion of the seal lip surface.
Connect the drive axle to the transaxle.
4. Install the left lower ball joint to the left steering knuckle.
5. Install the left tie rod end to the left steering knuckle.
6. Install the left stabilizer shaft link to the left lower control arm.
7. Install the left front tire and wheel.
8. Lower the vehicle.
9. Fill the transaxle to the proper level. Refer to Fluid Capacity Specifications.
10. Inspect the transaxle fluid level. Refer to Transmission Fluid Checking Procedure.
11. Inspect for fluid leaks.
Front Wheel Drive Shaft Oil Seal Replacement - Right
Front Wheel Drive Shaft Oil Seal Replacement - Right
Tools Required
^
J6125-B Slide Hammer