
G8 V6-3.6L (2008)
Important: The front engine cover is removed in the following graphics for illustration purposes and is not required to perform the
procedure.
10. Loosen the EN-48313 so that the legs are retracted.
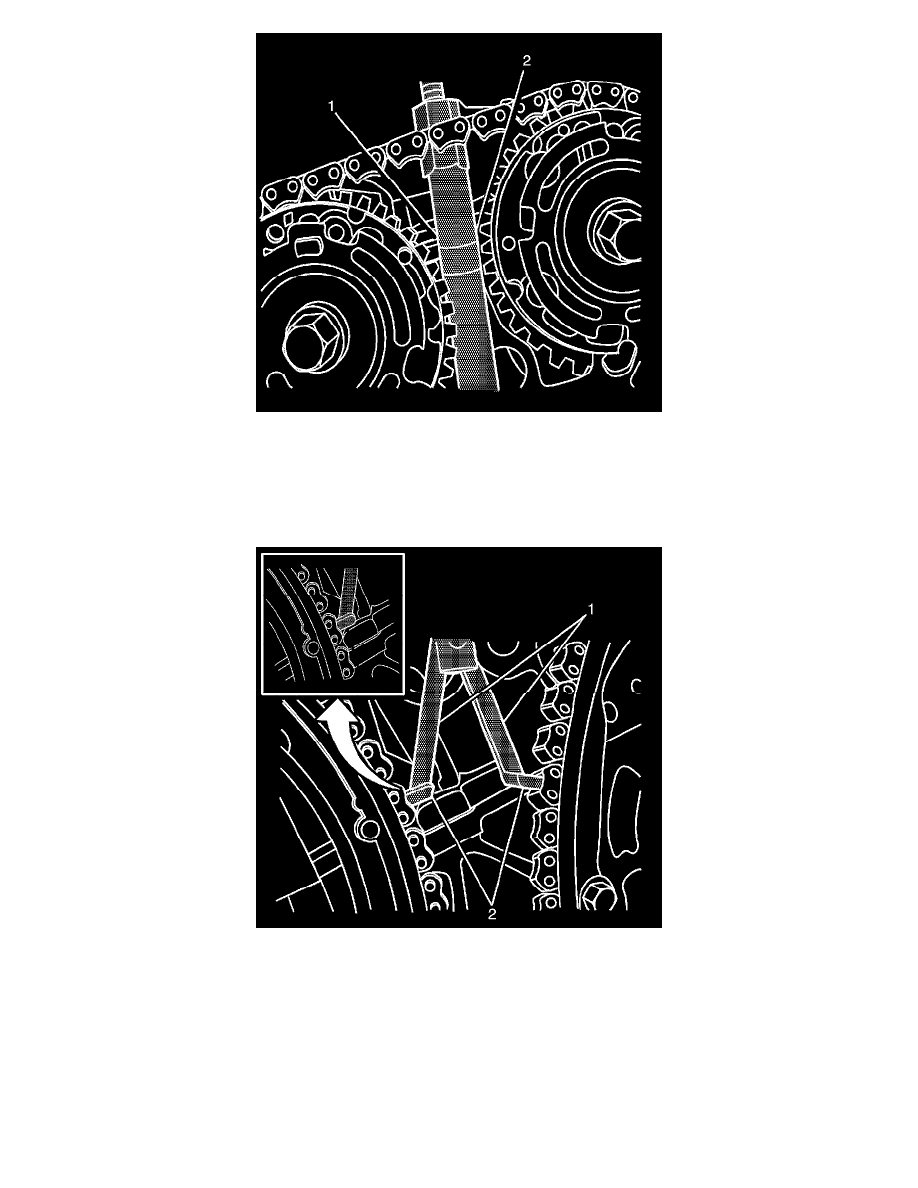
11. Insert the EN-48313 between the camshaft actuators, rearward of the timing chain until the top line that is scribed in the body of the tool (1) is
adjacent to the top surface of the cylinder head (2). This is the approximate installed position.
12. Make sure that the feet (2) on the legs (1) of the EN-48313 are facing the front of the engine.
Important: DO NOT tighten EN-48313 at this stage.
13. Partially expand the legs (1) of the EN-48313 by turning the T-shaped handle clockwise.
Important: Make sure that the feet (2) of the EN-48313 are correctly engaged into one of the link pockets to prevent chain slipping during
tightening.
14. Continue expanding the EN-48313 until the feet (2) contact the timing chain.
Notice: Refer to Torque Reaction Against Timing Drive Chain Notice (See: Service Precautions).