
Grand AM L4-138 2.3L VIN A MFI (1992)
Drive Belt Tensioner: Testing and Inspection
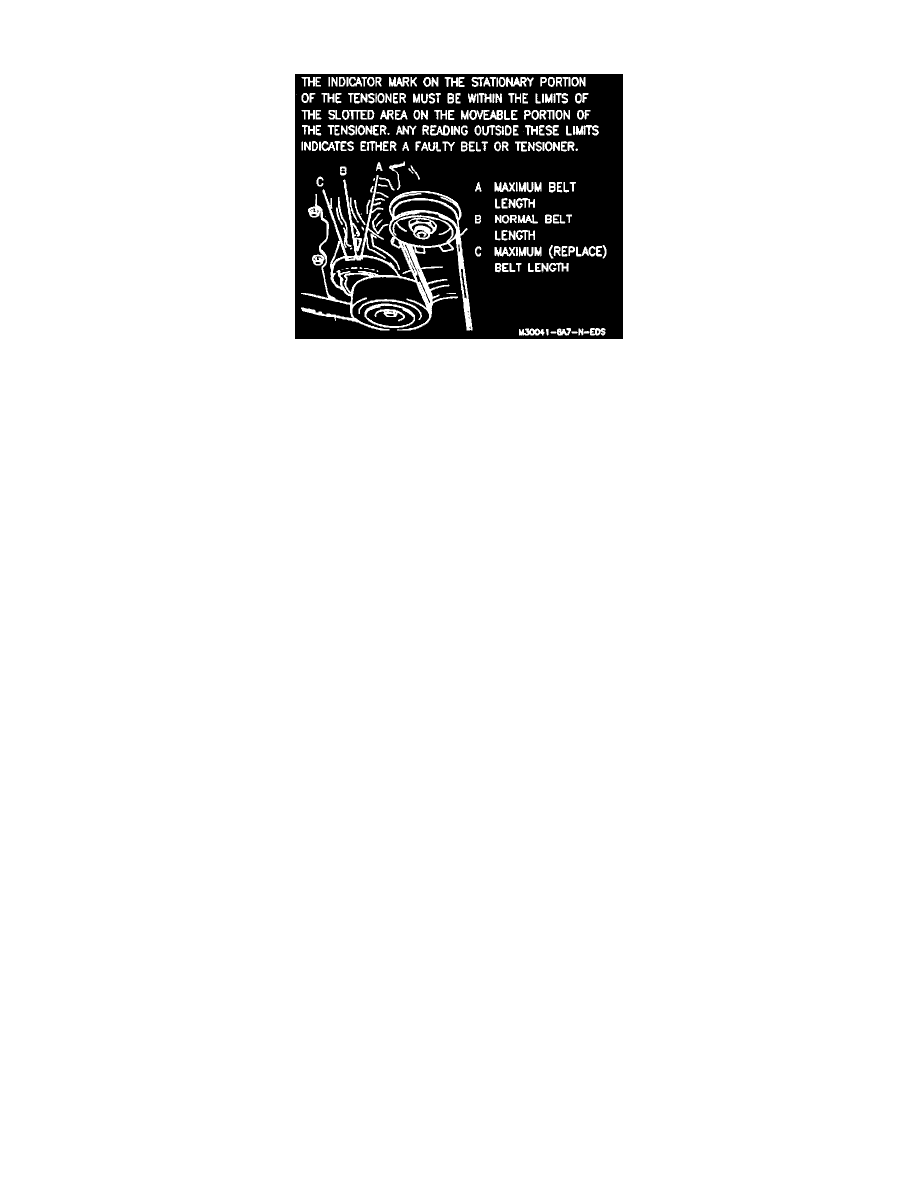
Serpentine Drive Belt Tensioner Markings
Tool Required:
J 36018 Belt Tension Gage
1. Inspect tensioner markings to see if the belt is within operating lengths. Replace belt if the belt is excessively worn or is outside of the tensioner's
operating range.
2. Run the engine with no accessories on Until the engine is warmed up. Shut the engine off and read belt tension with J 36018 placed halfway
between the generator and the A/C compressor (or idler pulley for non A/C applications). Remove tool.
3. Start the engine (with accessories off) and allow the system to stabilize for 15 seconds. Turn the engine off. Using a 13 mm box end wrench,
apply clockwise force (tighten) to the tensioner pulley bolt. Release the force and immediately take a tension reading without disturbing belt
tensioner position.
4. Using the same wrench, apply a counterclockwise force to the tensioner pulley bolt and raise the pulley to the "install" position. Slowly lower the
pulley to the "at rest" position and take a tension reading without disturbing the belt tensioner position.
5. Average the three readings. If the average of the three readings is lower than 220 N (50 lbs.) and the belt is within the tensioner's operating range,
replace the tensioner bracket assembly.