
Grand AM L4-138 2.3L VIN A MFI (1992)
Correction:
Most lamp fit concerns may be corrected by removing and re-installing the lamps to improve appearance or by revising the
locating tab as follows.
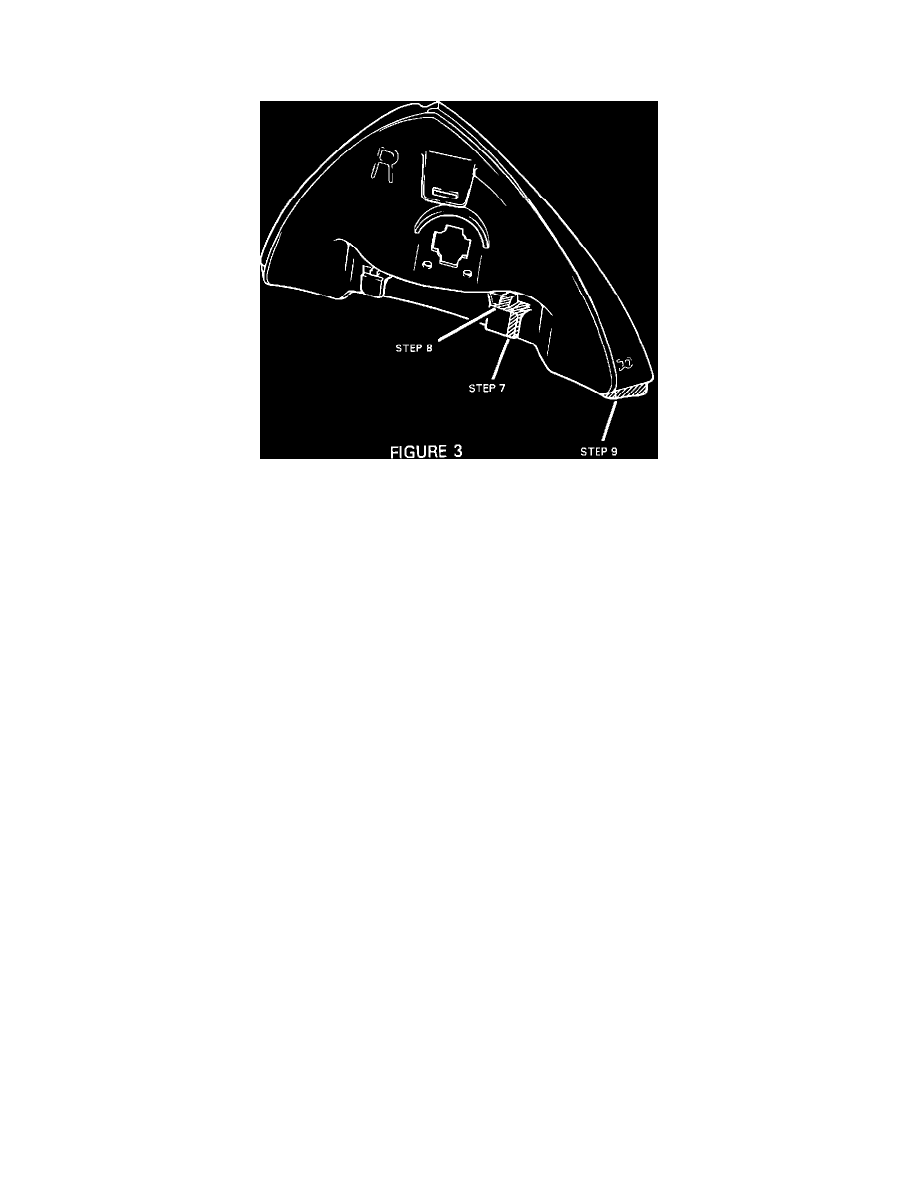
Figure 3
1. Open hood.
2. Remove lamp screw.
3. Remove lamp and re-install making certain both locating tabs are seated in the headlamp housing slots by a gently rocking motion, making certain the
lamp is rearward and inboard as far as possible using hand pressure only.
4. Install lamp screw.
If fit is still not acceptable use the following procedure.
5. Remove lamp screw.
6. Remove bulb/socket from lamp.
7. Using diagonal style pliers, trim 4 mm (5/32 in.) from lamp rear tab as shown in Figure 3.
8.
Remove 1/2 to 1 mm of material from angular surface as shown in
Figure 3 making certain to maintain existing angle to retain anti-rattle/wedge fit.
9.
File 4 mm (5/32 in.) material on rear corner of lamp as shown in Figure 3 being cautious not to disturb the seal of the lens or the plastic weld.
10.
Install bulb/socket lamp.
11.
Install side marker lamp to headlamp assembly as in step 3 above.
12.
Install screw to side marker lamp.
13.
Close hood.
Warranty Information:
Labor Operation Number:
N1564 (Left) N1565 (Right)
Labor Time
: .3 Per Side
Trouble Code
: 6R