
Grand AM L4-138 2.3L VIN A MFI (1992)
8. Front lower engine strut.
9. Lower the right suspension support by removing two front and two middle bolts and loosening two rear bolts.
10. Left front wheel and tire assembly.
11. Left splash shield.
12. Crossmember.
13. Left stabilizer bushing nuts.
14. Stabilizer shaft from left lower control arm.
15. Bolts supporting left suspension support.
16. Swing the suspension support control arm back on the ball joint and suitably support.
17. Transaxle cooler pipes and plug to prevent leakage.
18. P/S lines from P/S gear and plug to prevent leakage.
19. Trans axle mount to body bolts.
20. Lower engine/trans axle assembly just enough to be able to remove transaxle mount from bracket.
21. Transaxle mount.
22. Transaxle bracket.
23. Valve body cover and gasket.
24. TCC wires from case connector.
25. Control valve and oil pump assembly from case cover.
^
Do not lose check balls.
26. Oil pump drive shaft.
27. Spacer plate and gaskets.
28. Case cover.
^
Install two 12 x 1.95 x 14 bolts in dowel pin holes and tighten equally to pull case cover loose.
IMPORTANT
^
When disassembling a Hydra-Matic 3T40, inspect the drive link assembly for wear.
INSTALL OR CONNECT
1. Case cover.
TIGHTEN
^
Case Cover Bolts to 24 Nm (18 lb. ft.).
2. Check balls into case cover.
3. Spacer plate and gaskets.
4. Pump drive shaft.
5. Check ball into control valve assembly.
6. Auxiliary valve body and control valve assembly onto transaxle.
7. TCC wire to case electrical connector.
8. Valve body cover and gasket.
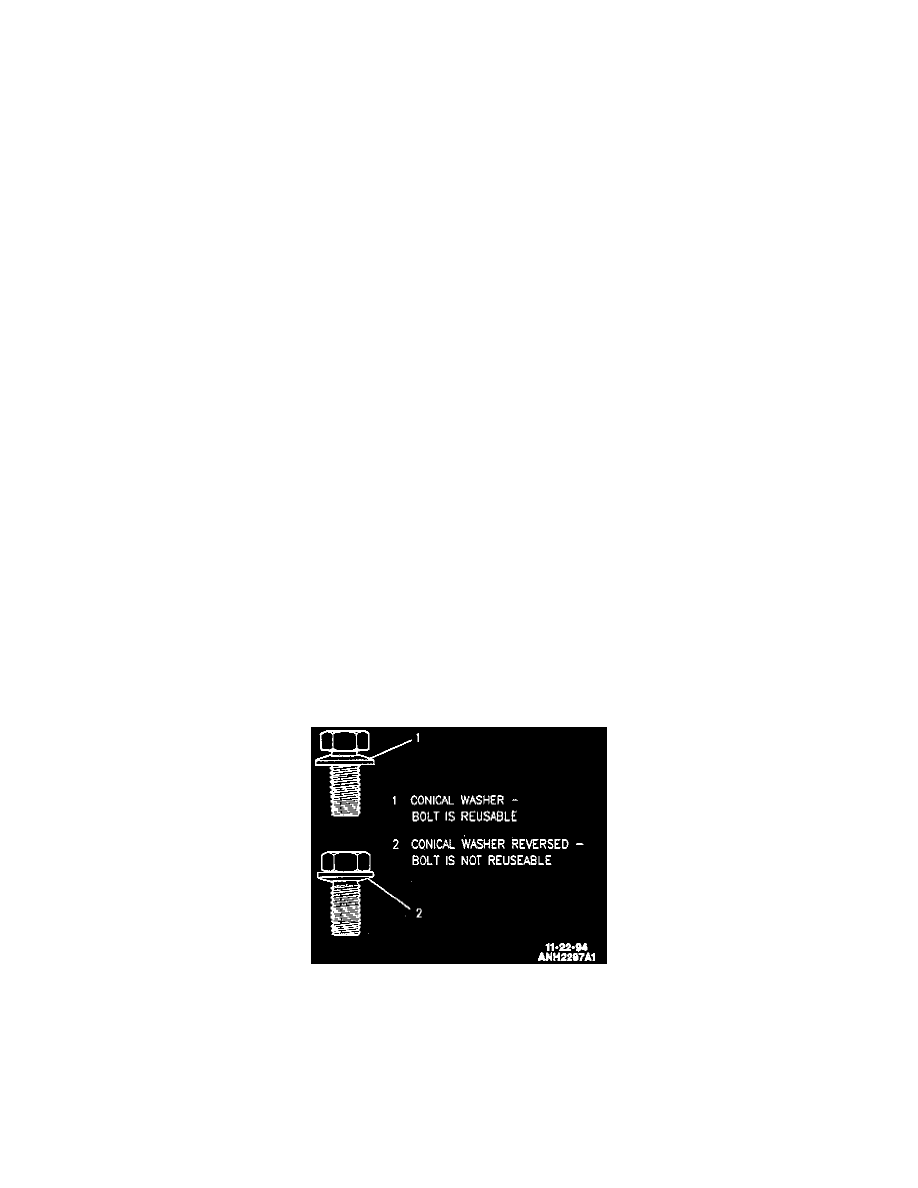
INSPECT
^
Bolts to determine if the washer is inverted.
IMPORTANT
^
Use adhesive/sealant compound GM P/N 12345282 or equivalent to reduce the potential for fluid leaks on bolts.