
Grand AM L4-144 2.4L DOHC VIN T SFI (1997)
3. Install the exhaust camshaft housing.
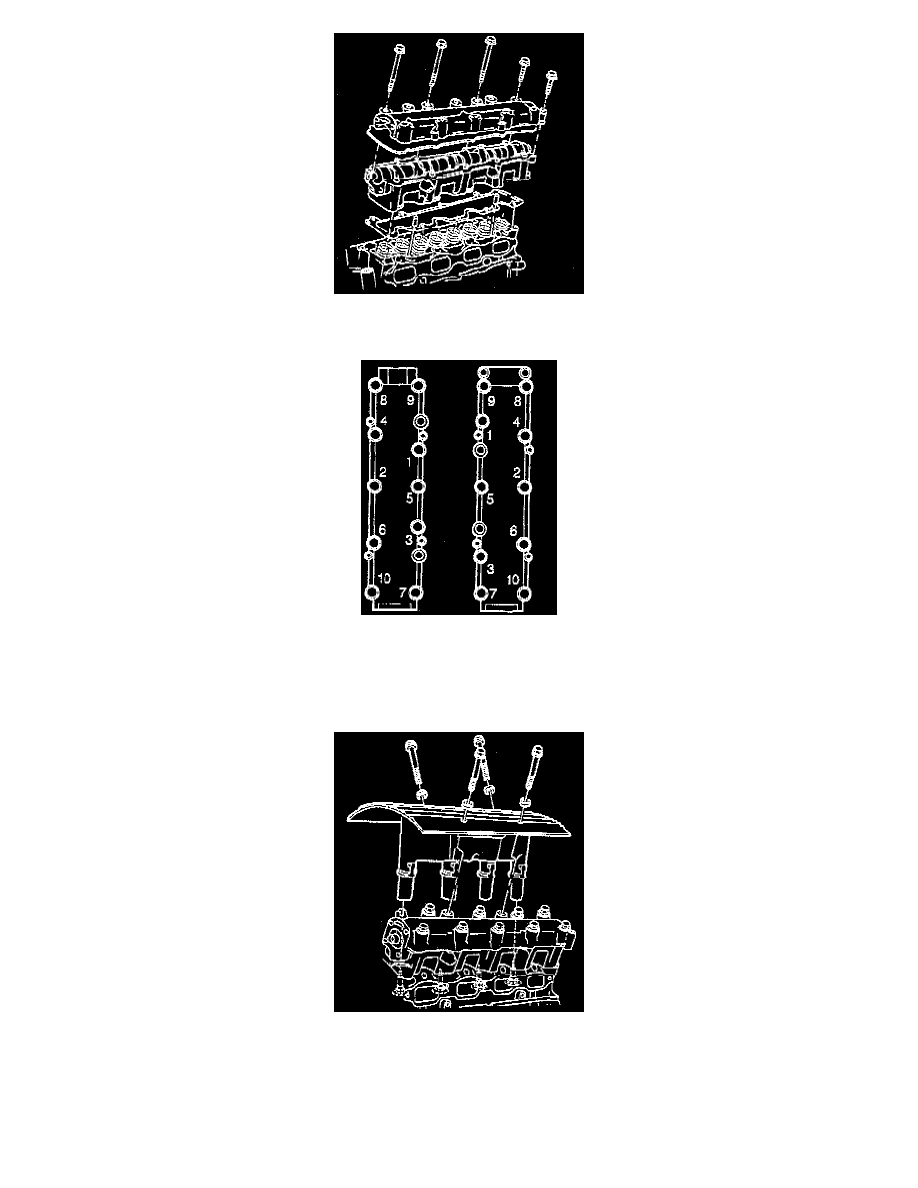
4. Apply Pipe Sealant GM P/N 1052080 or equivalent to the camshaft housing retaining bolt threads.
5. Use the torque angle meter in order to install the bolts. Install the bolts in sequence. Tighten the bolts to 15 Nm (11 lb ft) plus 90 degrees.
6. Install the timing chain housing to the camshaft housing and timing chain.
7. Install the transmission fluid level indicator tube assembly to the exhaust camshaft cover.
8. Connect the electrical connection to the oil pressure switch.
9. Reinstall any spark plug boot connector assembly that stuck to a spark plug, back onto the ignition coil and module assembly.
10. Place the ignition coil and module assembly over the spark plugs and push straight down.
11. Clean any lubricant that is present on the ignition coil and module assembly to the camshaft housing bolts.
12. Apply Pipe Sealant GM P/N 1052080 or equivalent onto the ignition coil and module assembly to the camshaft housing bolts.
13. Install the ignition coil and module assembly to the camshaft housing bolts. Tighten the bolts to 15 Nm (11 lb ft) plus 30 degrees.
14. Connect the electrical connector to the ignition coil and module assembly.
15. Connect the negative battery cable.