
Grand AM L4-144 2.4L DOHC VIN T SFI (1997)
Technical Service Bulletin # 67-61-22A
Date: 980701
Timing Chain Tensioner - Service Procedure
File In Section: 6 Engine
Bulletin No.: 67-61-22A
Date: July, 1998
SERVICE MANUAL UPDATE
Subject:
Section 6A - Engine Mechanical - Timing Chain Tensioner Service Procedure
Models:
1997-98 Buick Skylark
1997-98 Chevrolet Cavalier, Malibu
1997-98 Oldsmobile Achieva
1997-98 Pontiac Sunfire, Grand Am with 2.4L Engine (VIN T - RPO LD9)
This bulletin is being revised to clarify the service procedure in regards to timing chain tensioner installation and to include the 1998 model year. Please
discard Corporate Bulletin Number 67-61-22 (Section 6 - Engine).
This bulletin is being issued to update the service procedures for the timing chain tensioner on LD9 engines built after September 29, 1996. These
engines have a new two-piece timing chain tensioner.
Important:
The new two-piece timing chain tensioner is not interchangeable with the previous version. Do not attempt to replace the one-piece timing chain
tensioner with the two piece design.
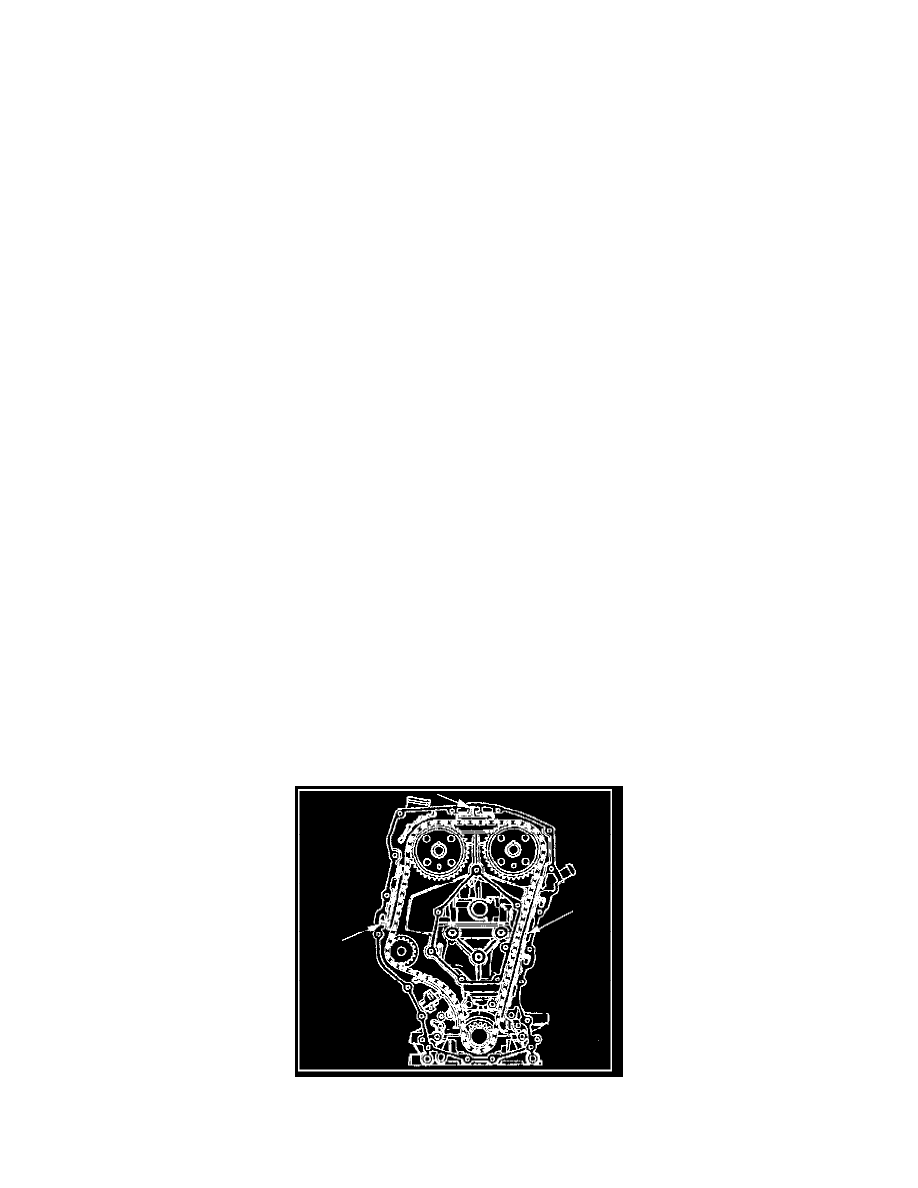
Timing Chain, Sprockets, and Tensioner Removal
Notice:
The timing chain on the LD9 (VIN T) Twin Cam Engine is not to be replaced with the timing chain from any other model year. The timing chain
sprockets are different on the Twin Cam engine and the shape of the links matches the sprockets. Engine damage may result if the wrong timing chain
is used. The timing chain and the crankshaft sprocket must be marked so that they are reinstalled with the same side facing out at the time of
reassembly.
Procedure
Important:
Read the entire procedure before removing the timing chain.
1.
Mark the timing chain and the crankshaft sprocket outer surfaces for reassembly. Ensure that this is done in order to prevent noise and increased
wear on the chain.
2.
Remove the timing chain guides. See Figure 1.
3.
Remove the timing chain tensioner block and tensioner.