
Grand AM L4-144 2.4L DOHC VIN T SFI (1997)
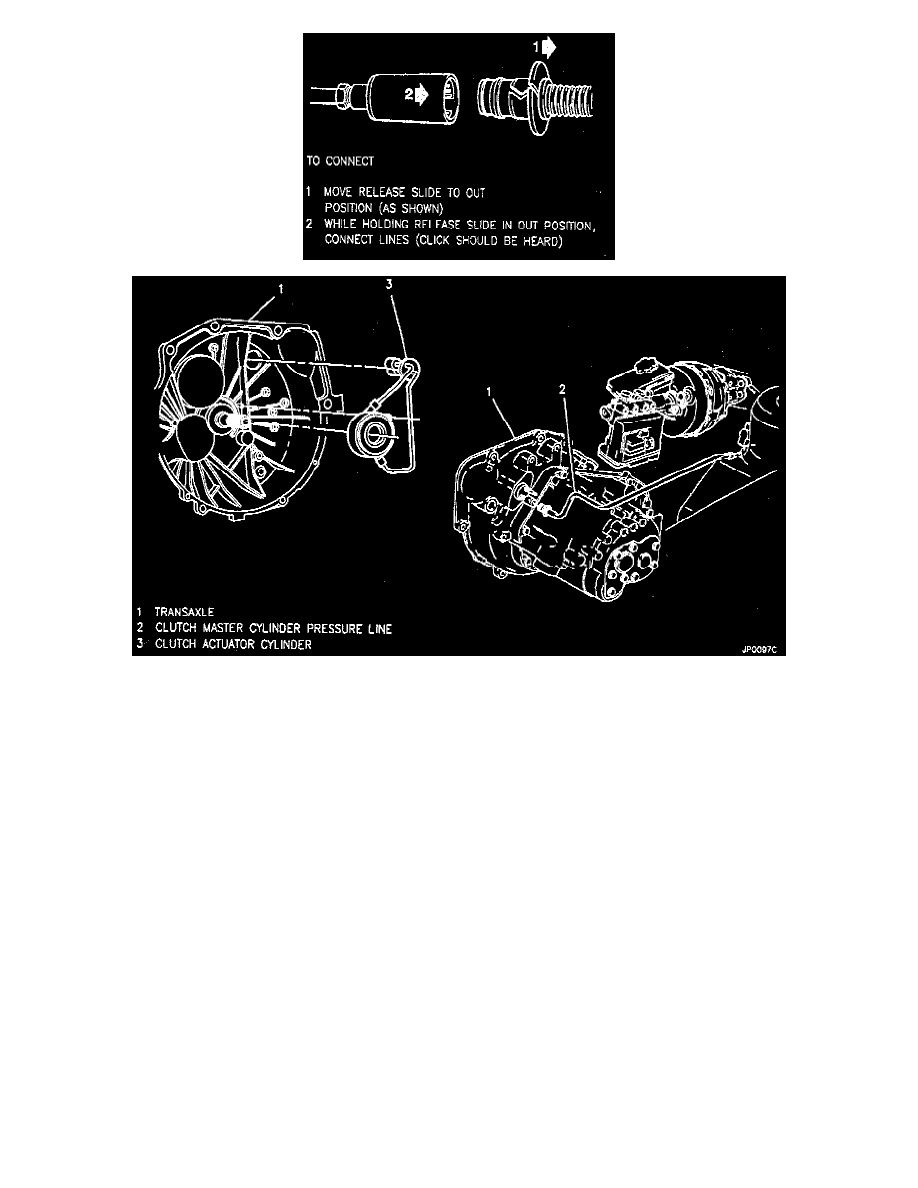
2. Clutch master cylinder assembly from clutch actuator cylinder assembly; refer to Figures 6, 7 and 8.
3. Transaxle assembly.
4. Clutch cover bolts one turn at a time, until spring pressure is relieved.
5. Clutch cover and clutch disc.
Clean
^
Clutch cover and flywheel mating surfaces and the bearing retainer outer surface of all oil, grease, metal deposits, etc.
INSTALL OR CONNECT
1. Align the "Heavy Side" of the flywheel assembly, stamped with an "X", with the clutch cover "Light Side" marked with paint. Support with J
29074. The clutch disc is installed with the damper springs offset toward the transaxle. Stamped letters on the clutch disc identify "Flywheel side."
2. Clutch cover assembly-to-flywheel bolts evenly following the below tightening sequence: