
Grand AM V6-3.4L VIN E (2001)
1. Install the engine support fixture.
2. Remove the tire and wheel assemblies.
3. Raise the vehicle on a hoist. Refer to Vehicle Lifting.
4. Remove the front fender liner.
5. Disconnect the Antilock Brake System (ABS) sensor from the wheel speed sensor and frame.
6. Remove the lower ball joints from the steering knuckles. Refer to Louver Ball Replacement
7. Remove the stabilizer shaft insulators. Refer to Stabilizer Shaft Insulator Replacement.
8. Remove the brake modulator assembly from the support bracket.
9. Remove the front transmission mount bracket bolts.
10. Remove the rear transmission mount bracket bolts.
11. Remove the side transmission mount bracket bolts.
12. Remove the mounting bolts from the power steering gear.
13. Remove the right front brake line from the vehicle.
14. Remove the brake lines from the retainers on the crossmember (2).
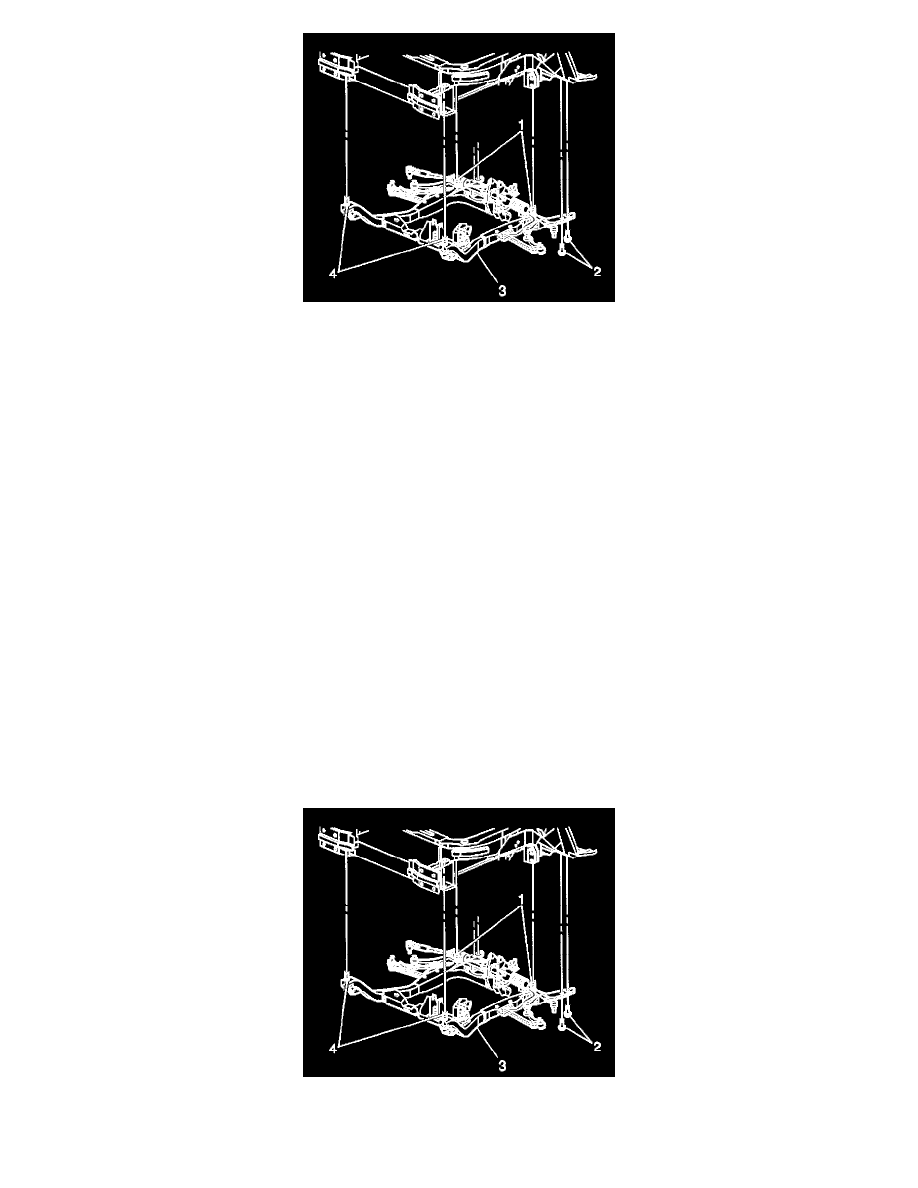
15. Lower the vehicle until the suspension crossmember (2) rests on the jack stands.
16. Remove the front suspension crossmember support bolts (3).
17. Remove the rear suspension crossmember support bolts (4).
18. Remove the suspension crossmember to body bolts (1).
19. Raise the vehicle off of the suspension crossmember (2).
20. Remove the following components if replacing the suspension crossmember:
-
The lower control arms.
-
The front transmission mount.
-
The rear transmission mount.
-
The side transmission mount.
-
The stabilizer shaft.
-
The lower radiator support.
Installation Procedure
1. Install the following components on the suspension crossmember if removed:
-
The lower radiator support.
-
The stabilizer shaft.