
Grand AM V6-3.4L VIN E (2001)
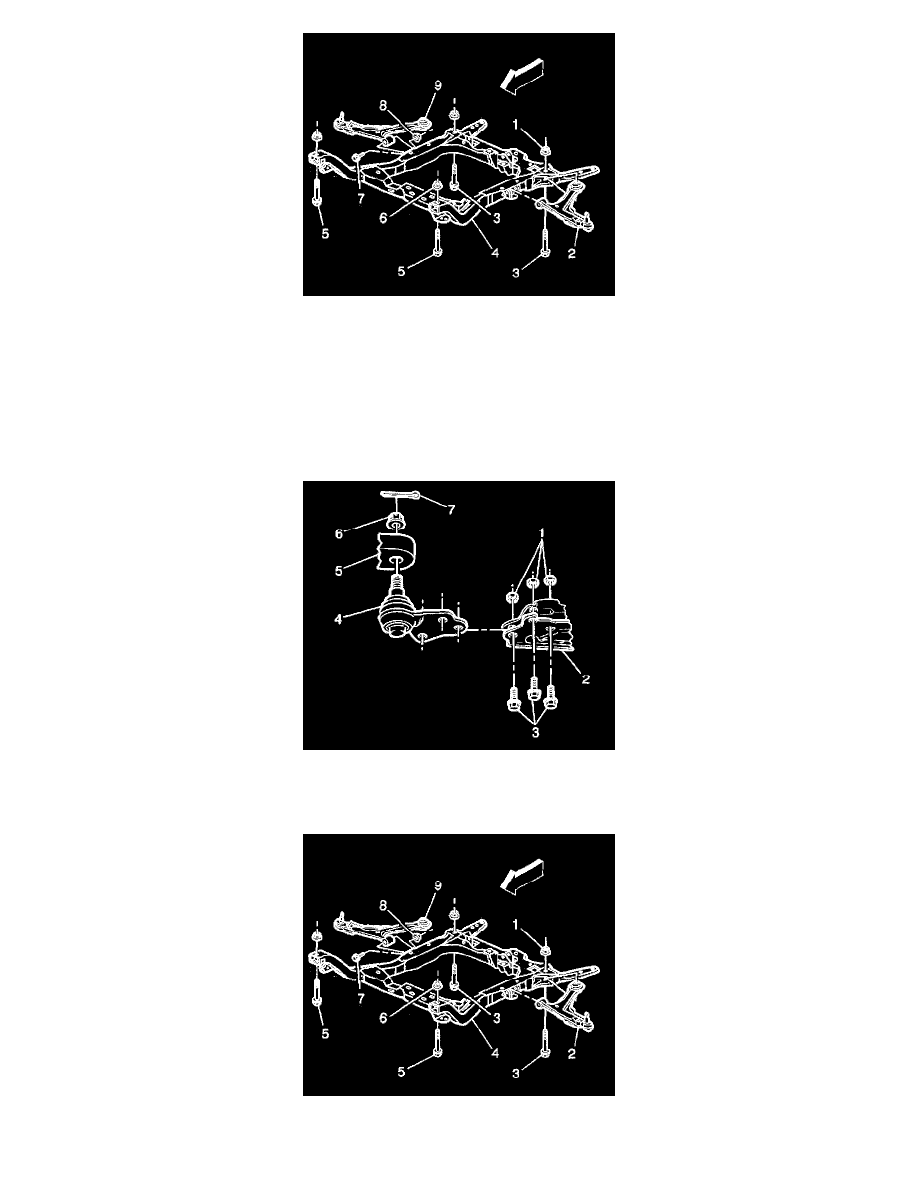
7. Remove the bolts (7) and the nuts (8) from the lower control arm (9).
8. Remove the rear crossmember bolts (3) from the lower control arm (9).
9. Remove the lower control arm (9) from the crossmember (4).
10. Install the control arm (4) into a vice.
11. Drill out the three rivets retaining the ball joint to the lower control arm. Use a 3-mm (run-in) drill bit to make a pilot hole through the rivets.
Finish drilling the rivets with a 13-mm (run-in) drill bit.
12. Remove the ball joint from the lower control arm.
Installation Procedure
1. Install the ball joint (4) in the control arm (2).
2. Install the three ball joint bolts (3) and nuts (1) as shown on the instruction sheet in the ball joint kit. Tighten the ball joint bolts to specifications
found in the ball joint kit.
3. Install the lower control arm (9) to the crossmember (4).