
Grand AM V6-3.4L VIN E (2001)
*
Inspect the condition of the window opening and the adhesive bead to determine which installation method should be used.
*
Remove no more of the urethane adhesive from the pinchweld than necessary in order to maintain the original shape. This will ensure the
proper clearance between the window and the pinchweld flange.
*
Clean around the edge of the inside surface of the window with a 50/50 mixture of isopropyl alcohol and water by volume on a dampened lint
free cloth.
5. After repairing the opening as indicated, shake the pinchweld primer (black #3) for at least 1 minute.
Caution: Failure to prep the area prior to the application of primer may cause insufficient bonding of urethane adhesive. Insufficient
bonding of urethane adhesive may allow unrestrained occupants to be ejected from the vehicle resulting in personal injury.
6. Use a new dauber to apply the pinchweld primer (black #3) to the surface of the bonding area.
7. Allow the primer to dry for approximately 10 minutes, also check to ensure that all nicks and scratches are covered.
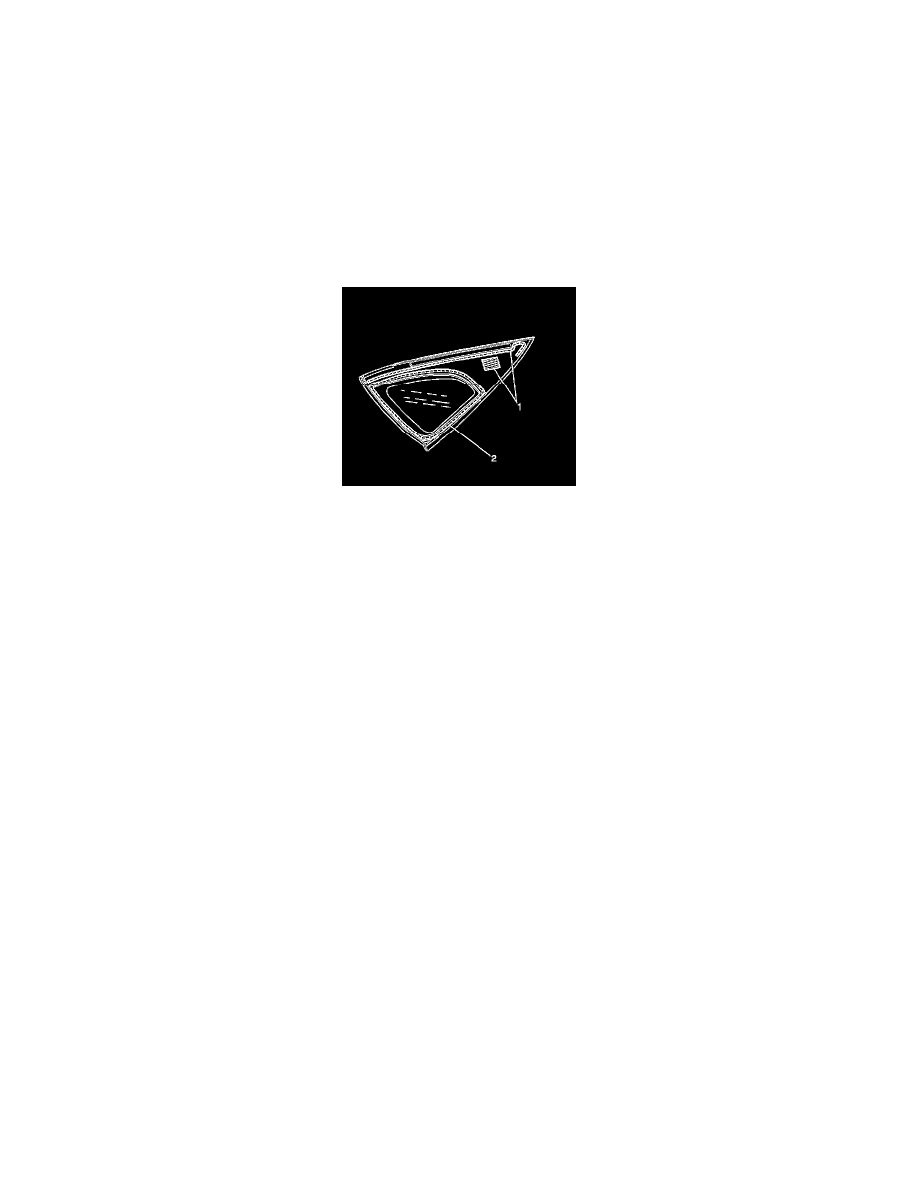
8. With the aid of an assistant, dry fit the stationary window (1) into the opening.
9. Use masking tape in order to mark the location of the stationary window in the opening.
10. Slit the masking tape at the top edge of the stationary window.
11. Remove the stationary window from the opening.
12. Place the stationary window on a clean, protected surface.
13. If the original window is being reused, remove all but a thin film of the existing urethane adhesive from the window surface by using a clean utility
knife or razor blade scraper.
Important: Do not remove all traces of the adhesive. Remove all mounds or loose pieces of urethane adhesive.
14. If the extended method is being used remove all but approximately 2 mm (3/64 in) of the existing bead of adhesive from the pinchweld flange.
15. Clean around the edge of the inside surface of the window with a 50/50 mixture of isopropyl alcohol and water by volume on a dampened lint free
cloth.
Important: Do not apply the (black #3) primer to the existing bead of the urethane adhesive. Apply the primer only to nicks, scratches or
the primed surfaces.
16. Shake the pinchweld primer (black #3) for at least 1 minute.
17. Use a new dauber to apply the primer to the surface of the pinchweld flange.
18. Allow the glass primer to dry for approximately 10 minutes.
Important: Use care when applying the stationary window prep (clear #1) in order to prevent the window prep from running into the
vision area of the stationary window. This primer dries almost instantly and may stain the viewing area of the window if not applied
evenly.
19. If installing a new non-encapsulated stationary window:
1. Use a new dauber, to apply the stationary window prep (clear #1) approximately 10-16 mm (3/8-5/8 in) around the entire perimeter of the
window inner surface.
2. Apply stationary window prep (clear #1) to any exposed edges of the window.
3. Wipe the glass primed area immediately with a clean lint free cloth.
4. Shake the glass primer (black #2) for at least 1 minute.
20. If installing a new encapsulated stationary window:
Use a new dauber, in order to apply the window prep (clear #1) to the area approximately 10-16 mm (3/8-5/8 in) around the entire perimeter of the
glass inner surface of the primer/bonding areas. The primer is good up to 8 hours after applying it to the glass. The primed surface of the glass
must be kept clean.
21. Allow the glass primer to dry for approximately 10 minutes.