
Grand AM V6-3300 3.3L (1992)
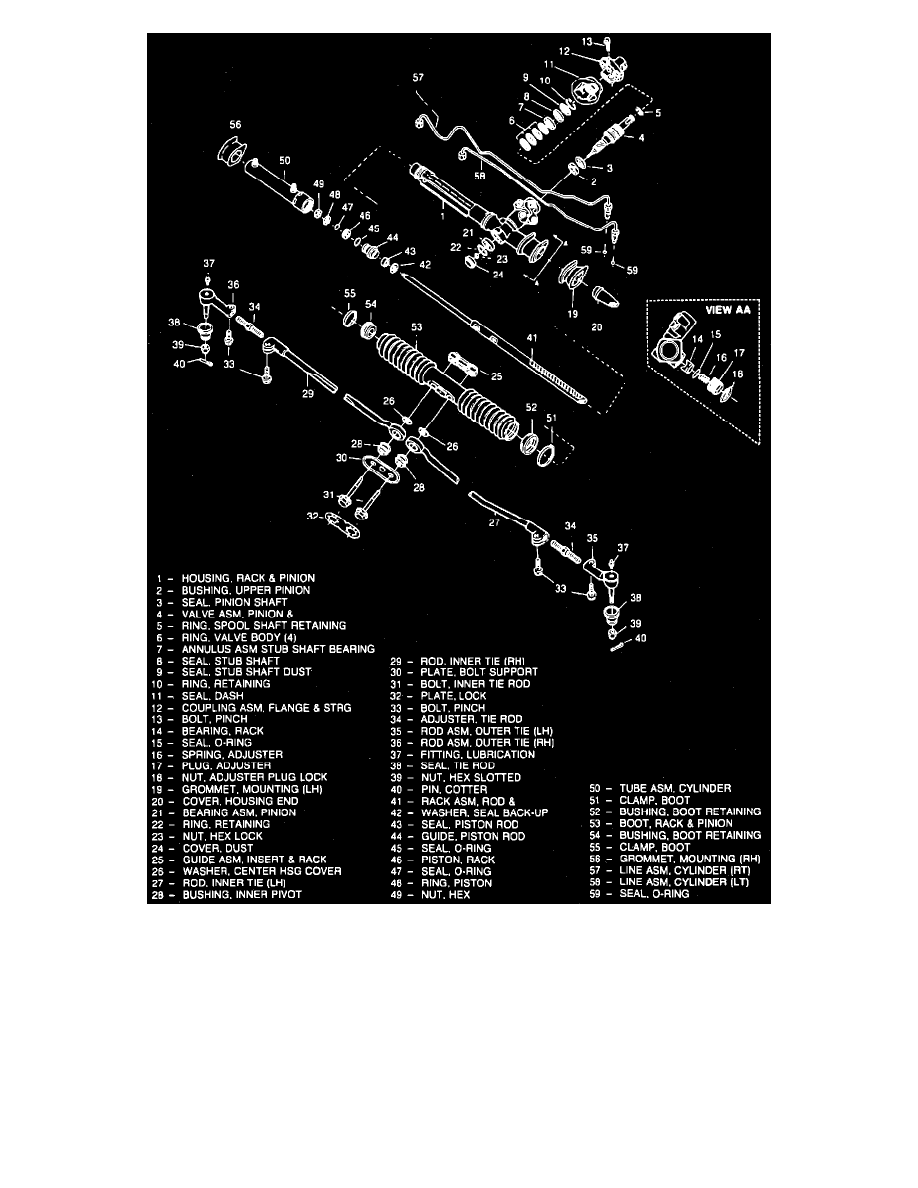
Fig. 11 Exploded View, Power Rack & Pinion Assembly. Front Wheel Fig. 11 Drive Beretta, Calais, Cavalier, Corsica, Grand Am, LeMans, Skyhawk, Skylark & Sunbird
1.
Remove dust cover from housing, Fig. 11.
2.
While holding stub shaft, remove locknut from pinion.
3.
With gear centered, mark location of stub shaft notch on housing to aid in proper installation of the pinion and valve assembly. Using a press,
press on threaded end of pinion until it is possible to remove the pinion and valve assembly from the housing.
4.
Remove stub shaft dust seal, stub shaft seal, stub shaft bearing annulus assembly, then the pinion and valve assembly with spool shaft retaining
ring and valve body rings attached.
5.
Using wrench, tool No. J 36343 or equivalent, remove cylinder tube assembly from housing. Mark location of fittings on housing before
removal.
6.
Remove piston rod guide rack from housing and disassemble as follows:
a. Remove hex nut from rod and rack assembly.
b. Remove rack piston, containing O-ring seal, and piston ring, piston rod guide assembly, consisting of piston rod guide, O-ring seal, piston rod