
Grand Prix V6-191 3.1L (1989)
Intake Manifold: Service and Repair
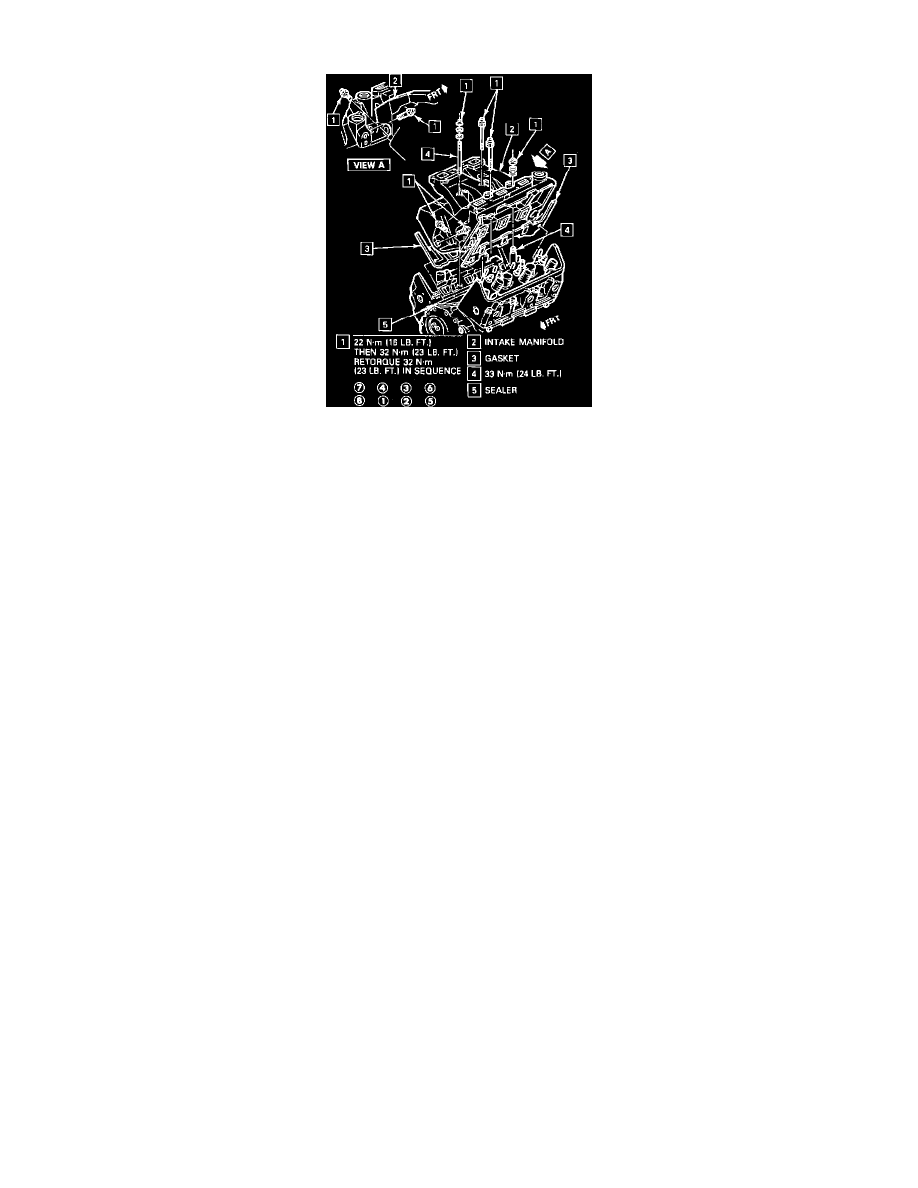
Fig. 3 Installing Intake Manifold
1.
Disconnect battery ground cable.
2.
Remove accelerator cable and T.V. cable bracket, throttle body and EGR valve, then the plenum.
3.
Relieve fuel pressure as follows:
a. Connect fuel pressure gauge tool No. J-34730-1 or equivalent to fuel pressure connection. Wrap shop cloth around fitting while connecting
gage.
b. Insert bleed hose into suitable container and open valve to bleed system pressure.
4.
Disconnect fuel inlet and return pipes from fuel rail.
5.
Remove serpentine belt cover and belt.
6.
Detach power steering pump and alternator and position out of way.
7.
Remove alternator bracket.
8.
Disconnect idle air vacuum hose at throttle body.
9.
Disconnect wires at injectors and remove fuel rail.
10.
Remove breather tube and runners, then the rocker arm covers.
11.
Drain cooling system.
12.
Disconnect radiator hose from thermostat outlet.
13.
Disconnect wires at coolant sensor and oil sending switch, then remove coolant sensor.
14.
Disconnect bypass hose at fill neck and head.
15.
Disconnect heater inlet pipe from manifold.
16.
Remove manifold attaching bolts and the manifold. Retain Bevelled washers in same positions on four center bolts.
17.
Reverse procedure to install, noting the following:
a. Remove old gasket material and the loose sealant from front and rear ridges of cylinder block, then clean sealing surfaces.
b. Apply bead of suitable sealant as shown, Fig. 3.
c. Torque intake manifold nuts and bolts to specification, Fig. 3.