
Grand Prix V6-191 3.1L VIN M SFI (1998)
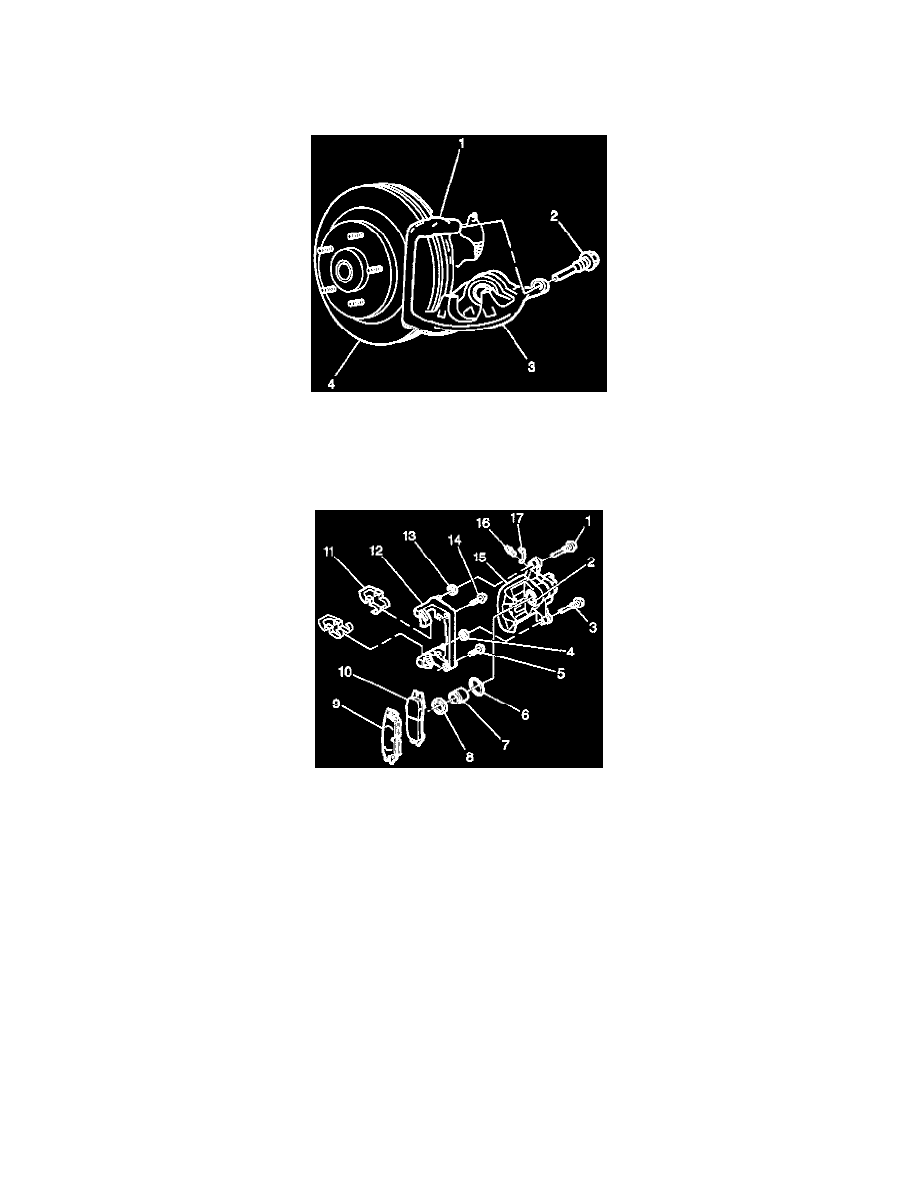
12. Inspect the caliper bolts (2) for corrosion or damage. If corrosion is found, use new parts, including bushings, when installing caliper. Do not
attempt to polish away corrosion.
INSTALLATION PROCEDURE
1. Install the caliper (3) over the rotor (4) and the caliper bracket (1). Ensure that the bushings are in place.
2. Lubricate the caliper bolts (1 and 3). Use silicone grease. Do not lubricate the threads.
3. Lubricate the two rubber boots (13 and 4) in the caliper bracket (12). Use silicone grease.
NOTICE: Refer to Fastener Notice in Cautions and Notices.
4. Install the caliper bolts (1 and 3). Use a screwdriver in order to push the boot over the shoulder of the caliper bolt. Ensure that the boot is securely
in the groove of the caliper bolt.
^
Tighten the caliper bolts (1 and 3) to 43 Nm (32 ft. lbs.).
IMPORTANT: Replace the copper gaskets.
5. Install the brake hose bolt.
^
Tighten the brake hose bolt to 44 Nm (32 ft. lbs.).
6. Remove the wheel nuts securing the rotor to the hub and bearing.
7. Install the tires and the wheels. Align the previous marks on the wheel and the hub and bearing.
8. Lower the vehicle.
9. Fill the master cylinder to the proper level with clean brake fluid.
10. Bleed the entire brake system. Refer to Brake Bleeding.
11. Apply approximately 778 N (175 lb) of force to the brake pedal three times in order to seat the pads against the rotor. Inspect the hydraulic brake
system for brake fluid leaks.