
Grand Prix V6-204 3.4L DOHC VIN X SFI (1995)
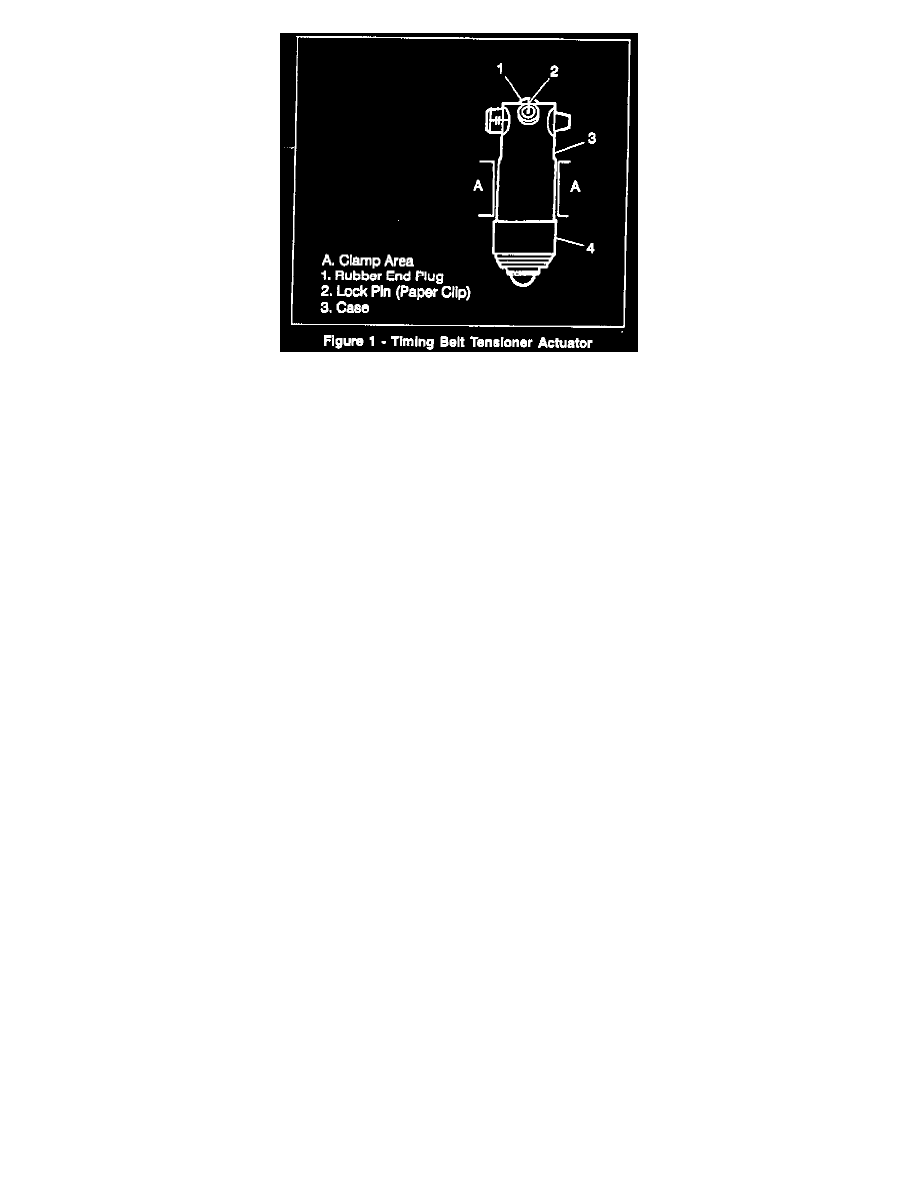
32. Position actuator in vertical position in vise (rod tip down), clamp actuator body in vise lightly. (Figure 1)
IMPORTANT:
^
Allow oil to drain to boot end for at least 5 minutes prior to refilling.
^
The actuator assembly uses a tapered bushing between the actuator and mounting base. Do not lose or damage the bushing when removing
the actuator assembly.
33. Straighten out a standard paper clip (0.032 inch diameter, no serrations) to a minimum straight length of 47 mm (1.85 inches). Form a double loop
in the remaining end of the paper clip.
34. Rubber end plug from the rear of the actuator assembly. The assembly is filled with oil and removal of the plug may allow oil to escape. DO NOT
REMOVE VENT LUG.
35. Push the paper clip through the center of the vent plug and into the pilot hole.
36. Insert a small screwdriver into the screw slot inside the actuator, behind the rubber end plug.
37. Retract actuator plunger by rotating screw in a clockwise direction, until it is fully retracted. Push on paper clip and slowly rotate screw
counterclockwise until paper clip engages.
38. Timing belt.
IMPORTANT: Remove timing marks from camshaft and intermediate shaft sprockets.
39. Rotate crankshaft so the # 1 cylinder is at TDC (top dead center). Mark the timing indicator with white paint (or equivalent) on the crankshaft
balancer and front cover.
40. Position camshafts so the flat spots are "up" for installation of J 38613-A.
41. Install J 38613-A on both camshaft carriers.